Overview
This “Little Bits” tutorial show you how to attach multiple audio files, to individual Polygon Hotspots, The audio files play when the mouse is over the hotspot and stop when the mouse leaves the hotspot. Each hotspot will include a thumbnail text description, styled using Google Fonts and an initial screen prompting the viewer to ‘Click to Start’ allowing us to trigger the sound in the browser.
Update 15 November: I have included a sample blank.mp3 file in a new Tutorial Folder and added instructions below to include it in the project. This file will be used with Safari (on the desktop). Please download the tutorial folder again.
Note: this tutorial is designed for Pano2VR V6.1.1 beta. You can download the software here. As “Little Bits” tutorials don’t go into a lot of detail about Pano2VR operations a working knowledge of Pano2VR is an advantage.
Final Output
Tutorial Files
In the tutorial folder, Polygon_Audio_Tutorial, there is an Asset Folder with 4 x audio files and an equirectangular file. There is also a Project folder with a Pano2VR project 'polygon-audio.p2vr', a skin 'polygon-audio.ggsk' and an Output Folder called 'Polygon-Audio' with project files created from the .p2vr and .ggsk elements. (Figure #1)
Figure #1: Tutorial Folder
Project Overview
In this tutorial we will modify the polygon-audio.p2vr project file and the polygon-audio.ggsk skin by;
Adding 4 audio files to the panorama
Creating a proxy folder in the skin
Adding a splash screen
Adding in a custom Google Font for the text tooltips
Note: this tutorial assumes a basic knowledge of Pano2VR V6
Note: click on any image in the tutorial to enlarge it
Getting Started
1. Download the zipped tutorial folder here
2. Double click on the Project/polygon-audio.p2vr file to open it (Figure #2)
Figure #2: Project file
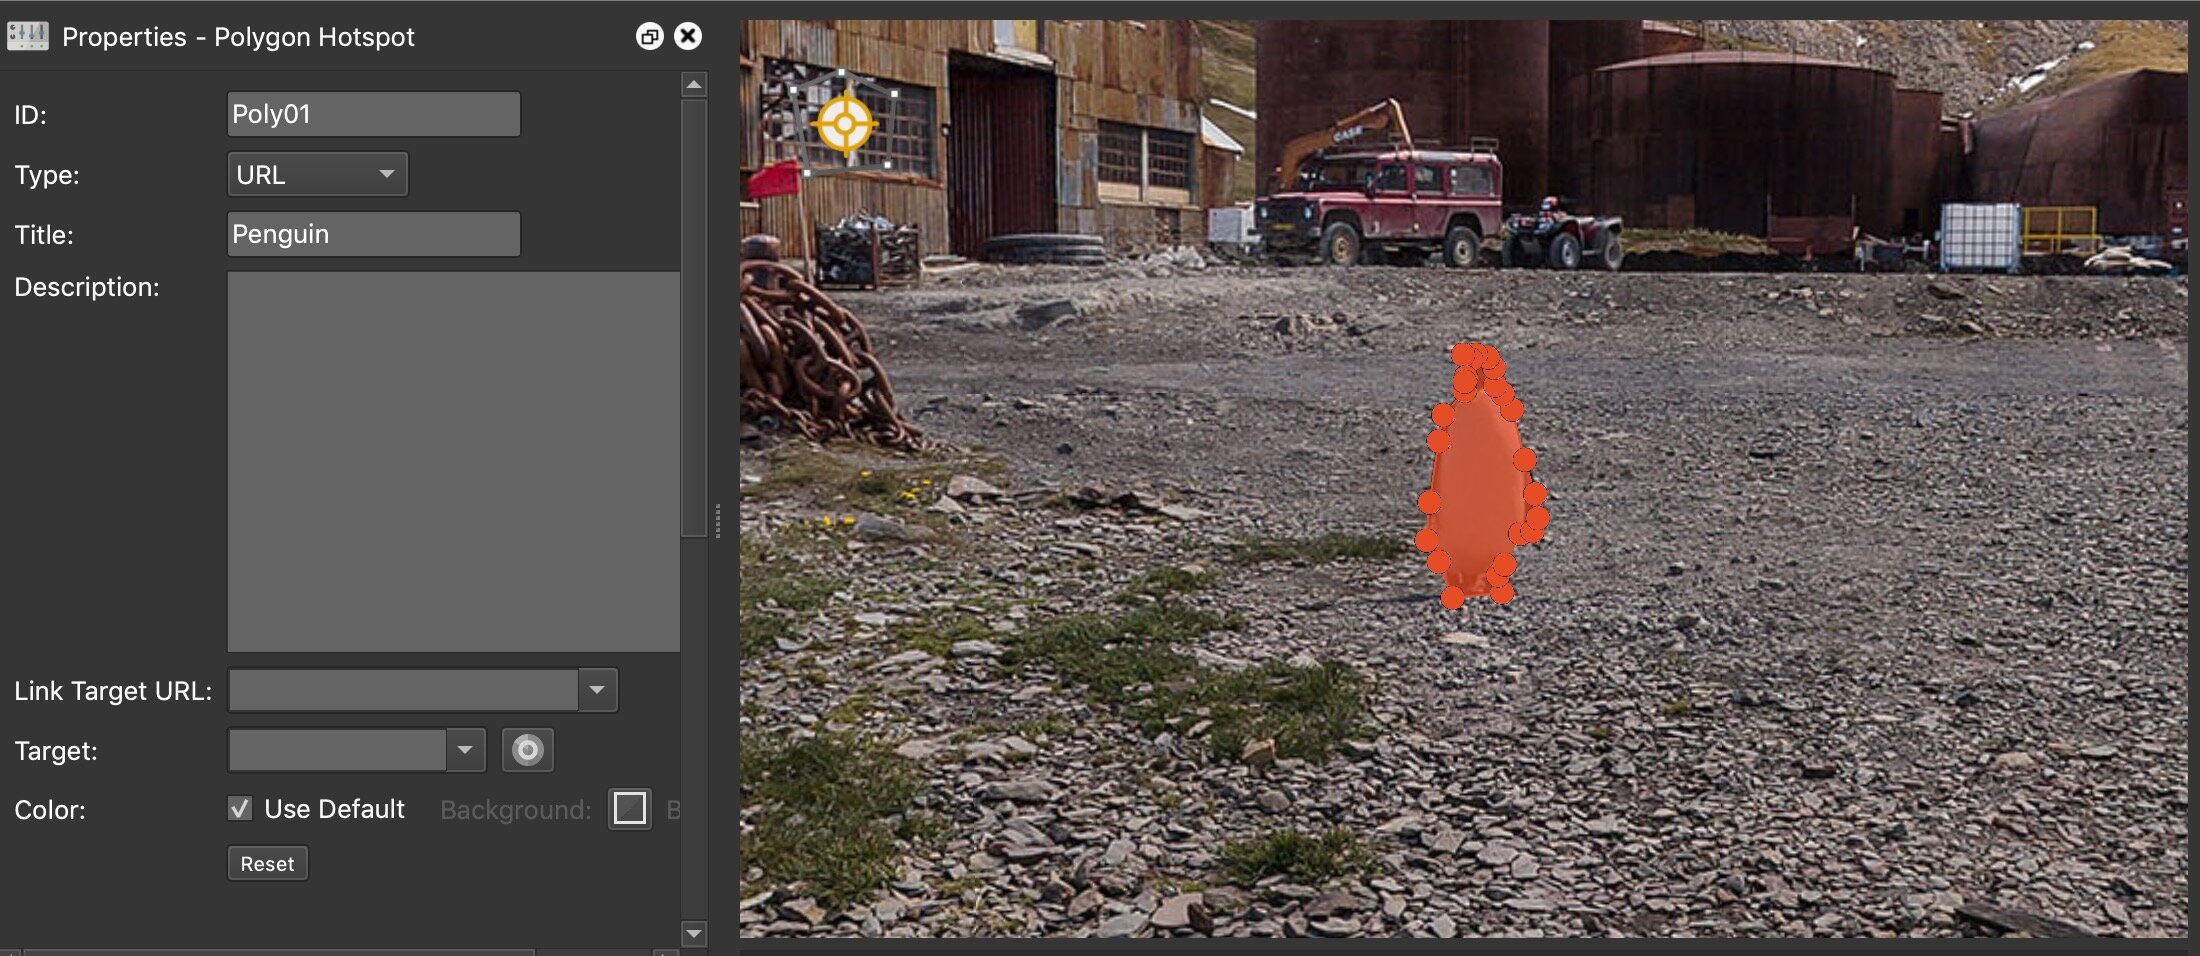
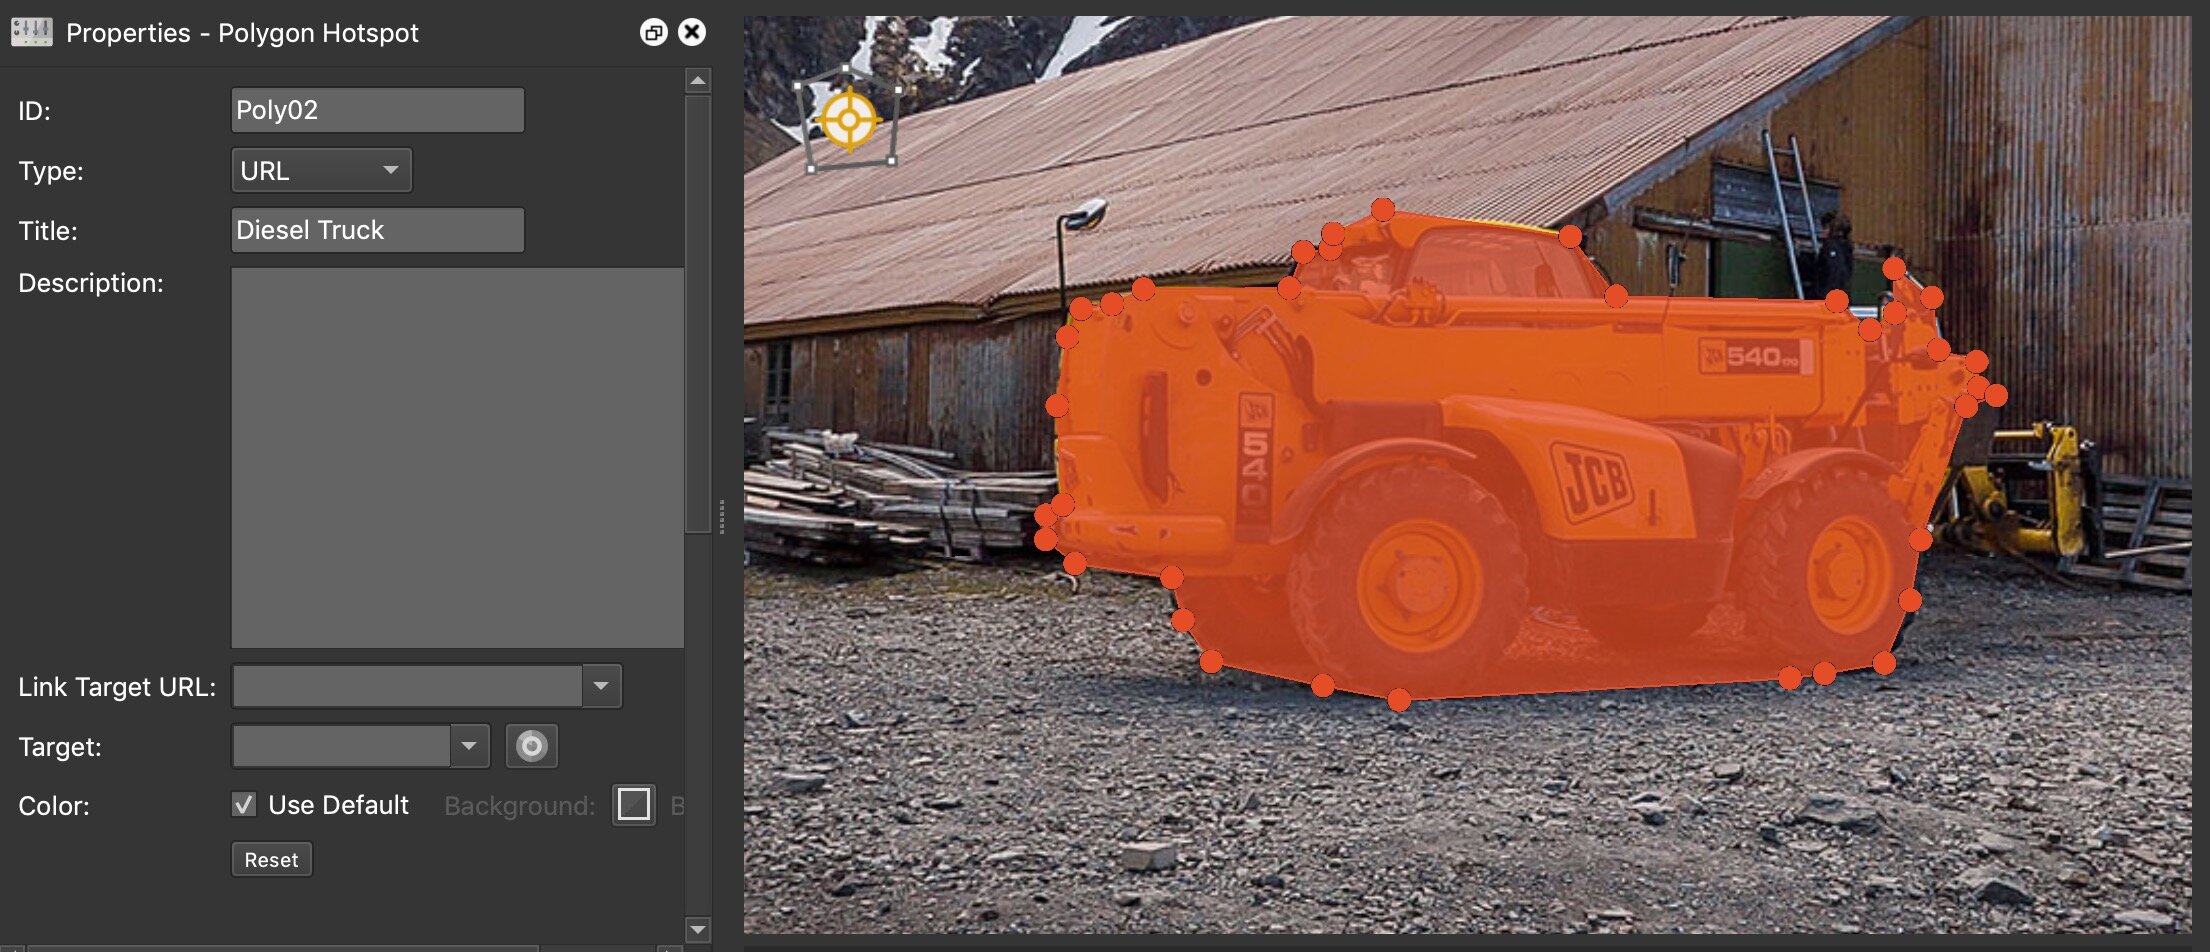
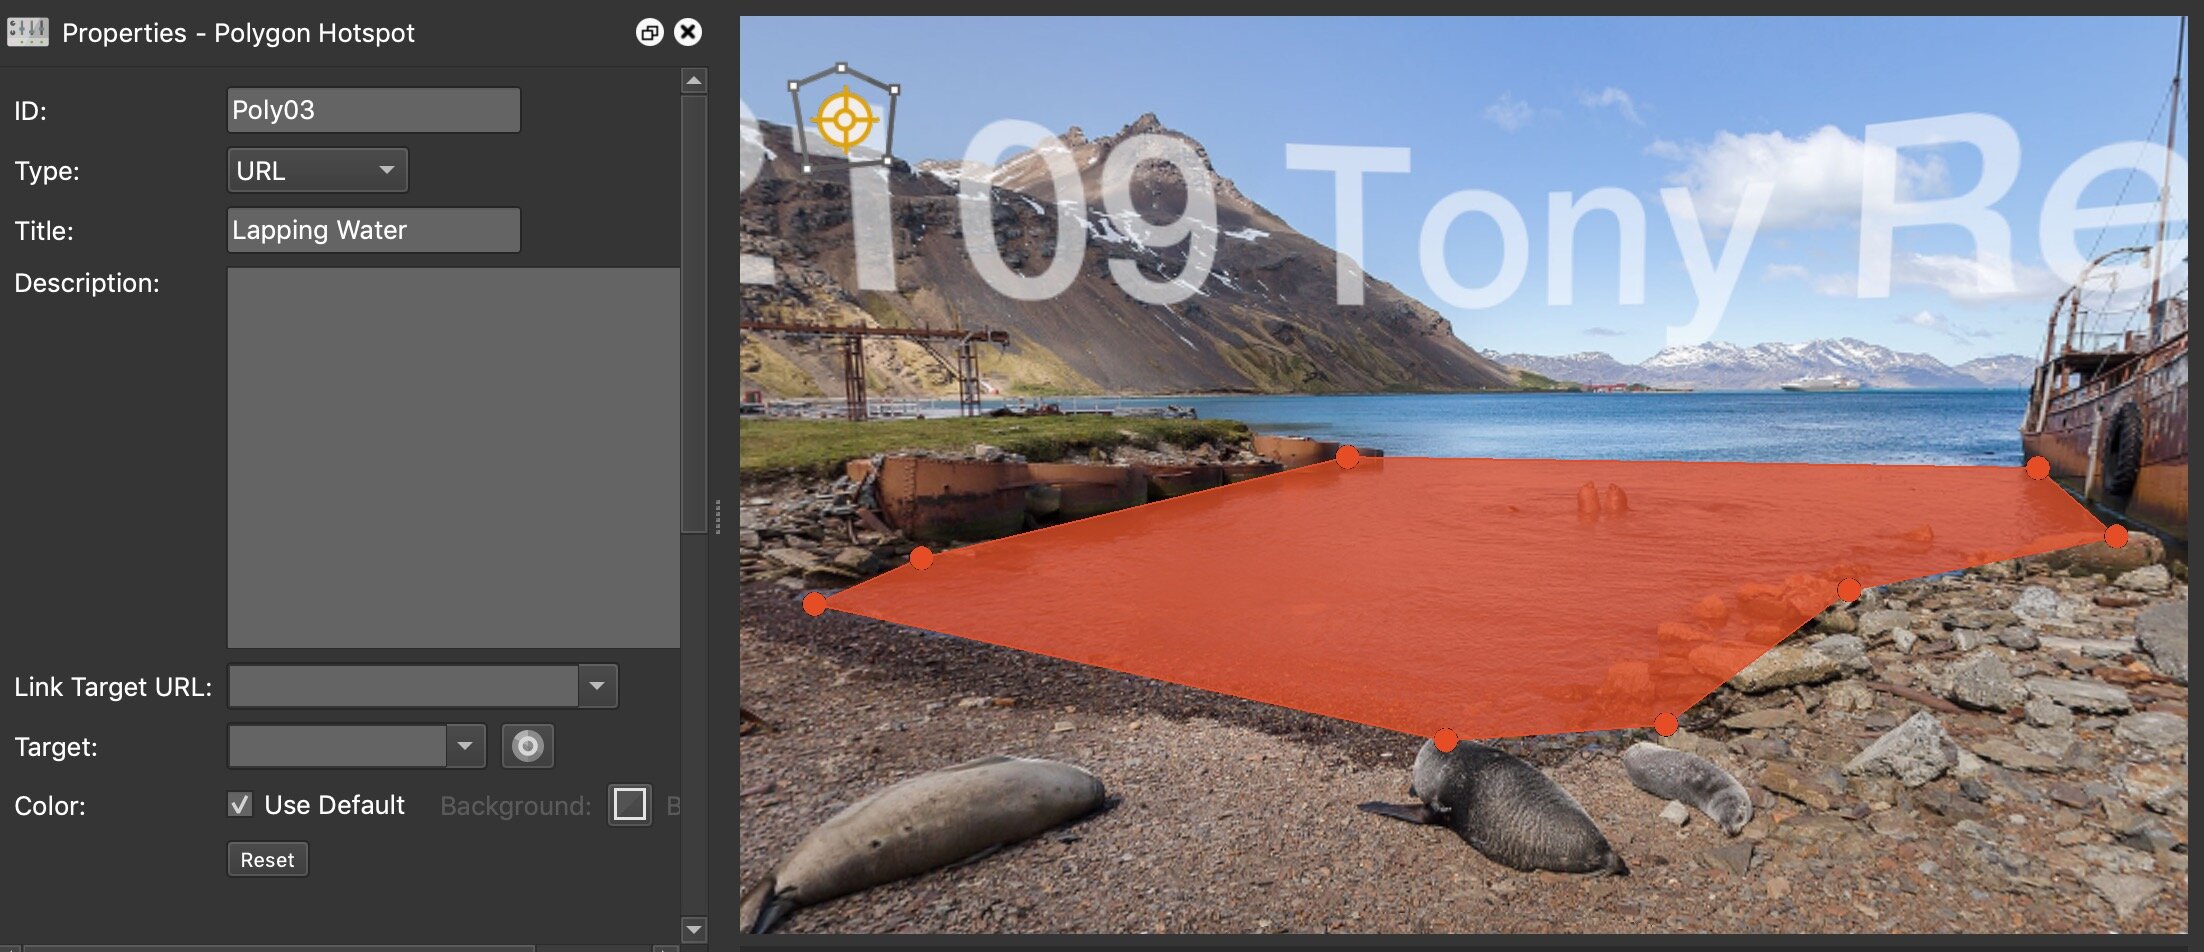
Note: this panorama has 3 Polygon Hotspots already defined. They are Penguin, Diesel Truck and Lapping Water. (See below)
3. Click on the ‘View Output’ button to see the current project status, (Figure #3)
Figure #3: Current status showing text tooltip for Diesel Truck
Note: As you mouse over the polygon areas you will see a text tooltip. The polygon’s themselves are not displayed as the current Output/Hotspot/Polygon Hotspots/View Mode: is set to ‘Always Hidden’. If you want to see them on Mouse Over just change the option to ‘Show Current’
Adding the Audio Files
1. Open the Assets folder in the Tutorial folder and select the king_penguin.mp3 audio file.
2. Drag the file onto the Viewer and release the mouse to add the file. The Properties/Sound panel will show details of the audio file (Figure #4)
Figure #4: Audio file added to project and Sound Panel
3. In the Properties/Sound Panel set the following;
ID: king_penguin
Mode: Static
Level: 0.80
Loop: -1
Move the Sound icon over the penguin polygon and check the Position Lock checkbox (Figure #5)
Figure #5: Sound Panel settings
Note: A sound added as a static mode will be heard regardless of the current viewing angle of the panorama. As we only activate the sound when the mouse is over the polygon this is the simplest mode to use.
We set the loop to -1 to prevent the audio from playing automatically as we will use a click to start option to enable sound in the browser.
Locking the sound element makes it easier to manage the placement of different sounds.
4. Repeat steps 1 - 3 with the diesel_vehicle and seawash .mp3 audio files. Name them ‘diesel’ and ‘seawash’ respectively.
Note: there are some issues that arise with playing the audio in Safari if the Preferences/Websites/Auto-Play is set for ‘Stop Media with Sound’ or ‘Never Auto-Play’. A solution is to play a small audio track that doesn’t have any audible sounds when the splash screen is mouse clicked.
5. Select the blank.mp3 audio file.
6. Drag the file onto the Viewer and release the mouse to add the file.
7. In the Properties/Sound Panel set the following;
ID: blank
Mode: Static
Loop: -1
Move the Sound icon to be bottom of the frame (Figure #6)

Figure #6: Blank audio and settings
5. Save the project
Adding Hotspot Proxy Skin Elements
1. Click on the Edit Skin button to open the Skin Editor
Note: the first step is to create a skin element that has a hotspot proxy ID. The proxy ID is used to make a link between hotspots and skin elements and their actions. When the Mouse Enters the polygon hotspot the actions assigned to the Poly01 skin element are initiated.
2. Click on the Menu/Basic: Draw Container button to select it and click once in the skin to add it
3. Add the following Properties/Position: settings';
ID: Poly01
Position: X: 20px, Y:20px
Width: 100px Height: 100px
4. Add the following Properties/Advanced; settings;
Permeable: checked
Hotspot Proxy ID: Poly01
5. Add the following Properties/Actions: settings';
Source: Mouse Enter | Action:Play Media | Parameters: 1 | Target: king_penguin
Source: Mouse leave | Action: Stop Media | Parameters: | Target: king_penguin
6. Repeat steps 2 - 5 for Poly02 (diesel) & Poly03 (seawash) (Figure #7)
Figure #7: 3 Containers set to their relevant Hotspot Proxy ID’s
Note: you can copy and paste the Poly01 twice and just change the relevant settings.
7. Save and close the skin
8. Republish the Project (see below)
Note: In some browsers you may have to click in the panorama before the audio will automatically play. We will add a ‘click to start’ to resolve this browser issue.
Adding the Click to Start
Note: As I’m sure you are aware, web browsers are moving towards stricter autoplay policies in order to improve the user experience. These changes are intended to give greater control of playback to users and to benefit publishers with legitimate use cases.
For example, Chrome's autoplay policies areas follows:
- Muted autoplay is always allowed.
- Autoplay with sound is allowed if:
- - User has interacted with the domain (click, tap, etc.).
- - On desktop, the user's Media Engagement Index threshold has been crossed, meaning the user has previously played video with sound.
- - The user has added the site to their home screen on mobile or installed the PWA on desktop.
So we will add a simple text box and screen tint to initiate the interaction with the domain. To enable audio in Safari we will also add an Action to play the blank audio file.
1. Open the Skin if it’s not already open
2. Add a Variable with the following properties;
Name: setAudio | Type: True/False | Init Value: false
3. Add an External File as follows:
Type: CSS
URL: https://fonts.googleapis.com/css?family=Schoolbell&display=swap
Note: This will add the Google Font Schoolbell https://fonts.google.com/?query=schoolbell
4. In the Embedded Stylesheet: remove all of the text except .ggskin (Figure #8)
Figure #8: Skin Property Settings
5. Select ‘Draw Rectangle’ and click once in the skin to add it. Set the following properties:
Position: ID: screentint
Position: X: 0 px Y: 0px
Position: Size: Width: 100% Height: 100%
Appearance: Hand Cursor: checked
Rectangle: Background: Enabled: check
Rectangle: Color: HTML: #000000 Alpha channel: 100
Rectangle: Border: Width: 0
Actions: Source: Mouse Click | Action: Set Variable Value | Parameters: Set(=)/true | Target: setAudio
Actions: Source: Mouse Click | Action: Play Media | Parameters: 1 | Target: blank (Figure #9)
Figure #9: Settings for the screentint element
6. Select ‘Draw Text Field’ and click once in the skin to add it. Set the following properties:
Position: ID: call_to_action
Position: Position: Anchor: Center
Position: Position: X: 0px Y: 0px
Position: Size: Width: 360px Height: 38px
Appearance: Hand Cursor: checked
Rectangle: Background: Enabled: unchecked
Rectangle: Border: Width: 0
Text: Text: Polygon Hotspots with Audio - Click to Start
Text: Color: HTML: #ffffff (white)
Align: Auto Size: checked
Advanced: CSS Styles Inner Element: font-family: 'Schoolbell', cursive; font-size: 40px;
Actions: Source: Mouse Click | Action: Set Variable Value | Parameters: Set(=)/true | Target: setAudio
Actions: Source: Mouse Click | Action: Play Media | Parameters: 1 | Target: blank (Figure #10)
Figure #10: call_to_action settings
7. Select both the screentint and call_to_action elements,
8. Click on ‘Draw Container’ in the menu and click once in the canvas to add both elements as children of Container1.
9. With Container1 selected set the following properties;
Position; ID: start-button
Position: Position: Anchor: centre
Position: Position: X: 0px Y: 0px
Size: Width: 100% Height: 100%
Appearance: Visible: checked
Appearance: Visible: Logic Block: Trigger: *setAudio | Comparison: = | Value: true | Visible: false
10. Move screentint element below tour_title_call_to_action elements. (Figure #11)
Figure #11: Settings for start-button element
11. Save and close Skin
12 Republish the project
Updating the Text Tooltips
Note: the final stage is updating the text tooltips. To do this we will add CSS styled text to the Polygon Hotspot titles.
1. Open the project file if it’s no already open
2. Select the Poly01 Polygon Hotspot to make it active
3. In the Properties: Polygon Hotspot: Title: remove the existing title and paste in the following;
<p style="font-family: 'Schoolbell', cursive; font-size: 15px; text-shadow: 2px 2px #000000;">You are listening to the sound of a King Penguin. More audio clips can be heard as you move around the panorama</p>
4. In the Output: Hotspots: Hotspot Textbox panel set the following;
Size: 180 x 130
Background: Visible: uncheck
Border: Visible: uncheck (Figure #12)

Figure #12: Polygon Hotspot tooltip settings
5. Repeat steps 2-3 for Poly02 using the following text;
<p style="font-family: 'Schoolbell', cursive; font-size: 15px; text-shadow: 2px 2px #000000;">You are listening to the sound of a diesel JCB Telehandler.. More audio clips can be heard as you move around the panorama</p>
6. Repeat steps 2-3 for Poly03 using the following text;
<p style="font-family: 'Schoolbell', cursive; font-size: 15px; text-shadow: 2px 2px #000000;">You are listening to the sound of water lapping on the shore. More audio clips can be heard as you move around the panorama</p>
7. Save the project and republish
Note: when the mouse enters the polygon hotspot region the styled text is displayed.
Summary
I hope you have enjoyed the tutorial and it has helped you to achieve the best possible project outcome. If it has please take a second to consider a donation so that I can continue to add more tutorials.
