As a developer of 360-degree virtual tours, I rely heavily on specialized software to bring immersive experiences to life. My tool of choice, Pano2VR, allows me to transform equirectangular images into interactive virtual environments. It enables me to craft unique user interfaces, embed audio and video, and integrate location maps to enhance the viewer's journey.
One such Virtual Tour is the “Adelaide Street Art” tour (below) that showcases panoramas shot on an iPhone 11 Pro using the specialised Nodal Ninja Mini Rotator.
Publishing a Tour
When a tour is published, Pano2VR performs a crucial step: it processes the large, high-resolution equirectangular images, which can be tens of thousands of pixels wide, into a system of tiles at multiple resolutions. This is fundamental to providing a smooth and efficient viewing experience.
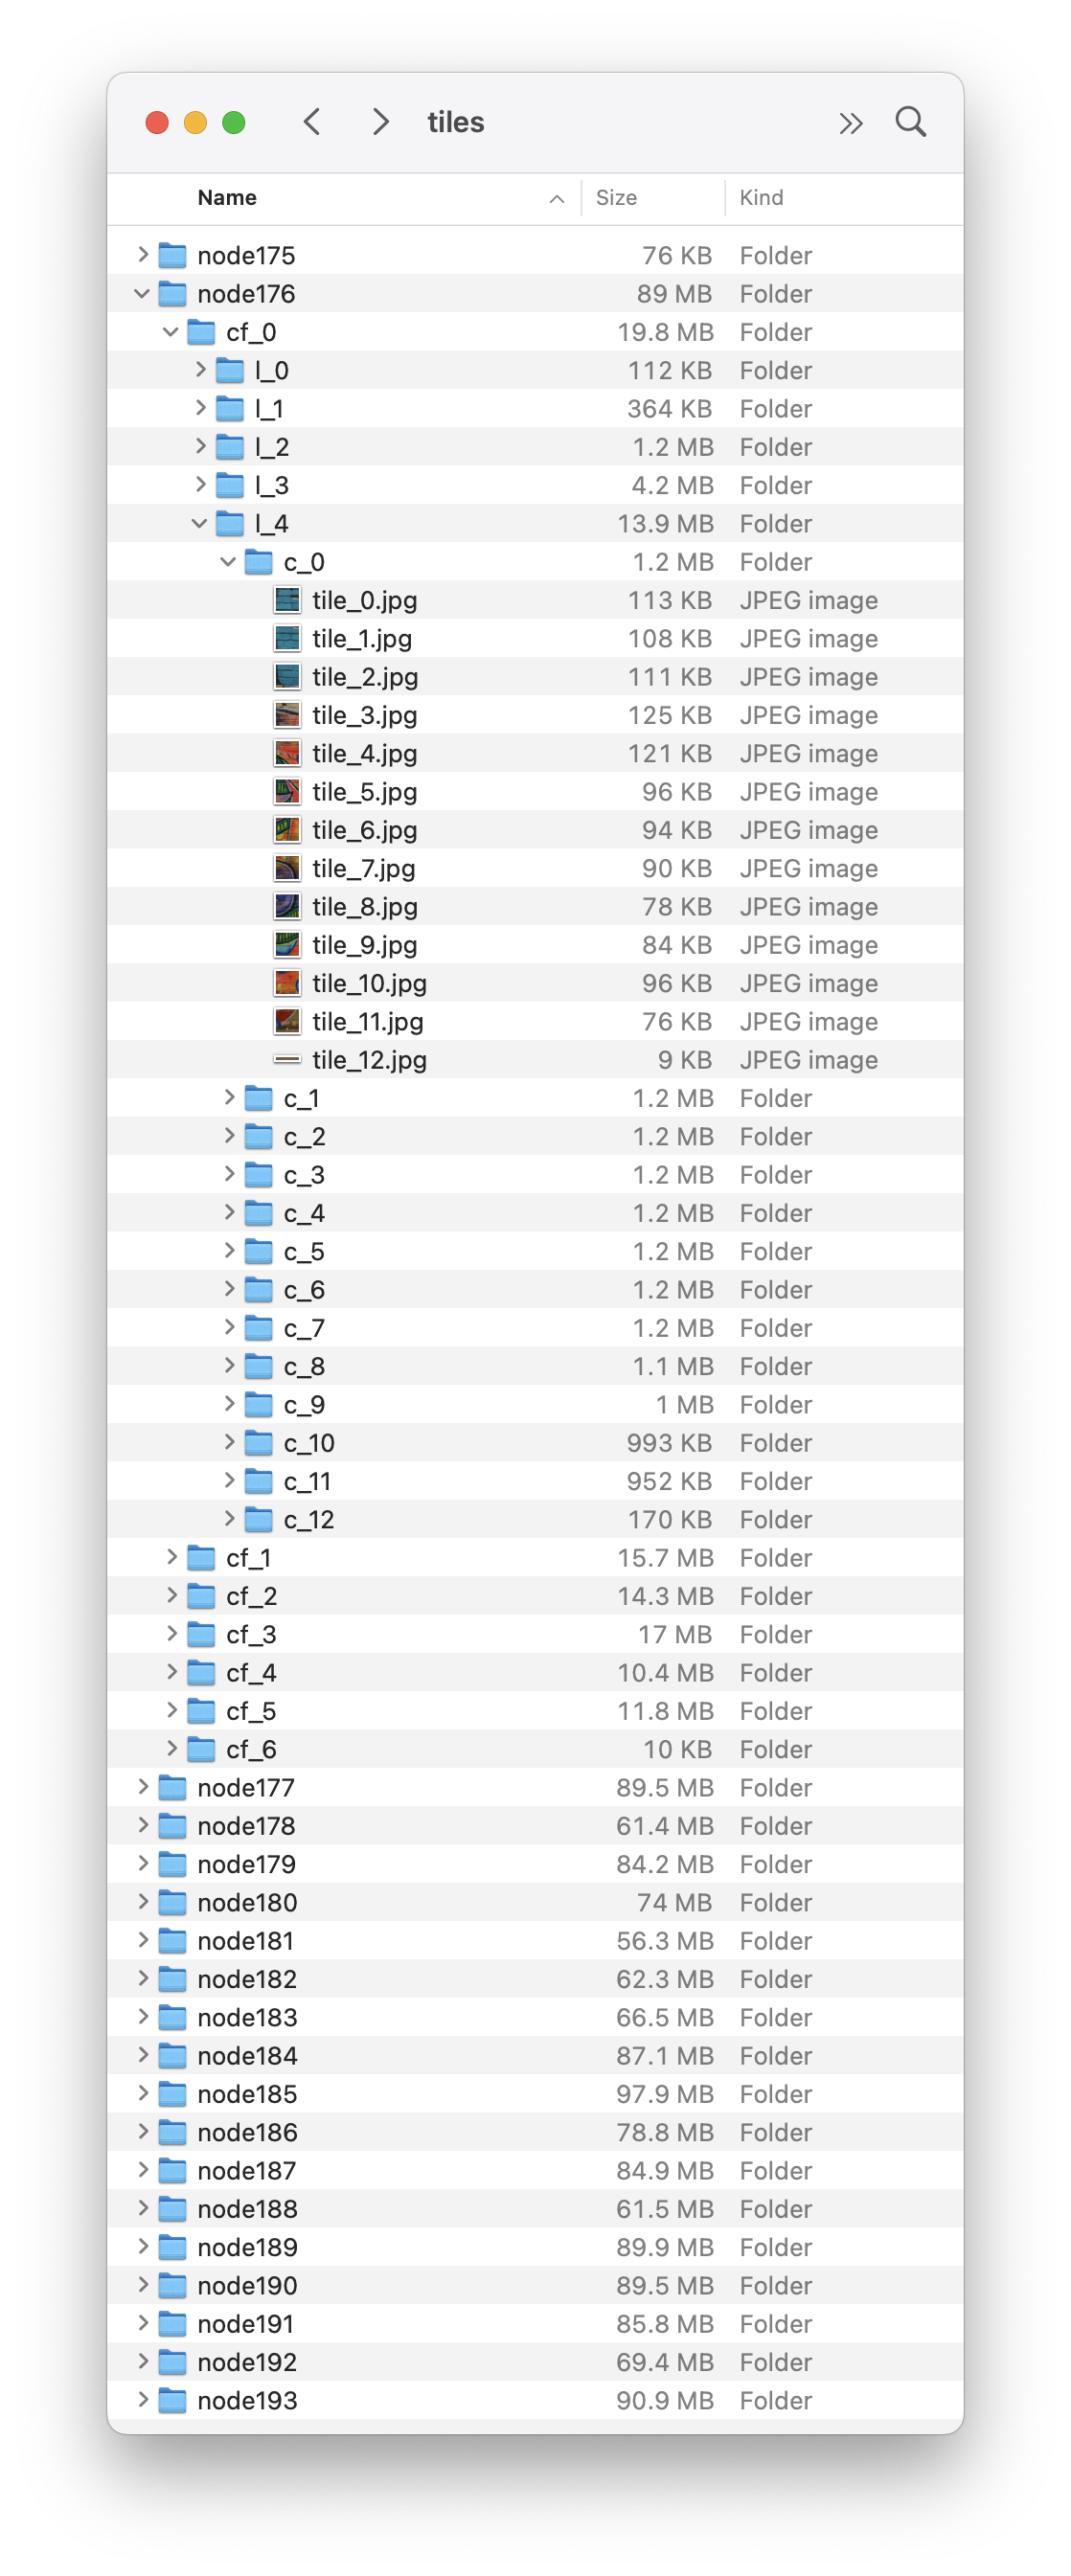
Image: Tile Folder Structure

Image: Tile Column contents
Above: Tile folders for the Adelaide Street Art tour showing Node176 > Cube Face cf_0 (front) > Level 4 (l4 and largest tile) > Column 1 (c_0) tile_0.jpg to tile_12.jpg (total number of tiles for the cube face = 169.
Why Tiling? The Secret to Fast Virtual Tours
Imagine trying to load large 360-degree image all at once, especially for users in Australia with varying internet speeds or on mobile devices! It could be slow, consume excessive bandwidth, and may likely frustrate viewers. This is where tiling shines:
* Efficient Loading & Memory Management: Instead of loading a large image, Pano2VR breaks it down into smaller, overlapping "tiles" (often with a default size like 510px). This means Pano2VR loads only the tiles needed for the current view. This significantly speeds up the initial loading time and reduces memory consumption, especially for high-resolution images.
* Adaptive Quality (Multi-Resolution): This is key. Pano2VR creates multiple levels of these tiles, each at a different resolution. When zoomed out, the viewer loads lower-resolution, smaller tiles for a rapid overview. As the user zooms in, the system seamlessly swaps to higher-resolution tiles for that specific area, revealing crisp detail only when and where it's needed. This optimizes for bandwidth and device capabilities, providing the best possible experience for everyone.
The Craft Behind the Immersive Experience
To give you a sense of the effort involved in creating these tours and the amount of work required for each equirectangular image, here's a glimpse into the post-processing workflow for a project like my “Adelaide Street Art” tour.
Post-Production Workflow:
Initial Processing: Denoised and color corrected in Lightroom Classic.
Stitching: Panoramas, composed of 27 individual images, were then stitched in PTGui, resulting in large images typically around 19,552 x 9,776px (varying by shot) and 8-bit TIFF files, often reaching 589.9 Megapixels.
Refinements: Further work in Photoshop included detailed nadir patching using the Flexify - Flaming Pear plugin, followed by final corrections with the Raw Filter.
Retouching: In many of the stitched images there are numerous areas that need retouching including “tags” ontop of the street art, unwanted artifacts, misalligned stitches.
The Unthinkable Happens
Recently, I faced every digital creator's worst nightmare.
Through an unfortunate oversight, I accidentally reformatted a drive not realising it contained my original, fully retouched, high resolution equirectangular images. These weren't just any files; they were the culmination of a detailed shooting and processing workflow, and the source for all my optimized image tiles.
This was more than a minor setback – it was a catastrophic loss. Without those original equirectangular images, I couldn't add new content to my tours or even re-publish existing ones.
Launching the Pano2VR tour was heartbreaking because it revealed the extent of the issue as it listed the files that could not be found.
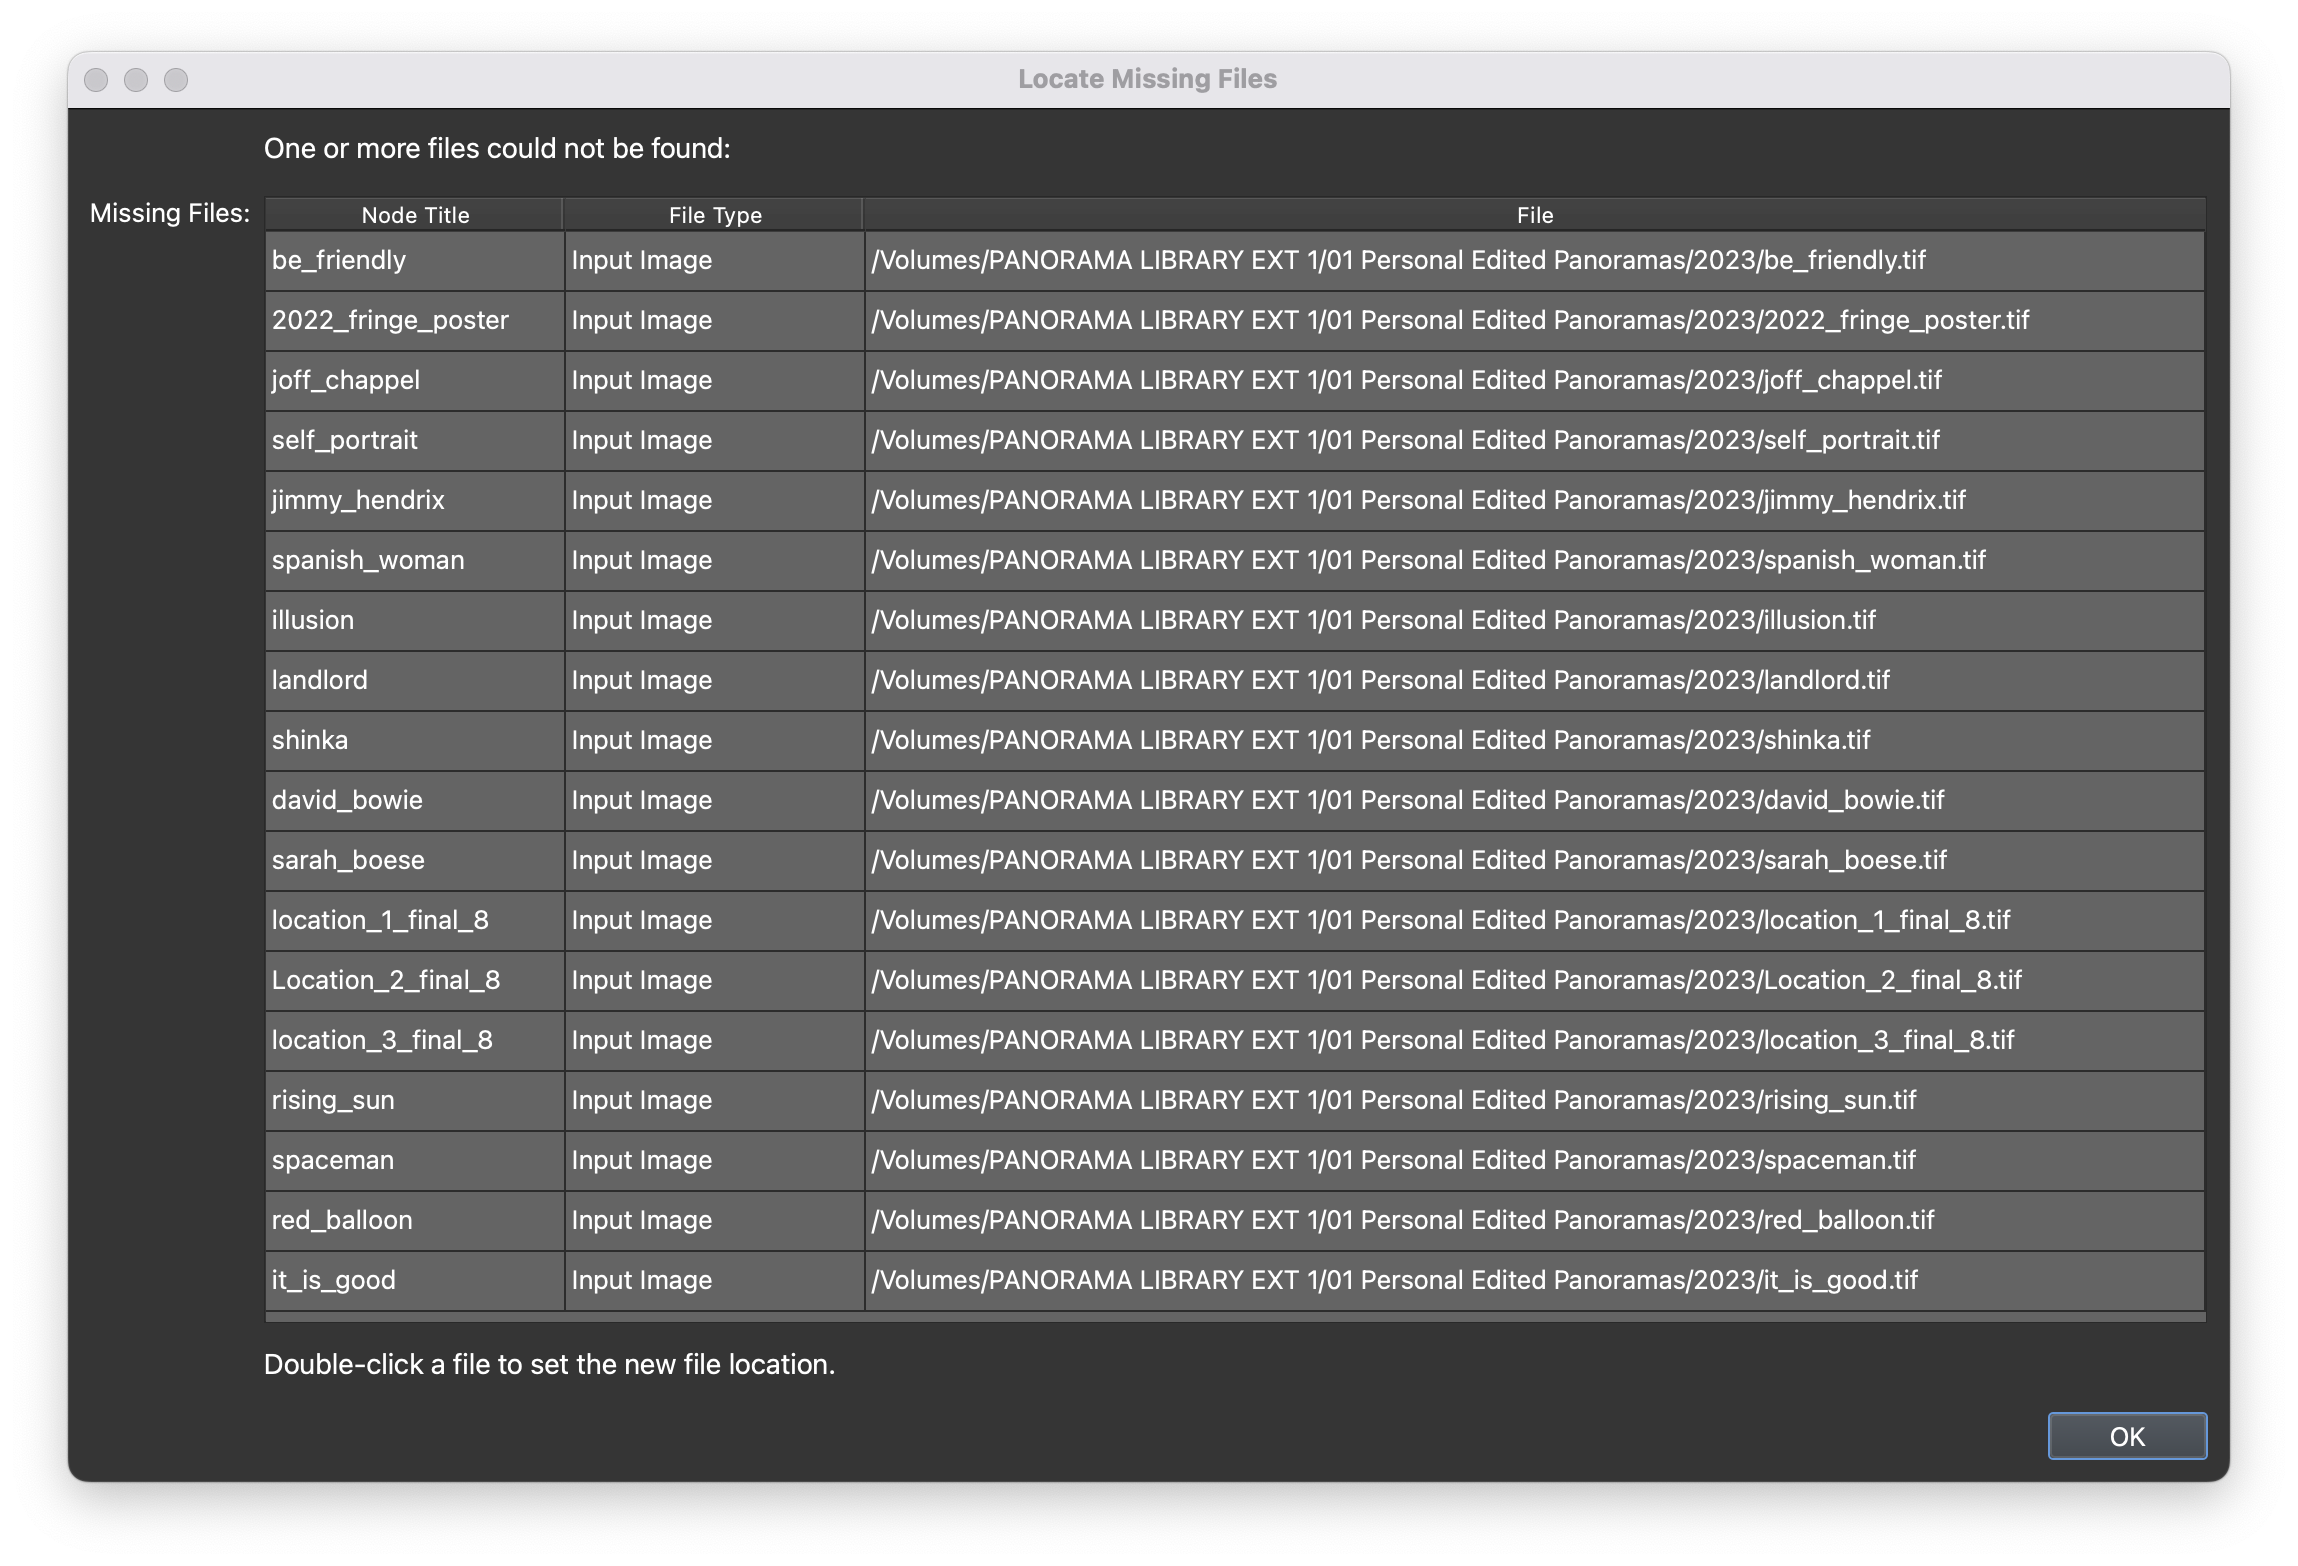
Image: Opening the Pano2VR project and being confronted with the list of Missing Files :-(
My immediate options were grim: I had two options:
I could either re-stitch all the panoramas from scratch using the raw photoshoot images and then reapply all the retouching or…
Painstakingly rebuild each equirectangular file by manually arranging 169 x 6 individual tile images in Photoshop, image by image, column by column to create the 6 cube faces of each panorama.
Both paths promised an agonizingly long and tedious journey.
A Glimmer of Hope
Just as despair began to set in, a thought sparked in my mind: perhaps there was another way. It came to me that maybe Artificial Intelligence (AI) could offer a solution.
One of my go to AI services is Google’s Gemini and I’d recently watched a YouTube video by Matt Wolfe that showed him using Gemini to create a Productivity App. (jump to 3:10 to view the segment)
Based on Matt’s video I wondered if it would be possible to leverage Gemini to build an app to recover my lost work?
My reasoning was simple: Pano2VR cuts the original equirectangular images into those hundreds of smaller tiles.
These tiles, though fragmented, still contain all the visual information of the original.
Each tile is a piece of a larger puzzle, and with enough data and the right algorithms, and Gemini might be able to piece them back together.
Gemini to the Rescue: Crafting the Recovery Script
So, I turned to Gemini with the idea that it could help me develop an application to speed up this arduous recovery process. I explained the situation, detailing the specific folder structure created by Pano2VR and the need for dynamic dimension handling.
My prompt to Gemini, although I didn’t know it at the start, essentially asked for a Python script to:
Navigate a deeply nested folder structure: Specifically targeting l_4 folders within cf_Y folders inside a nodeXXX root.
Dynamically infer image dimensions: Instead of hardcoding sizes, the script needed to analyze existing tiles to determine the correct dimensions for combining them, with fallback defaults if inference was ambiguous.
Combine tiles into cube faces: Vertically combining tiles into columns, then horizontally combining columns into complete cube faces (one for each of the six faces).
Handle errors and adapt: Print warnings for missing files or unexpected sizes, and critically, resize images if necessary to fit the dynamically inferred target dimensions, ensuring a complete output even if it meant minor distortions.
Accept command-line arguments: To specify which nodeXXX folder to process.
Output to a unique folder: Organizing the reconstructed cube faces clearly.
After this initial prompt, Gemini got to work, letting me know that it would use Python and leverage the Pillow library.
Note: The Pillow library in Python is a powerful and user-friendly fork of the classic PIL (Python Imaging Library). It's an essential tool for anyone working with images in Python, offering extensive capabilities for image manipulation, processing, and saving.
The journey to the perfect solution wasn't immediate, but a fascinating iterative process. My primary concern was ensuring the script could dynamically infer image dimensions for each panorama node, rather than relying on any hardcoded sizes. I wanted it to adapt flawlessly, whether a tile was 512 x 512px or something slightly different, ensuring no distortions were introduced during the reconstruction.
We went back and forth, refining the logic. My focus was on:
Analyzing Size Dependencies: How could the script read image size to accurately calculate the original tile, column, and row dimensions?
Implementing Size Inference: Developing robust methods to derive actual dimensions directly from source images within each node directory. This meant moving away from "expected size" warnings and instead making the script adapt to the actual sizes it found.
Orchestrating Size Adaptations: Restructuring the image combination logic entirely so that images were always combined at their native sizes. If a tile's dimensions didn't perfectly align with its inferred position, the script would still proceed, resizing only when absolutely necessary to fit the dynamically determined target, but always prioritizing the original dimensions where possible. This ensured the integrity and seamlessness of the final cube faces.
Through this collaborative refinement, Gemini built a script, combined_panoramas.py, that could do the following:
Intelligently examine the scattered tiles
Dynamically determine their individual sizes
Extrapolate the final cube face dimensions
Seamlessly stitch the individual tiles together to create a single cube face
Repeat for each of the other five individual cube faces
Create a new folder,
Name the folder to match the original tile folder name
Save the cube faces into the new folder
All of this, in lightning speed
Once I had the 6 cube faces for each panorama then I could leverage Pano2VR’s ability to detect cube faces and render them as Equirectangular files.
The Script at and Pano2VR at Work
The video below shows the complete solution from examining the tile file structure, to running the script, loading the cube faces, transforming the cube cross to and equirectangular image and updating and outputting the original tour.
Moment of Truth
The relief and satisfaction of seeing my lost work restored, all thanks to Pano2VR and the power of AI and what was a truly collaborative development process, was immeasurable. This experience truly highlighted how AI, like Gemini, can turn what seems like an insurmountable problem into a manageable and even exciting challenge.
