This is Part 2 of the tutorial, using only tools provided by Pano2VR, to create a project with a hotspot that zooms opens a skin element (a text field) fullscreen.
Using an 'equirectangular image' Pano2VR project and a 'flat image' Pano2VR project we will combine both using a text field skin element to hold the 'flat image' project.
A skin component provides the elements for the 'flat image' project to provide zoom and pan options. In addition touch can be used on mobile to zoom and pan.
Overview and Tutorial Files
A shout-out to Jaroslav Pindora (P2VR Facebook User Group) solution to the hotspot image zoom and pan using just the tools within Pano2VR.
In Part 1 we covered the following;
Import an Equirectangular image and set a default view
Add a Point Hotspot
Define the HTML 5 Output Settings
Create a new Skin and add Assets from the Components Toolbox
Modify the assets to set up an iFrame
Generate the Output and test the Project
In Part 2 we will;
Import a flat image and set a default view
Set up an HTMl 5 Output
Import a pre-built component to manage the zoom and pan
Create the Skin
Generate the 'Flat Image' Output and test the project
Generate the Final combined Output
You can use your own .html files or download the P2VR Tutorial Folder and follow along with the steps below.
The download contains a tutorial folder called 'P2VR_Image_Zoom_Pan' which in turn contains an 'Assets' folder, a 'Project' folder and a 'zoom_pan' folder.
The assets folder contains an high res image 'leopard.jpg', a generic equirectangular image 'green-equi.png' and a skin component called 'zoom_ui.ggs'
1. Import a Flat Image and set a default view
1.1 Open a new Pano2VR project, drag the flat 'leopard.jpg' image, from the Asset folder, in the Tutorial folder, into (Figure #1)
Figure #1: Add the flat leopard.jpg
Note: In auto mode the image is distorted and we need to correct the correct Type
1.2 In the Properties > Input Panel select Type: Flat (figure #2)
Figure #2: Set the Type: to Flat
1.3 Click on 'Viewing Parameters' to open the settings panel and in 'Default View' change the value for FoV: to 100˚, click on 'Go To' and then click on 'Set'. In 'Field of View (Zoom)' change the value of MIn: to 4.0px (Figure #3)
Figure #3: Set Projection > FoV and Field of View (Zoom): to 4.0px
Note: the Projection > FoV: of 100˚ will show the whole image and the Field of View > Min: sets how far the into the image the zoom will go
1.4 Save the project into the 'Project' folder in the 'P2VR_Image_Zoom_Pan' tutorial folder. I've named it 'leopard_zoom.p2vr' (figure #4 & 5)
Figure #4: Save the project
Figure #5: Project saved into the Project folder
2. Set up the HTML5 Output
2.1 Open the project if it's not already open. Click on the 'Add Output'button in the Output panel and select 'HTML5' (Figure #6)
Figure #6: Select HTML5 as the Output type
2.2 Click on the 'Output Folder' button and navigate to the 'Zoom-Pan' folder in the Tutorial Folder. Select 'New Folder' and name it 'includes', click 'Create' and click on 'Open' (Figures 7 - 11)
Figure 7: Select 'New Folder'
Figure #8: Name it 'includes'
Figure #9: Create the new folder
Figure #10: Open the new folder
Figure #11: The 'includes' folder is now the output destination for the leopard_zoom.p2vr project
2.3 Save the project
3. Import the Zoom_UI Skin Component
3.1 In the P2VR_Image_Zoom_Pan tutorial folder, double click on the 'zoom_ui.ggskc' to open the 'Copy Component' window. From the dropdown menu select 'New' and click 'OK' (Figure #12, 13)
Figure #12: Copy Component window & dropdown menu
Figure 13: select 'New'
3.2 Create a new category title and call it 'leopardui' and click 'OK' (Figure #14)
Figure #14: New Category Title
Note: The component can be renamed, modified and moved to a new category at any time
3.2 Once the component has been added to the Component Library you will see a notification to that effect (Figure #15)
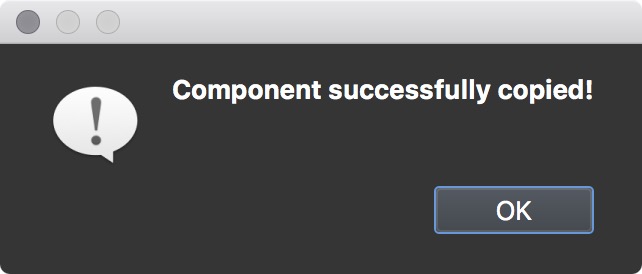
Figure #15: Notification of copy
4. Create the Skin
4.1 In the Output panel, click on the 'Edit Skin' button to open the Skin Editor (Figure #16)
Figure #16: Skin Editor
4.2 Click on the 'Components Toolbox' button to open the toolbox, select the Category 'leopardui' (Figure #17)
Figure #17: zoom_ui in the 'leopardui' category
4.3 Double click on the 'zoom_ui' component to add it to the skin and click on 'Close' to close the Components Toolbox window (Figure #18)
Figure #18: Skin with zoom_ui component added
Note: at this point there is no further work to be done on the skin. You can explore the elements to see the actions and logic blocks that have been applied.
4.4 Save the skin into the 'Project' folder in the 'P2VR_Image_Zoom_Pan' tutorial folder. I've named it 'leopard_zoom'. Close the skin editor, Save the project and select the 'Output' button to preview the zooming project (sample output below)
Note: by outputting the final leopard project to the 'includes' folder of our original panorama project the tutorial is almost finished.
5. Final Output
5.1 Close and Save the 'leopard_zoom' project, if it's still open, and open the 'image_zoom_pan' project. Click on the 'Edit Skin' button to open the skin editor (Figure #19)
Figure #19: image_zoom_pan project skin
5.2 Select the 'info_text_body' element and open the Properties > Rectangle dropdown menu (Figure #20)
Figure #20: info_text_body Properties > Rectangle
5.3 Click in the Color: swatch block and set the color to black and click 'OK' (Figure #21)
Note: this will ensure that we don't see any of the underlying panorama when the text field zoom is active
5.4 Save and close the Skin Editor, Save the project and click on the 'Generate Output' button to publish the final panorama as shown below
Note: Comments and suggestions for improving the tutorial or errors and omissions are welcomed.
Summary
I hope you have enjoyed the tutorial and it has helped you to achieve the best possible project outcome. If it has please take a second to consider a donation so that I can continue to add more tutorials.
