Overview - Part 4
In this section, we will look at Adding a Multiple Image Gallery with Description.
Adding the Hotspot
1. Open the RPGT_Tutorial_Simplex.p2vr project if it’s not already open
2. Set the Viewer window to Hotspot mode and click in the Panorama to set another Point Hotspot
3. With the Point Hotspot active set the following in the Properties - Point Hotspot panel:
Type: URL
Skin-ID: ht_gallery
Title: Australian Outback
Description: (Open the Tutorial files > Outback > Australian Outback.txt file. Copy and add the data contained within the Gallery Description section)
Link Target: 3 (the number of images in the gallery)
Target: outback (used to identify elements in the skin and the name of the gallery folder in the To Upload > images folder ) (figure #1)
Figure #1: Point Hotspot Properties
Note: Images are loaded into the project via the Output > Advanced > Assets panel. It is preconfigured to open files from the To Upload > images folder
4. From the Tutorial files > Outback copy the Outback folder into the To Upload > images folder and rename it ‘outback’
5. Remove the .txt file and re-name the Homestead.jpg to 1.jpg, Drover.jpg to 2.jpg and Billabong.jpg to 3.jpg (Figure #2)
Figure #2: outback images ready for uploading into the project
6. Output the project
Note: It should look like the example below
Note: When we mouseover the hotspot we see the name of the Gallery in the tooltip.
Clicking on the icon opens the popup with the title, image and description.
In the image area there is a next arrow button, clicking on it takes us to the next image. Now there are two arrow buttons to move forward and back.
Opening the direct link in an iPad or iPhone we see the responsive popups.
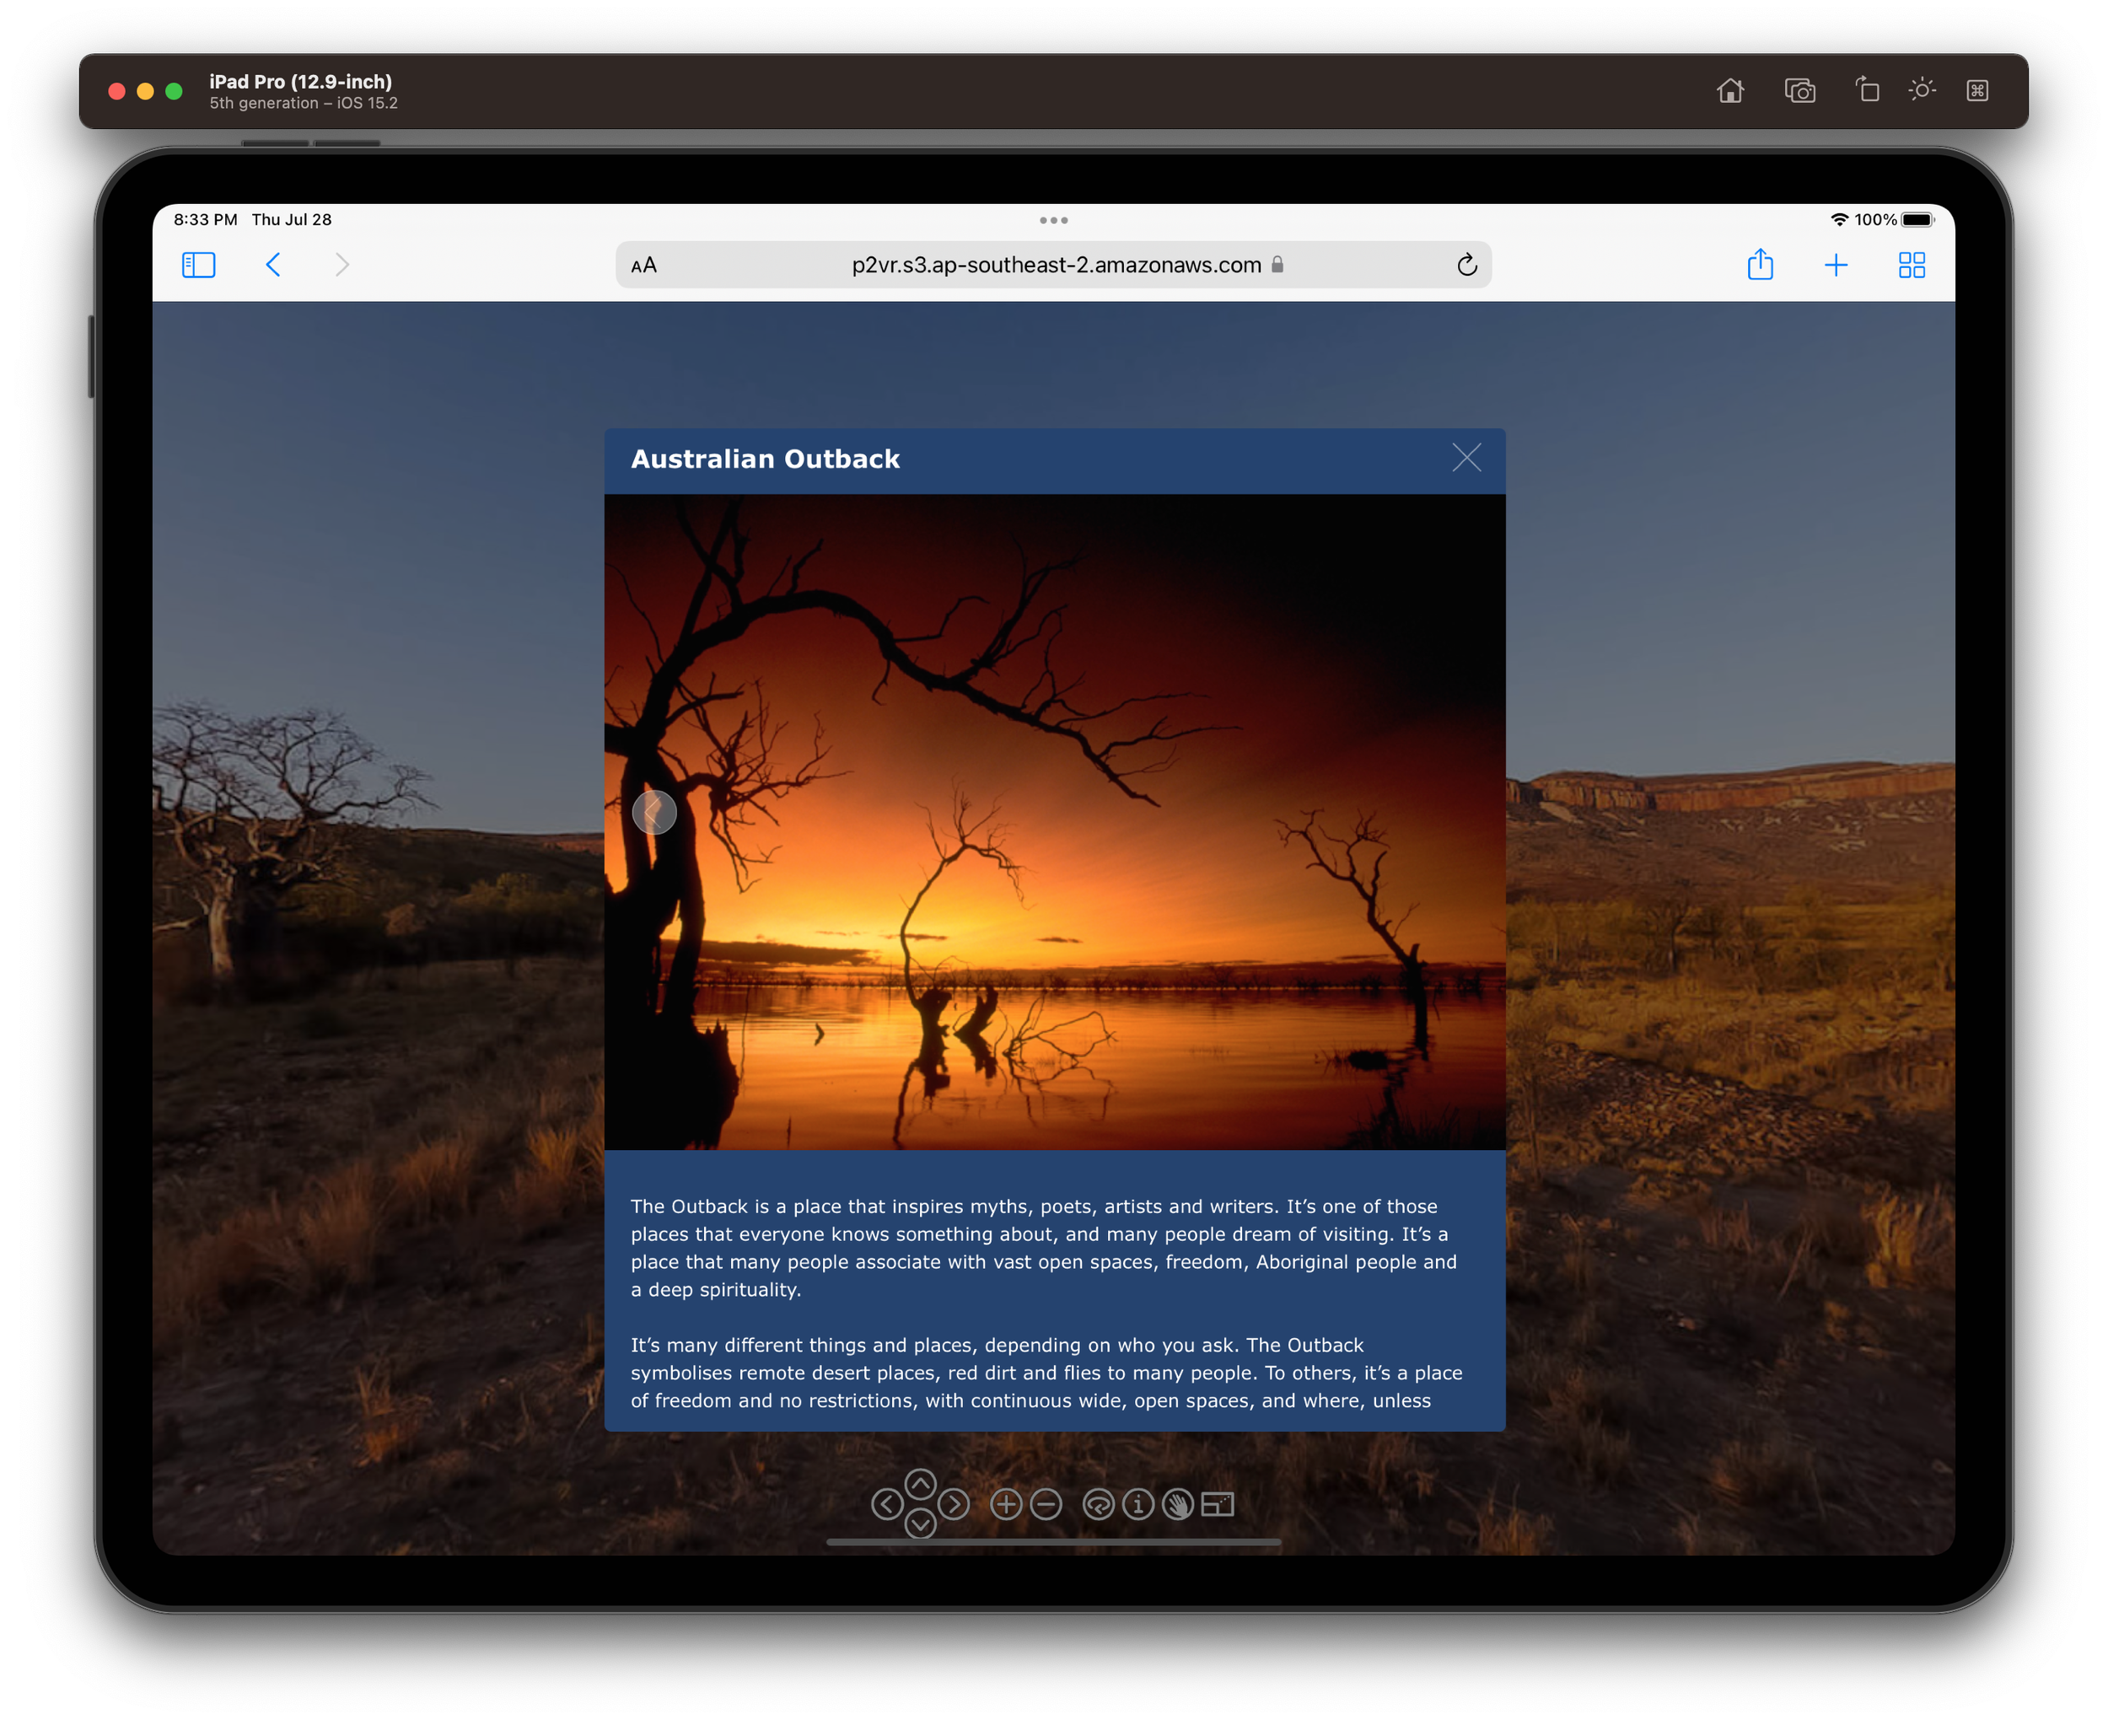
Figure #4: iPad landscape with the last image and the previous button visible
Figure #5: iPhone landscape first image and next button
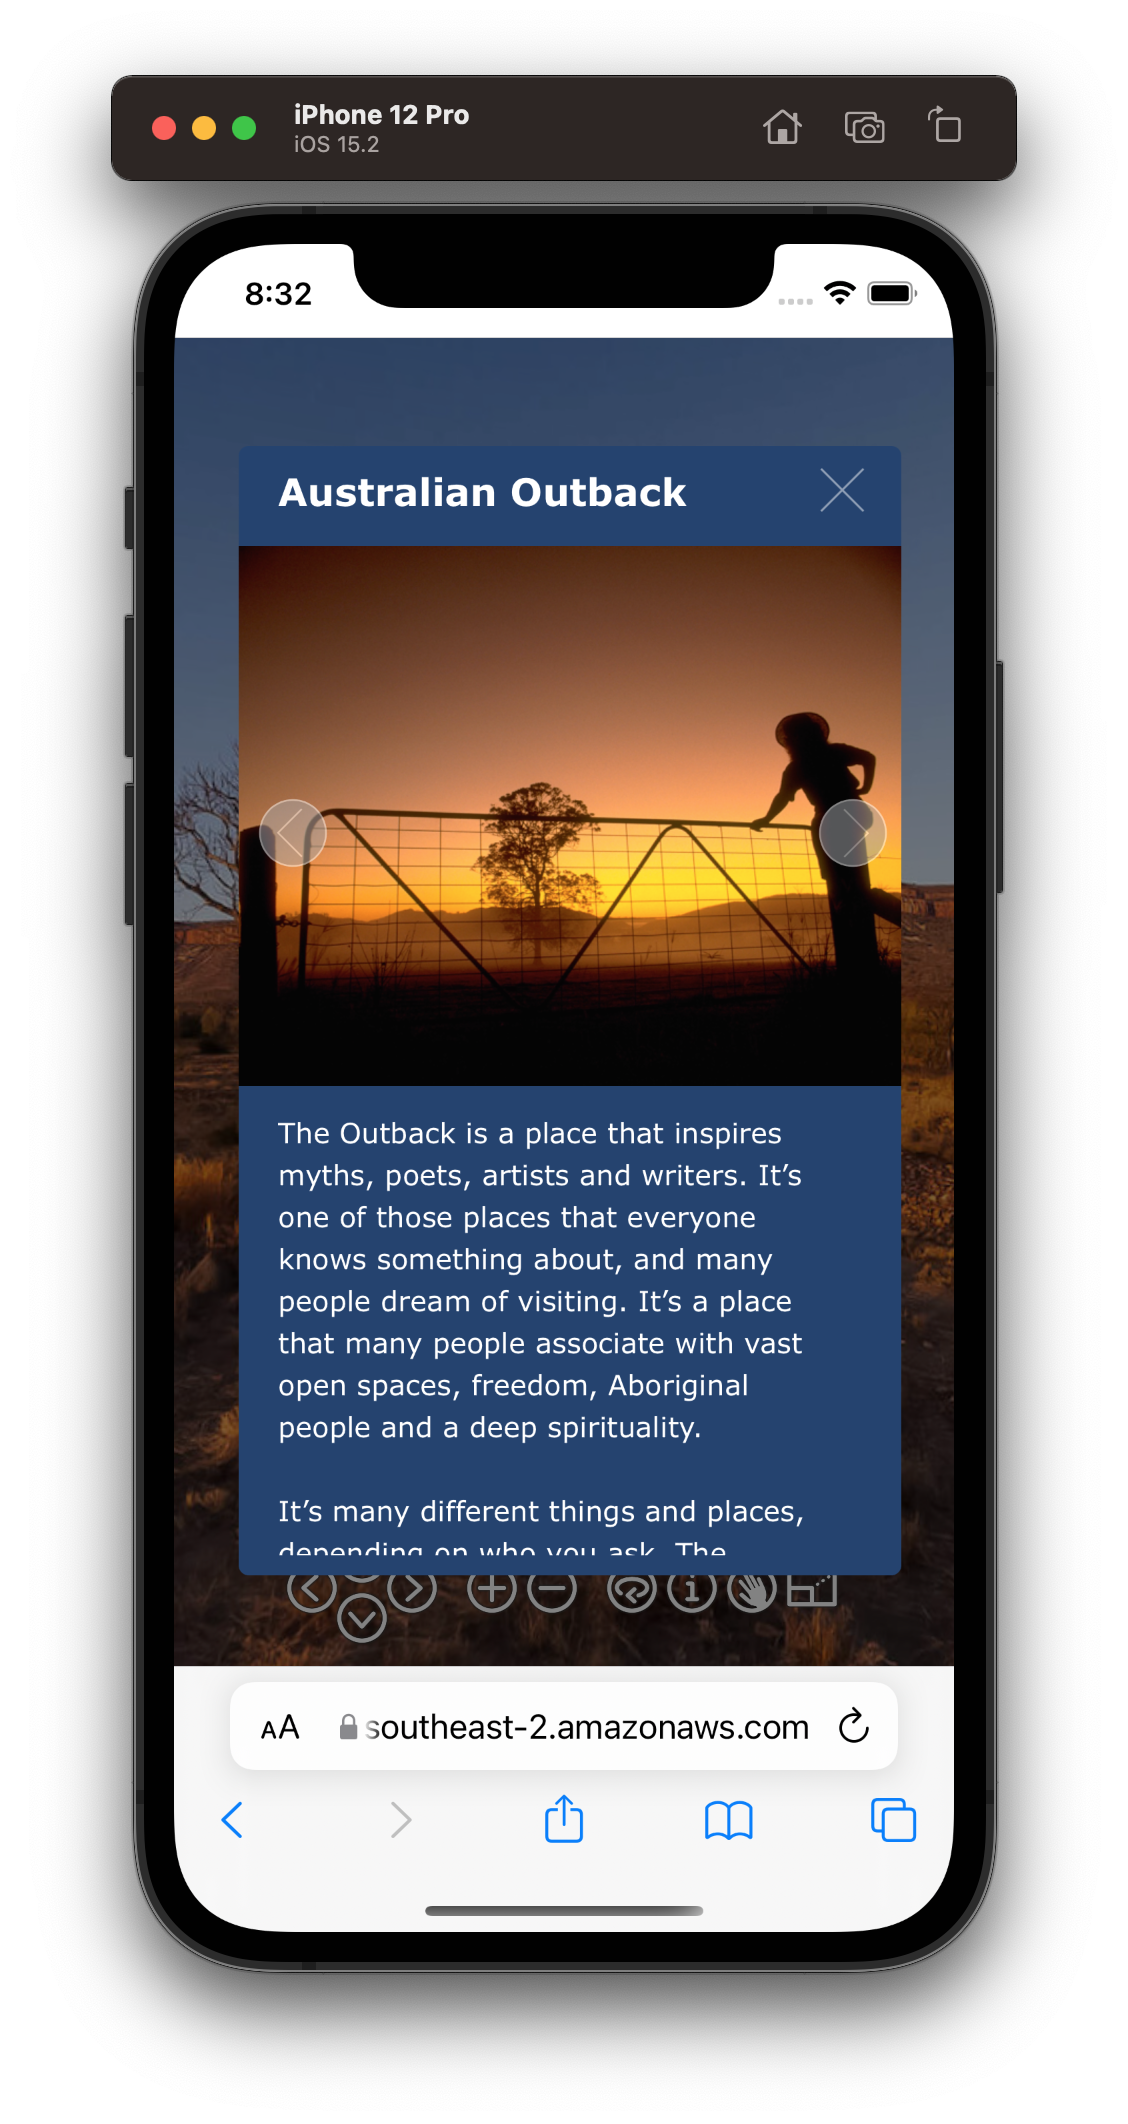
Figure #6: iPhone Portrait second image and both buttons visible
Note: This is the end of Part 4 move onto Part 5: Text only Popup
