Overview - Part 6
In this section, we will look at Adding Slide Titles.
Note; At the moment we only have a Title and a Description and we want to have individual Slide Titles for our images.
Unfortunately in V6 there is no way to add more data fields to a hotspot so we will dive into the Skin and add our data there.
Editing the RPGT Component Skin
1. Open the RPGT_Tutorial_Simplex.p2vr project if it’s not already open
2. Click on the ‘Edit Skin’ button to open the Skin Editor
Note: the Simplex skin elements are locked and hidden so we see only the RPGT skin elements
We will navigate to, and open, the Text element that will contain the slide titles of our images
3. In the tree open cnt_RPGT_component > cnt_popup_responsive > cnt_popup_slides_text > and click on txt_slide_title to highlight it. (figure #1)
Figure #1: txt_slide_title element selected
4. In the Properties section open the Text dropdown panel
5. Click on the Text: Logic Block button to open the Logic Block Settings window (figure #2)
Figure #2: Logic Block settings for the txt_slide_title element
Note: we are going to make an expression that when the slideshow name is ‘nature’ and the visible slide is number ‘1’ then display the title ‘Frilled Neck Lizard’.
6. In the first Trigger expression replace the Value text ‘gallery target’ with the gallery target associated with the hotspot. In the case of the Australian Nature hotspot its ‘nature’ (no quotes)
7. In the expression Text box replace ‘Slide Title’ with the name of the image used in the Gallery. In this case, it’s Frilled Neck Lizard
8. Select OK to create the logic block expression (figure #3)
Figure #3: Updated Logic Block Settings
9. Save the skin as Simplex_RPGT_Skin.ggsk
10. Close the skin
11. Open the Edit Skin Configuration window and check ‘Show Slide Title’ (figure #4)
Figure #4: Check ‘Show Slide Title’ (with Skin Colors)
12. Output the project
10. Click on the Australian Nature hotspot and the image now displays the slide title ‘Frilled Neck Lizard’ (figure #5)
Note: as the Australian Outback gallery is displaying 3 images we need to add 3 title expressions that will display 3 titles in the gallery. We will use the existing expression to speed up the process.
11. Go back to step 5 open the skin and open the Text: Logic Block
12. Click on the ‘Copy’ button and close the Logic Block (figure #6)
Figure # 6: Logic Block Copy button
Note: when you select ‘Copy’ it makes a copy of all the expressions in the Logic Block. e.g. if there were 4 expressions then a copy and paste would result in 8 expressions.
13. Re-open the Logic Block and select Paste 3 times (figure #7)
Figure #7: Single expression pasted 3 times.
14. Replace 'nature’ in the new expressions with ‘outback’ (no quotes) and set the op_slideshow_count number to 1, 2, and 3 respectively.
15. In the expression Text box replace ‘Slide Title’ with the name of the image used in the Gallery. For the correct slide titles, you can refer to the Australian Outback.txt document in Tutorial files > Outback (figure #8)
Figure #8: Updated expressions
16: Select ‘OK’
17. Save the skin
18. Output the project
Note: Now all of the Image galleries have individual slide titles for each image. (figures# 9, 10 & 11)
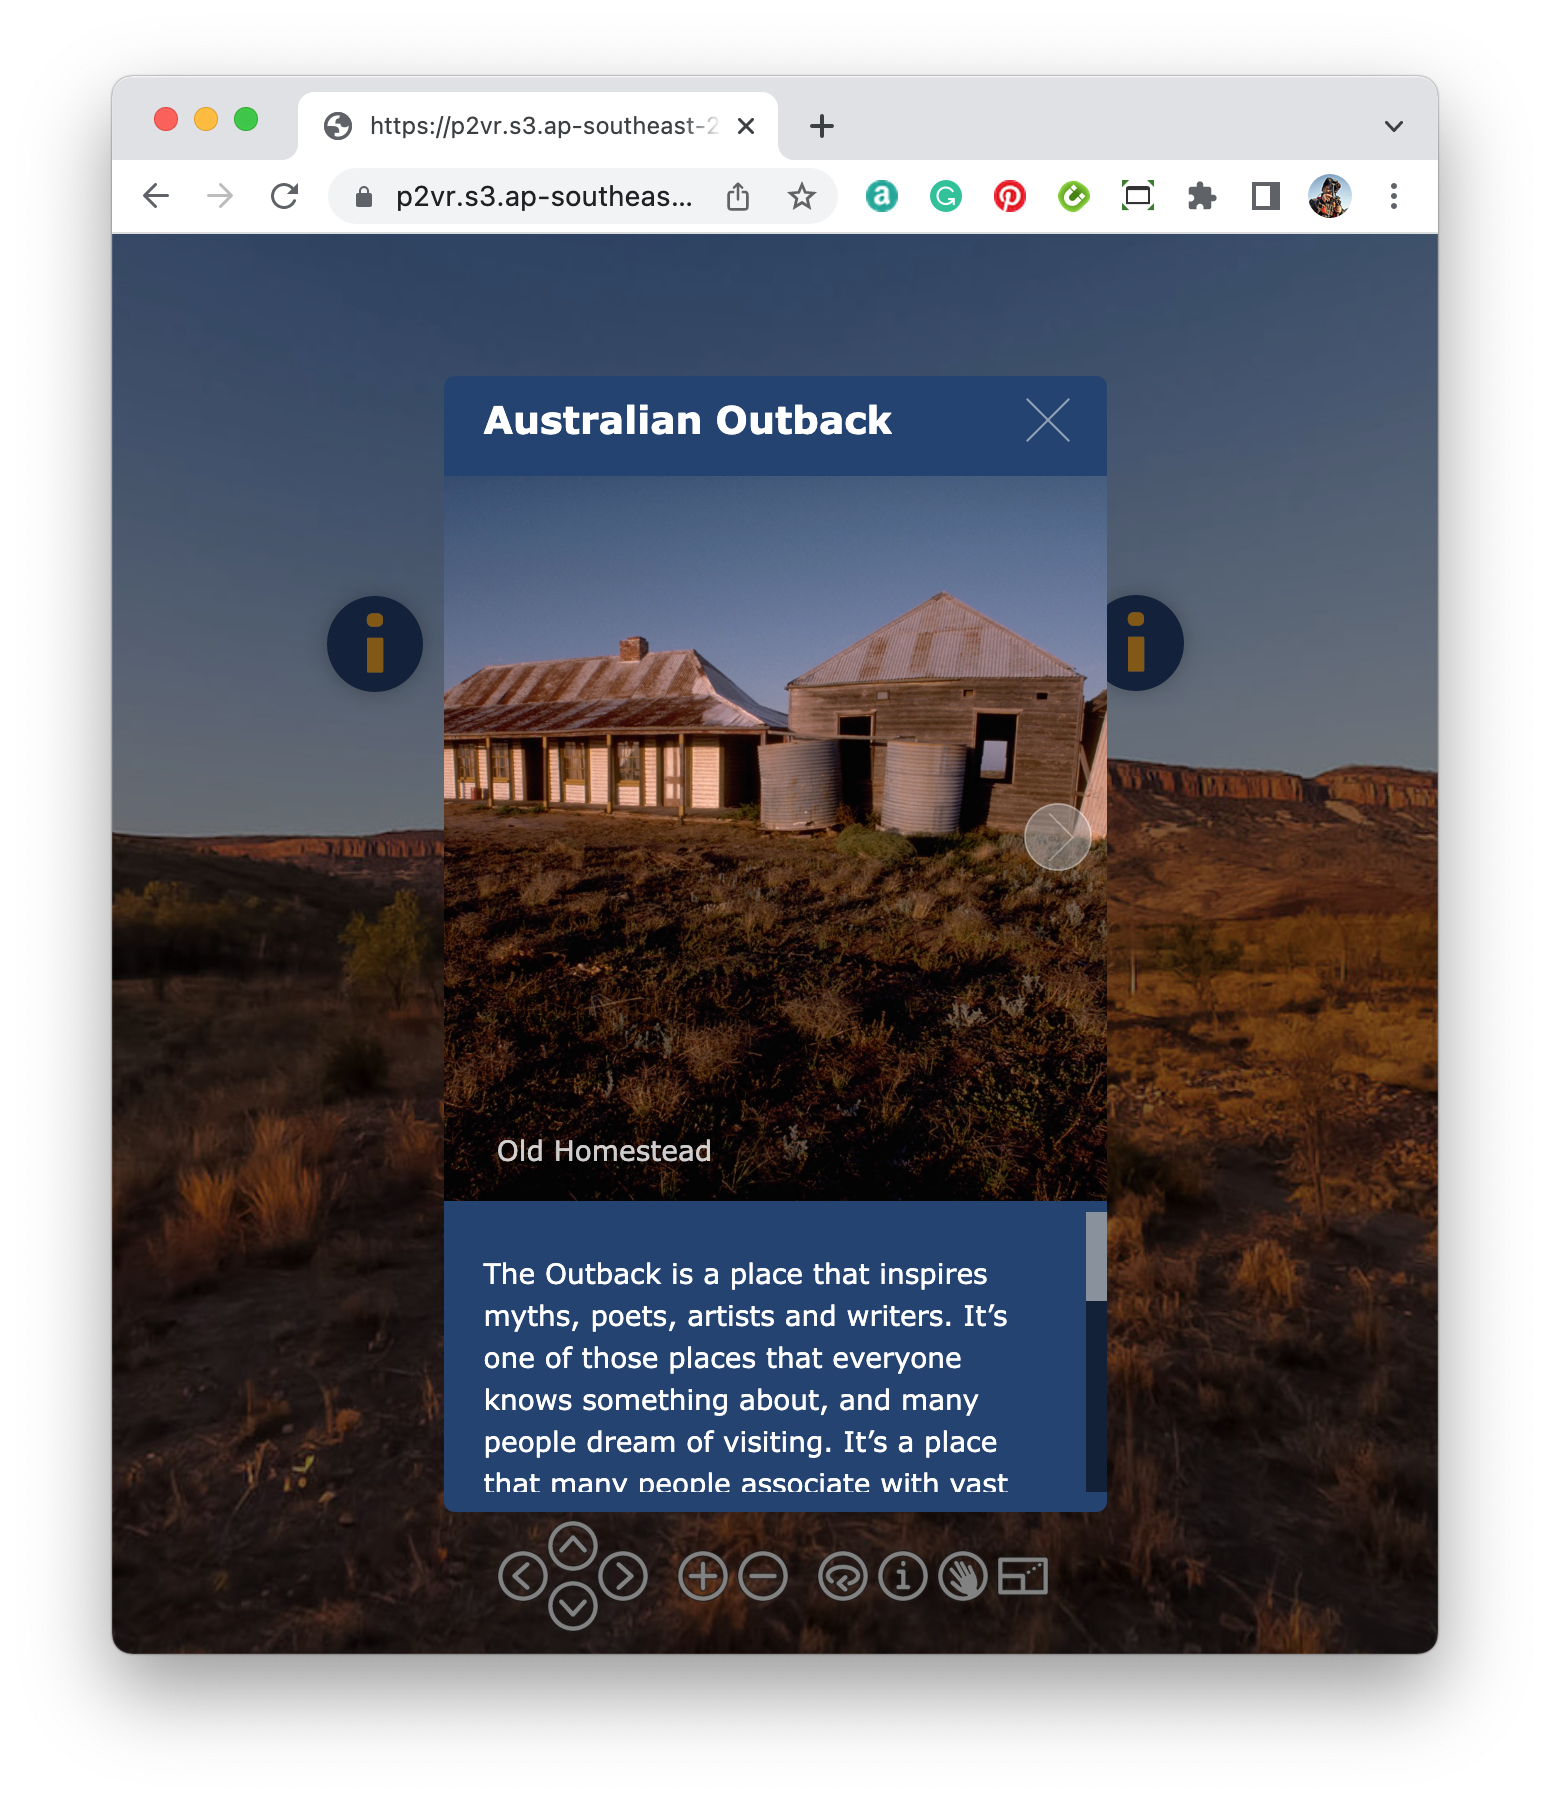
Figure #9: Old Homestead
Figure #10: Drover at the Gate
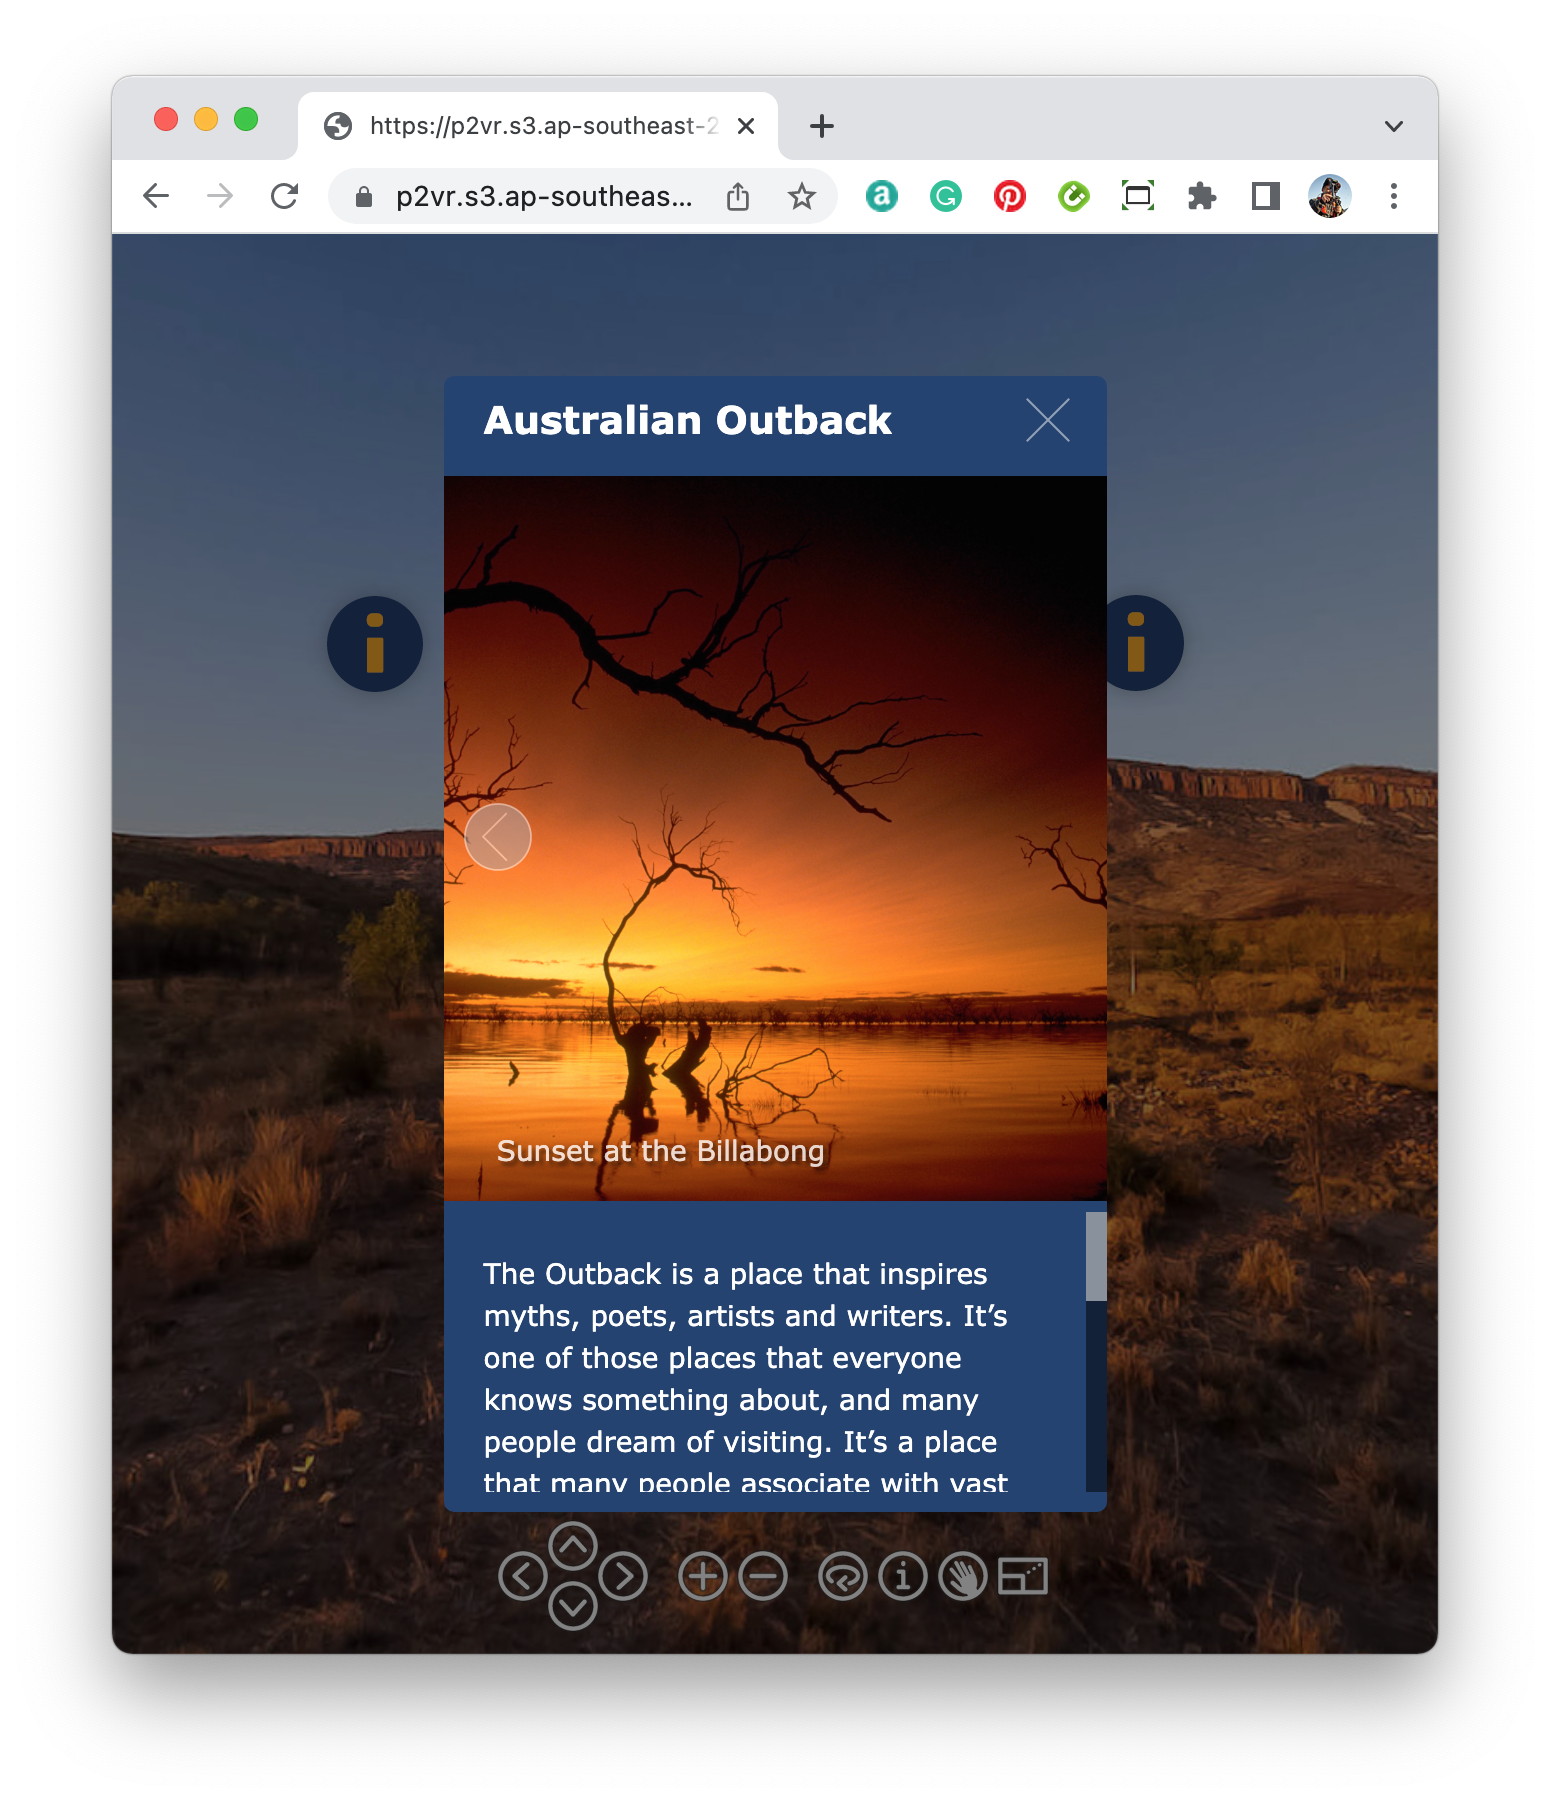
Figure #11: Sunset at the Billabong
Note: This is the end of Part 6 move onto Part 7: Adding Individual Descriptions
