Update 13/6/2017: There have been numerous changes in the way Google Photospheres are published and viewed in the past 12 months. For a long time the embed option wasn't available but Google have reinstated it and provided tools for setting the iFrame size and previewing the result. I've updated the post to highlight the changes but I've retained the old, now redundant method, just in case Google take away the embed option again.
If you want to embed one of your own Photospheres the best place to start is your Contribution panel. In this example I'm using my panel that's located at http://expedition.photography/contributionpanel

My Contributions Panel
1. Click on the Photosphere you want to embed. In this example I've opened a small tour of an alleyway in Collingwood, Melbourne. Painted with street art by an artist called Twoone.

Photosphere open in a Chrome window
2. Click on the 3 dots next to the Photosphere title, select 'Share or embed image'
3Dots - Share or embed image - Embed image
3. Select 'Embed image' to open the embed window
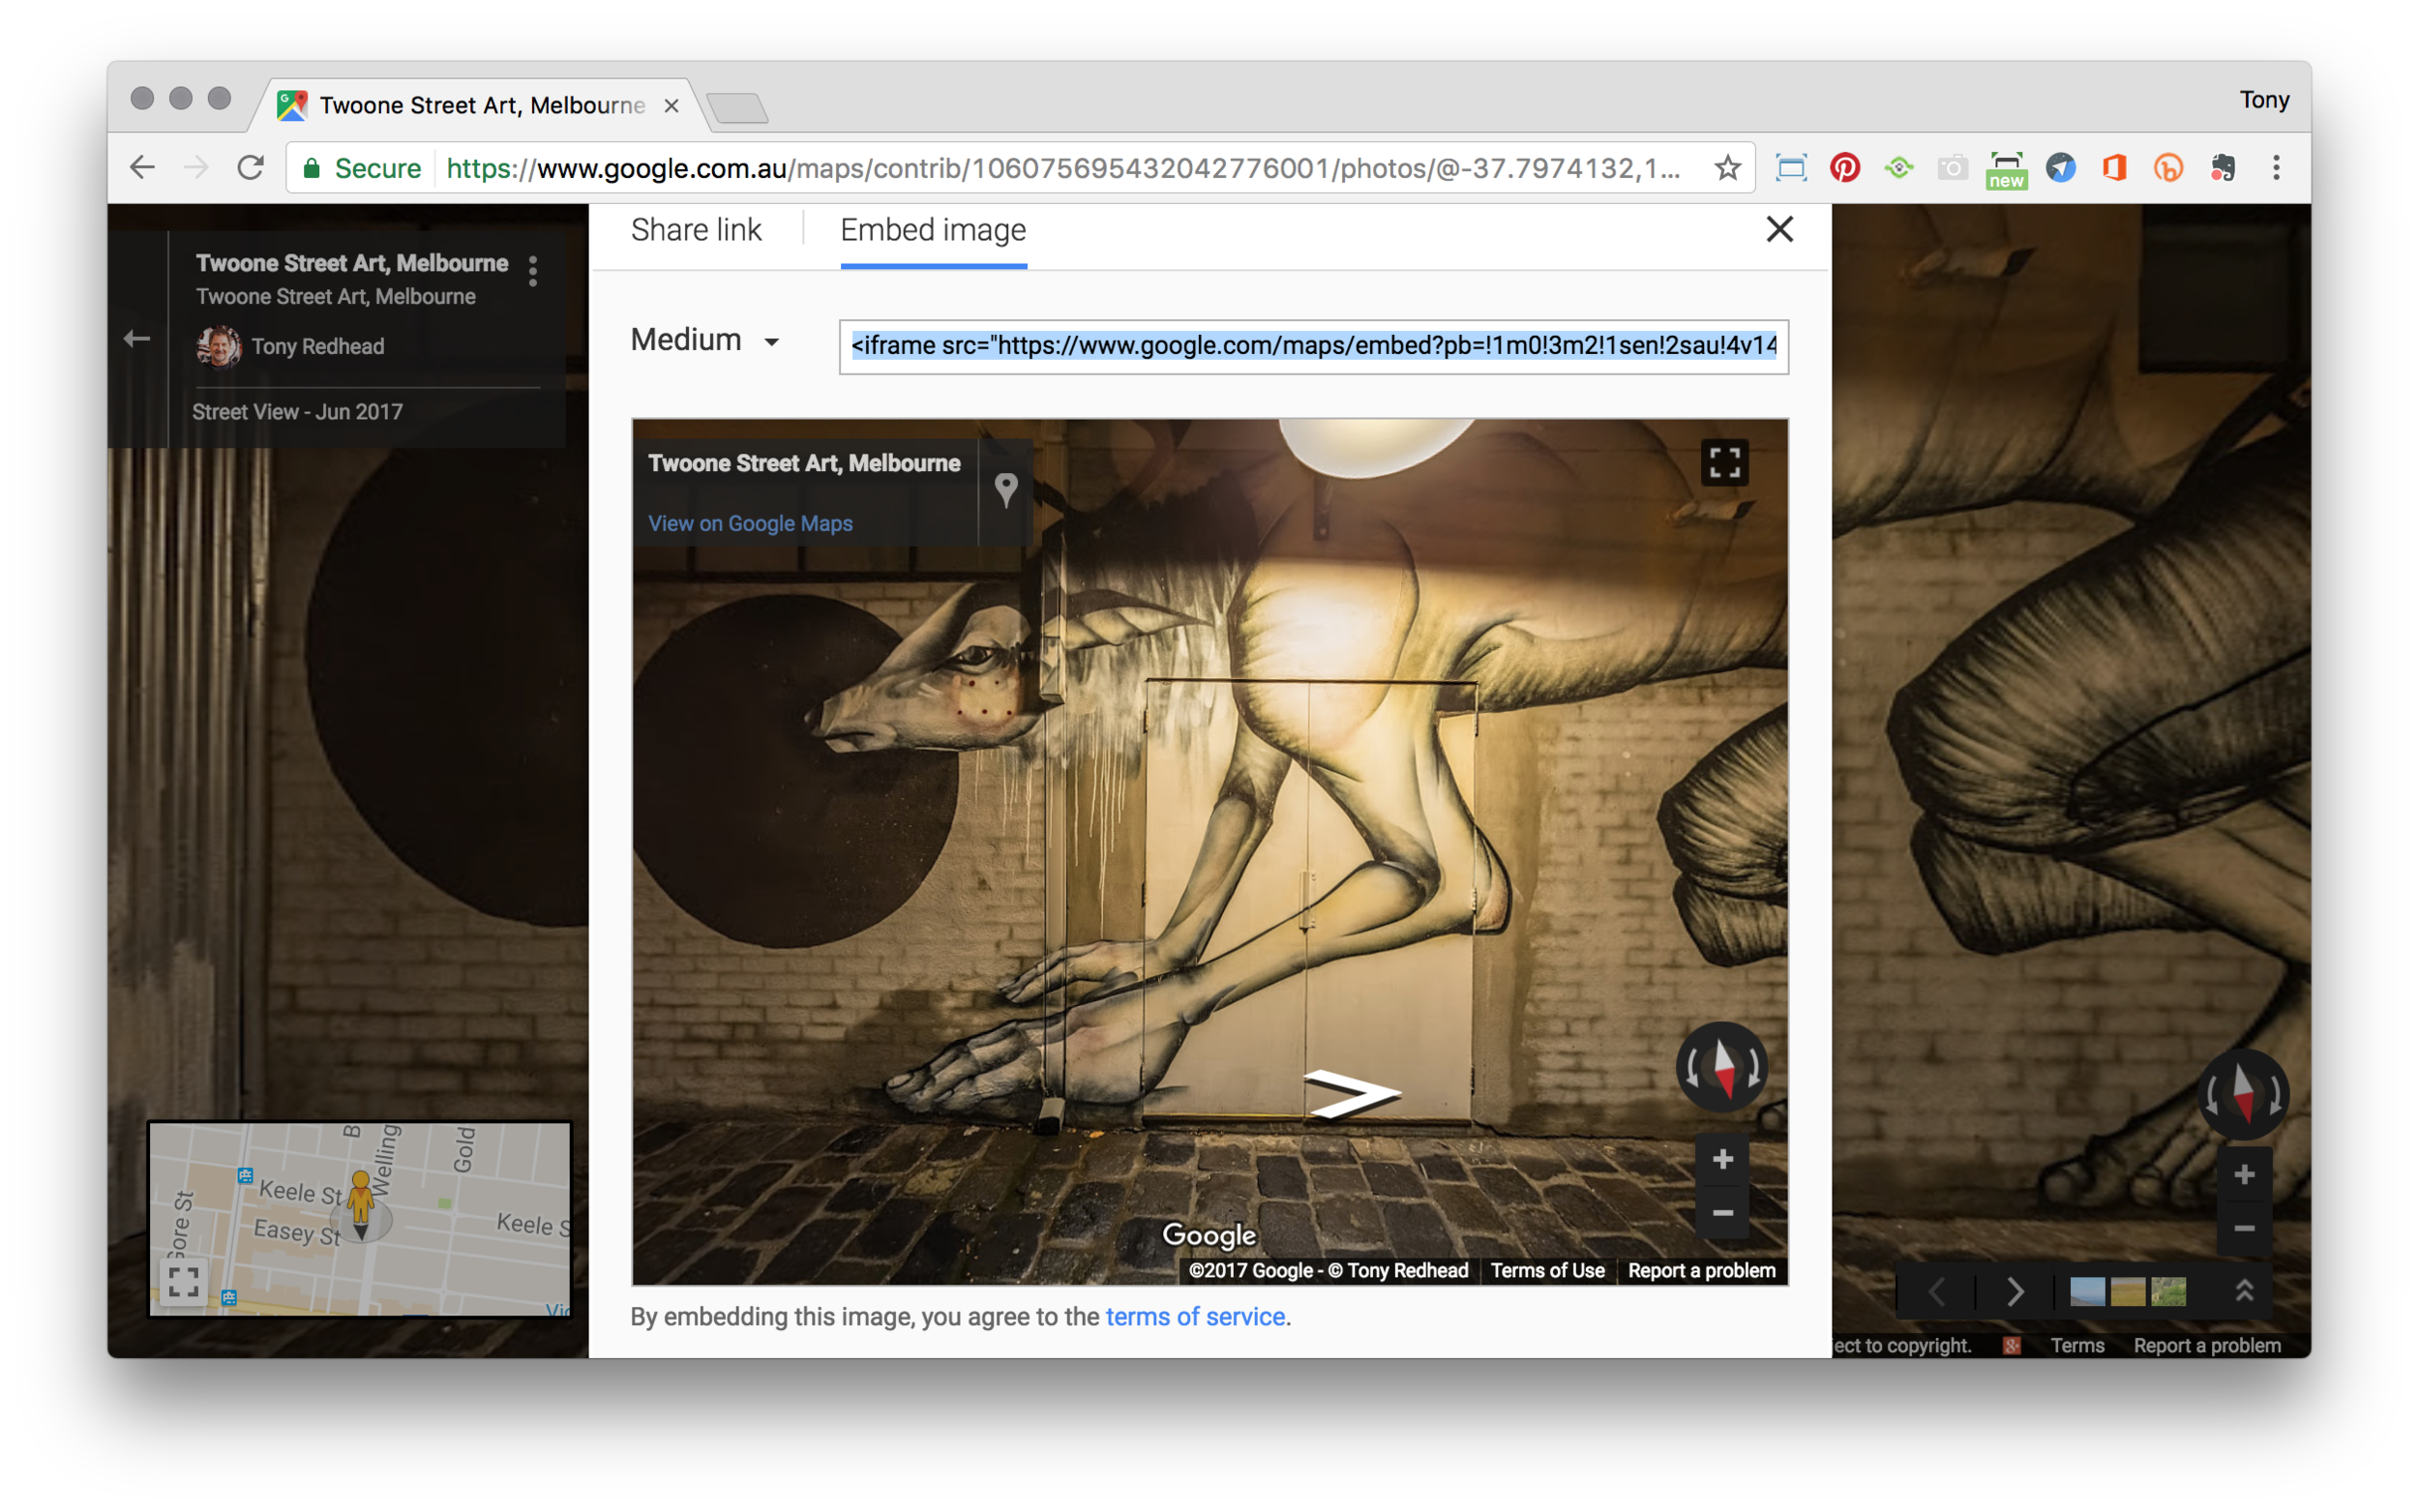
Embed window interface and preview
4. This window allows you to set the initial view and zoom of the image and preview what the final output will look like. Using the size dropdown you can pick from 3 basic sizes small, medium, large or use the custom option to set your own size.

Custom size window
5. If you set a custom size there is a preview at actual size option. Note: the embed option comes with a 'Fullscreen' preview button in the top right corner
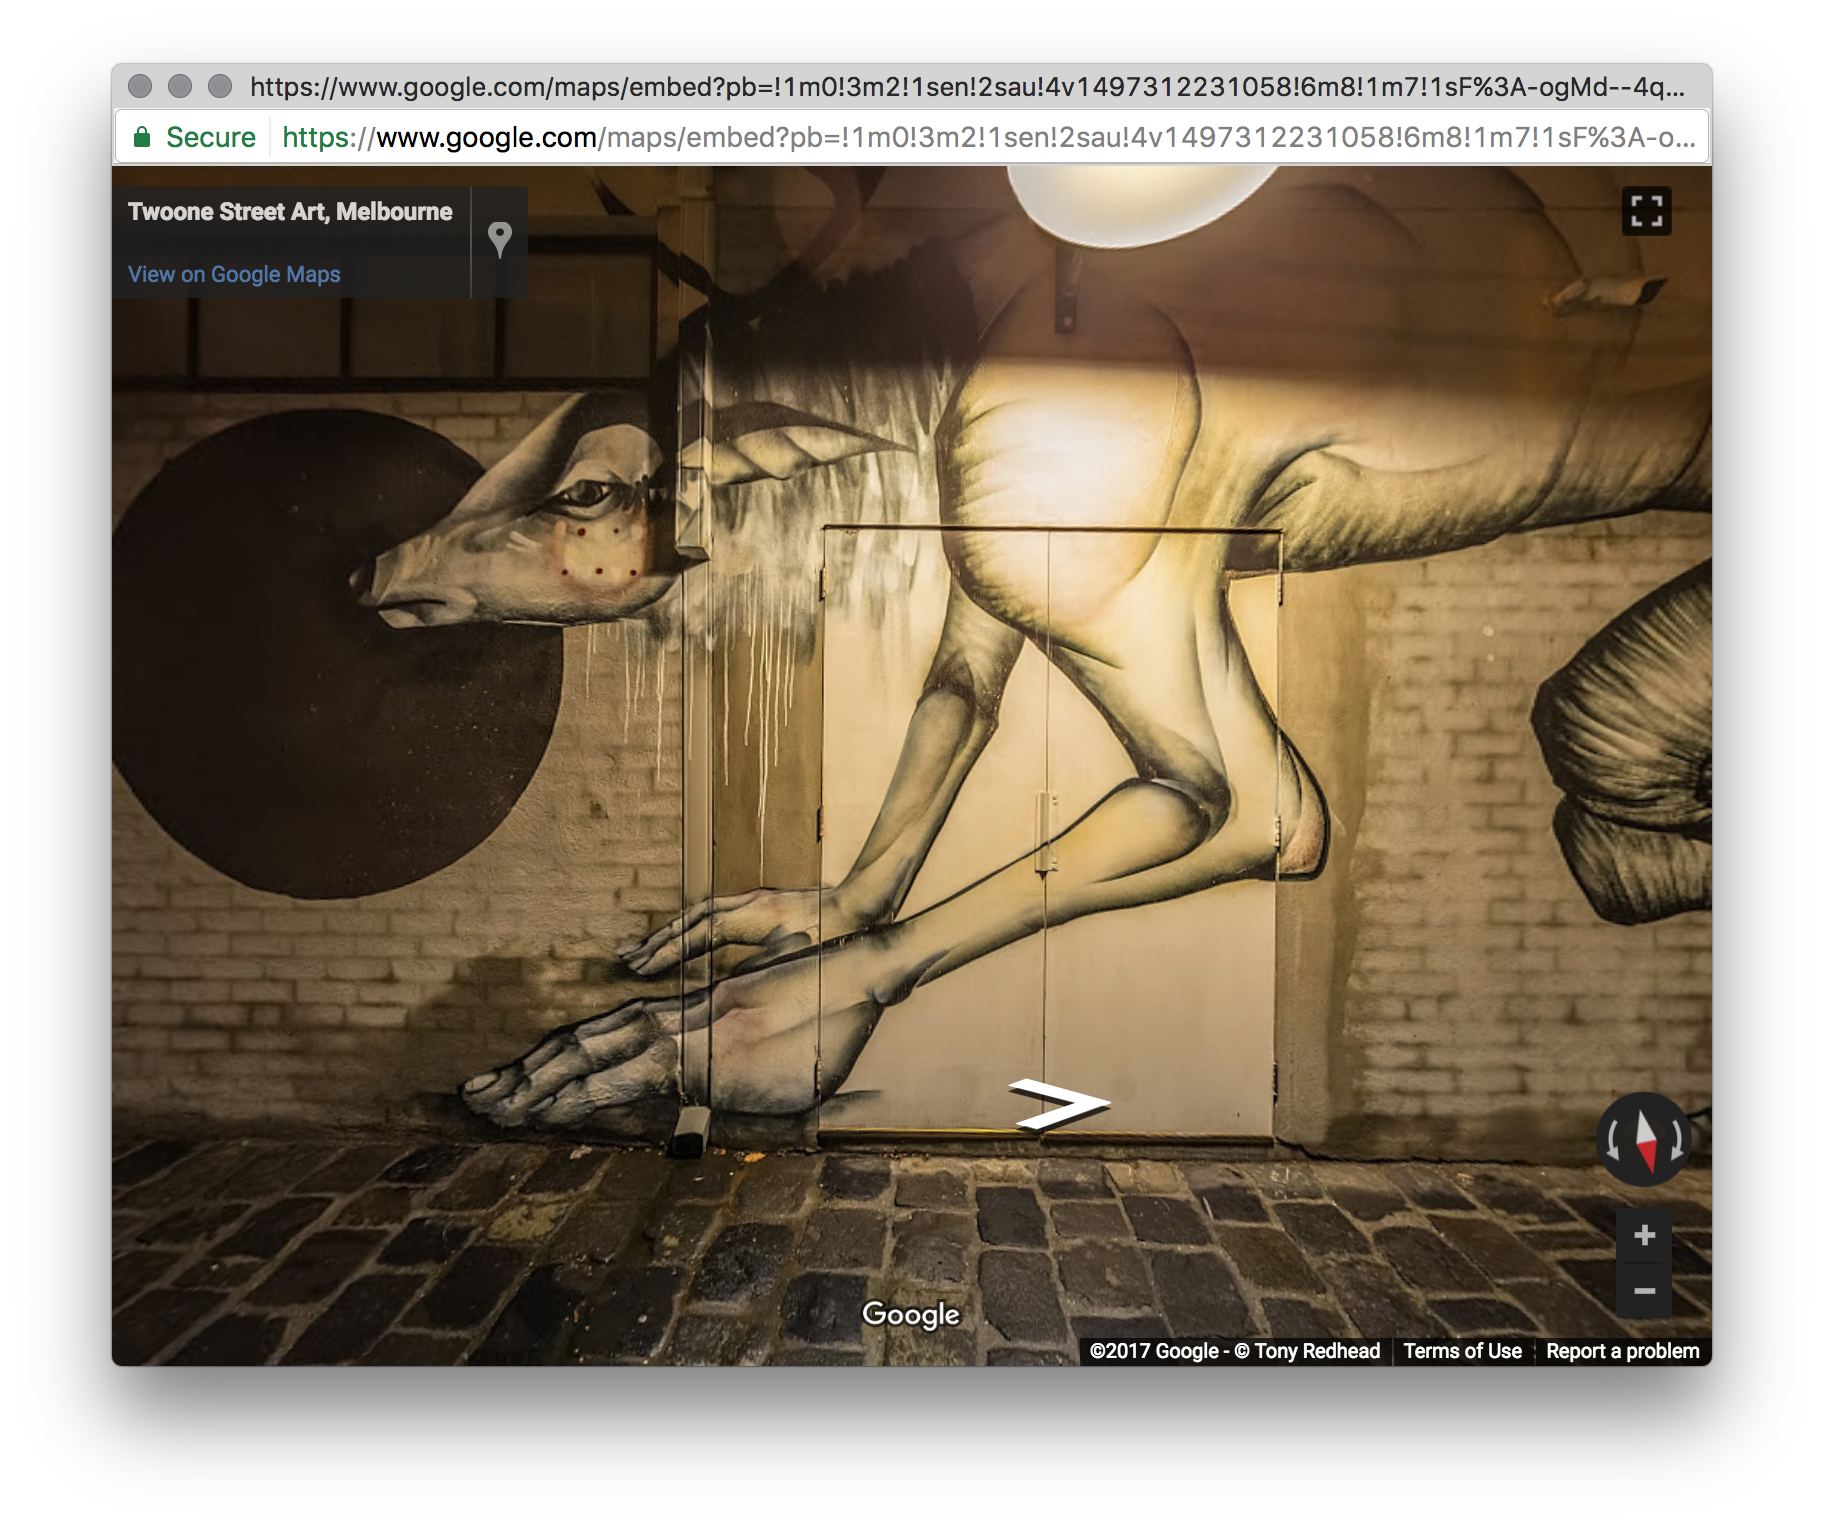
Custom size preview window
6. Cut the supplied code and add it to your website page. In the iFrame below I've modified the code to scale to 100% horizontally in the page and to have a vertical size of 450px to fit mobile devices.
<iframe src="https://www.google.com/maps/embed?pb=!1m0!3m2!1sen!2sau!4v1497313923804!6m8!1m7!1sF%3A-ogMd--4qBWA%2FWTiF5zqNfpI%2FAAAAAAAAG6k%2FyCdsgCVPJtcvCvMLbiC4HSPkqwhxK4OSwCLIB!2m2!1d-37.79741324647064!2d144.987294781003!3f191.4!4f0!5f0.7820865974627469" width="600" height="450" frameborder="0" style="border:0" allowfullscreen></iframe>
The method described below was used when Google removed the embed option while changing from the old Google Map View to the current configuration.
Update 21/1/2016: Jim Popenoe just posted that Google have made some progress updating Google Maps and it's now possible to embed Photospheres without requiring Javascript or an API key. Below is an example of a Photosphere I posted late last year and embedded using Jim's embed tool for Photospheres.
The embed tool is very easy to use and the code can be generated in five simple steps.
- Open the embed tool by browsing to the URL http://suddenlink.net/popenoe/tools/embedding-tool.htm
- Move and zoom the map to the location where your photosphere has been placed
- Drag the "Pegman" onto the blue dot to generate the code
- Move your photosphere to the view you want as the initial view
- Copy the code
Step 1 & 2: Open the URL and move the map to the location of your photosphere
Step 3: Drag Pegman onto your photosphere
Step 4: Set your initial view
The following is the code from the example above.
<iframe frameborder="0" width="640" height="360" style="border: 0" src="https://maps.google.com/maps?layer=c&panoid=F:-MAaQvLIigqk/VkasJQCjuVI/AAAAAAAAEbc/JR1fXHGIYek&ie=UTF8&source=embed
&output=svembed&cbp=13%2C189%2C%2C0.020000000000000018%2C11.9" allowfullscreen=true></iframe>
In my case as I'm embedding the code into a responsive page I want the embedded image to fill the page so I'll change the width to "100%" and the height to "480" to fit smartphones.
