What is Live Projection
The Live Projection feature in Affinity Photo is a powerful, non-destructive way to edit images with spherical distortion as if they were already corrected. It temporarily flattens the image onto a different surface, allowing you to make accurate edits using standard tools, and then automatically reapplies those edits to the original, distorted layer.
This tutorial will take us step by step through opening the equirectangular and editing out a tripod in the nadir.
In the tutorial we will cover the following:
Pano2VR Use Case ⇑
After shooting and stitching a 360˚ panorama, the nadir, the area directly below the camera, is often obscured by the tripod or missing data, which can look like a black hole or distorted spot in the final panorama. (figure #1)
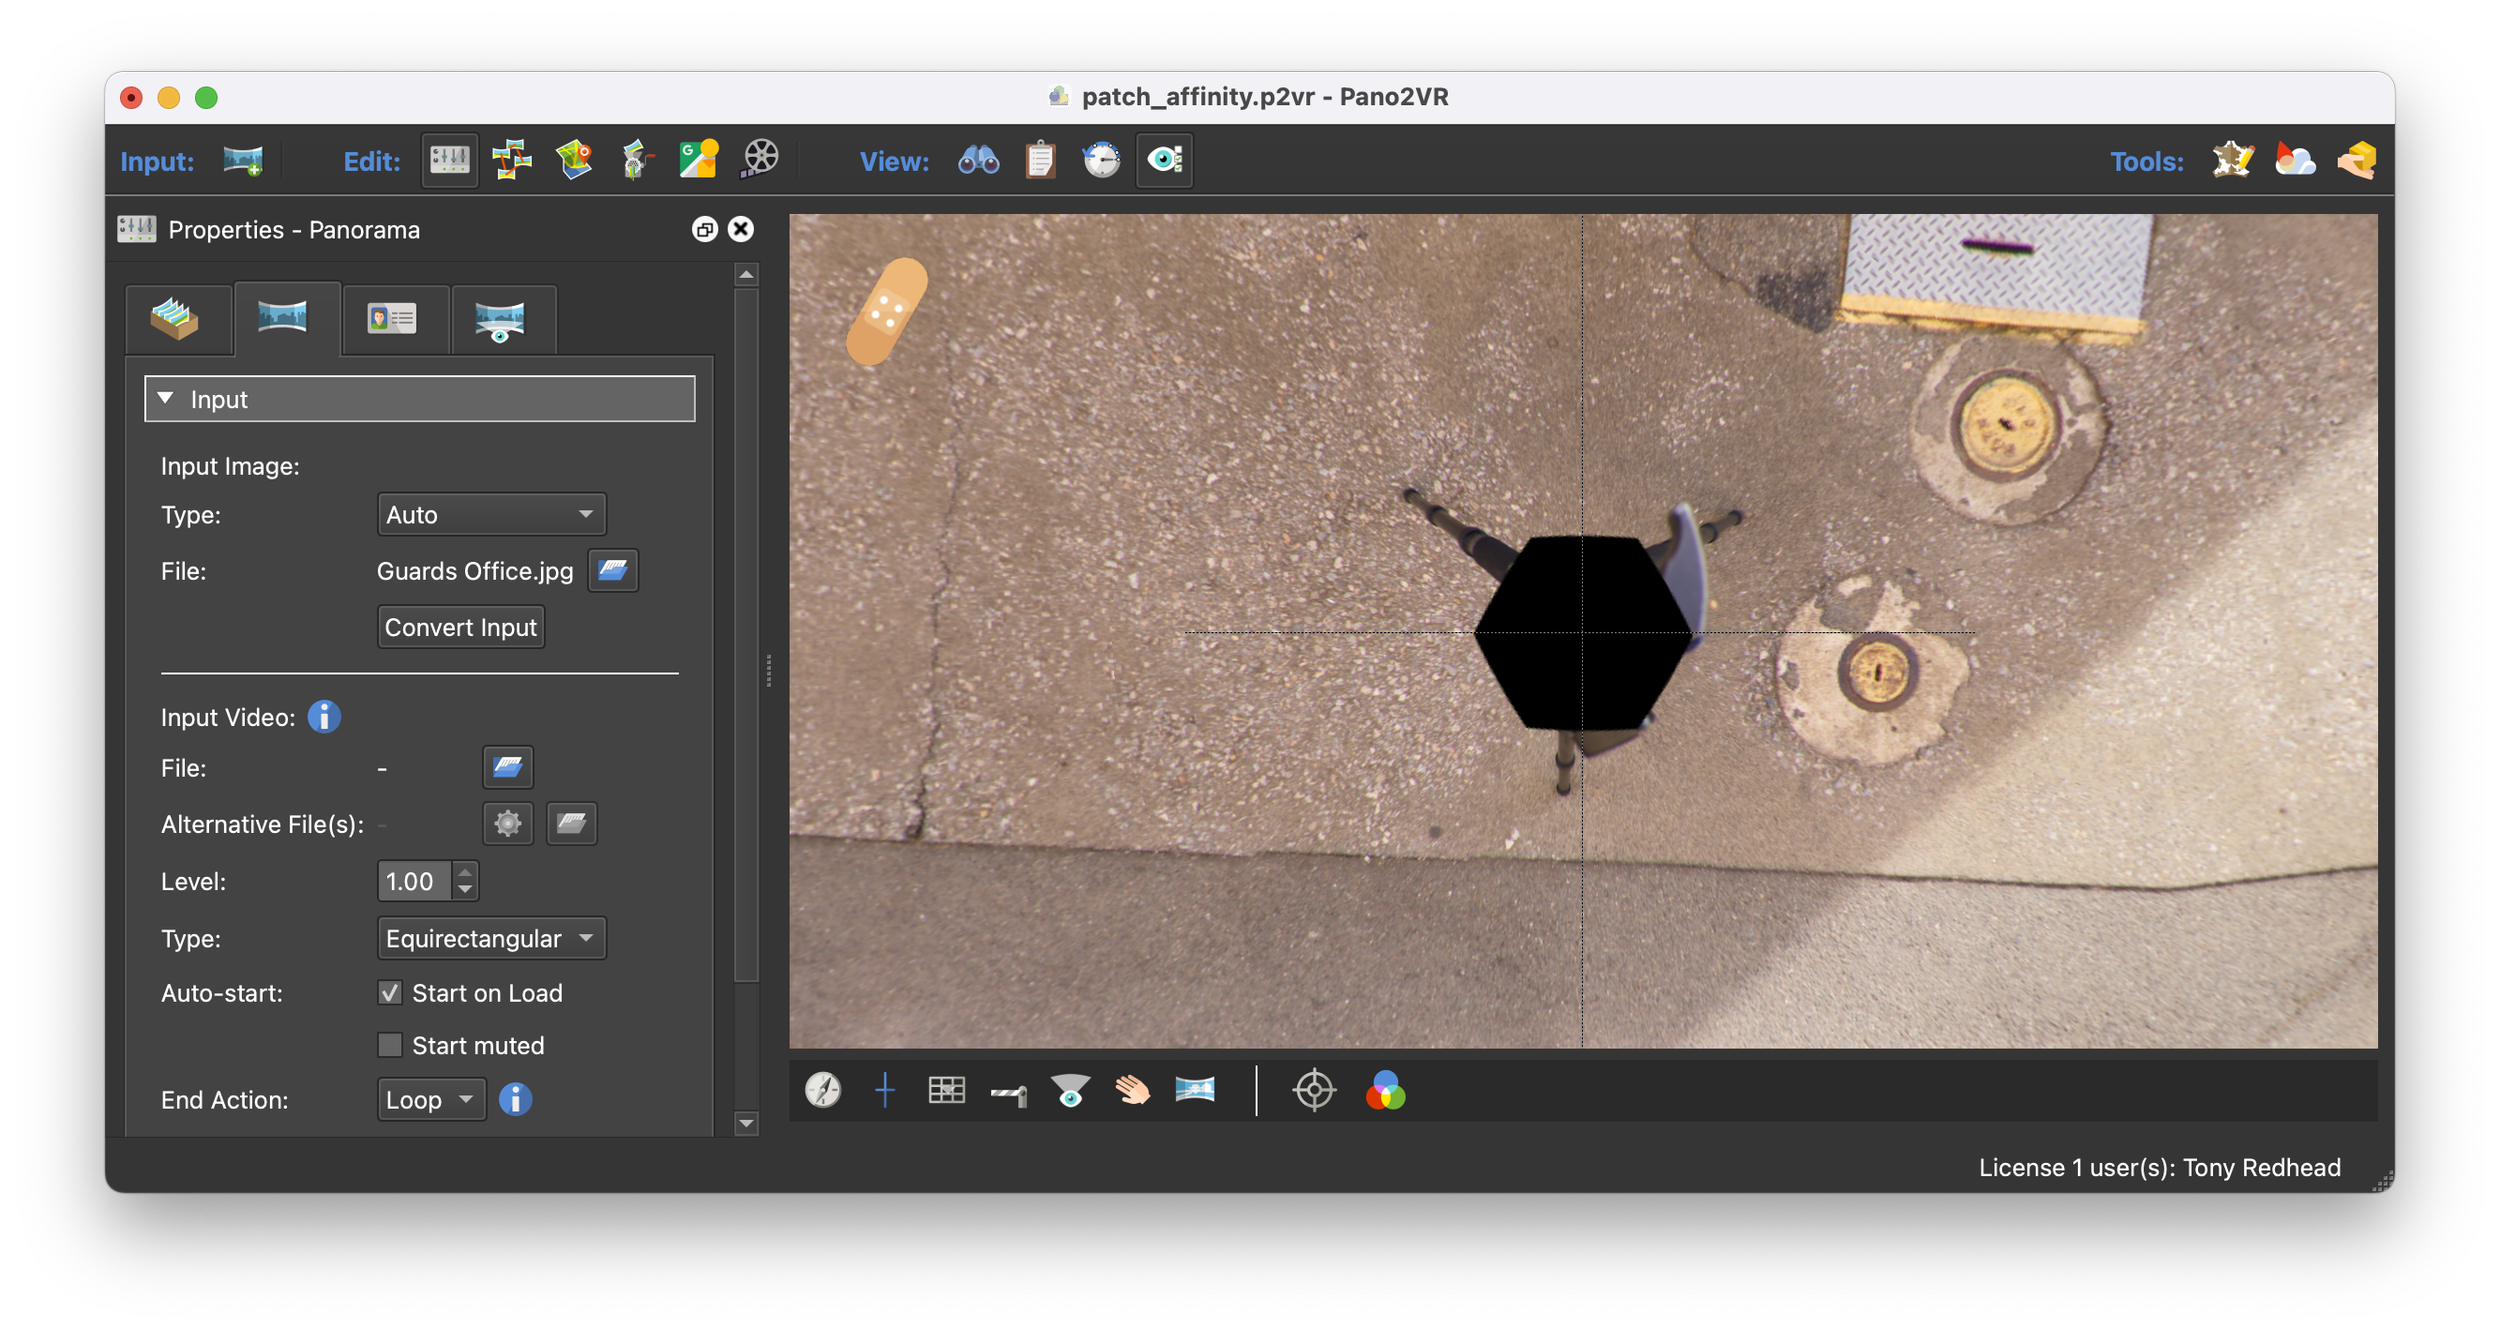
Figure #1: Nadir obscured by tripod and missing data
The most common method to retouch the nadir is to export a patch, open that patch into an editing program like Affinity or Photoshop. Retouch it, save it out and have it automatically placed back into the equirectangular image.
You can follow this method in my tutorial .PSD as default Save
This is quite effective but if you have several areas of the equirectangular image to edit it can be time consuming. This is where Live Projection can really help.
Enable Equirectangular Live Projection ⇑
I’ll be using this equirectangular image as it has a tripod and black hole at the nadir (figure #2 & 3)
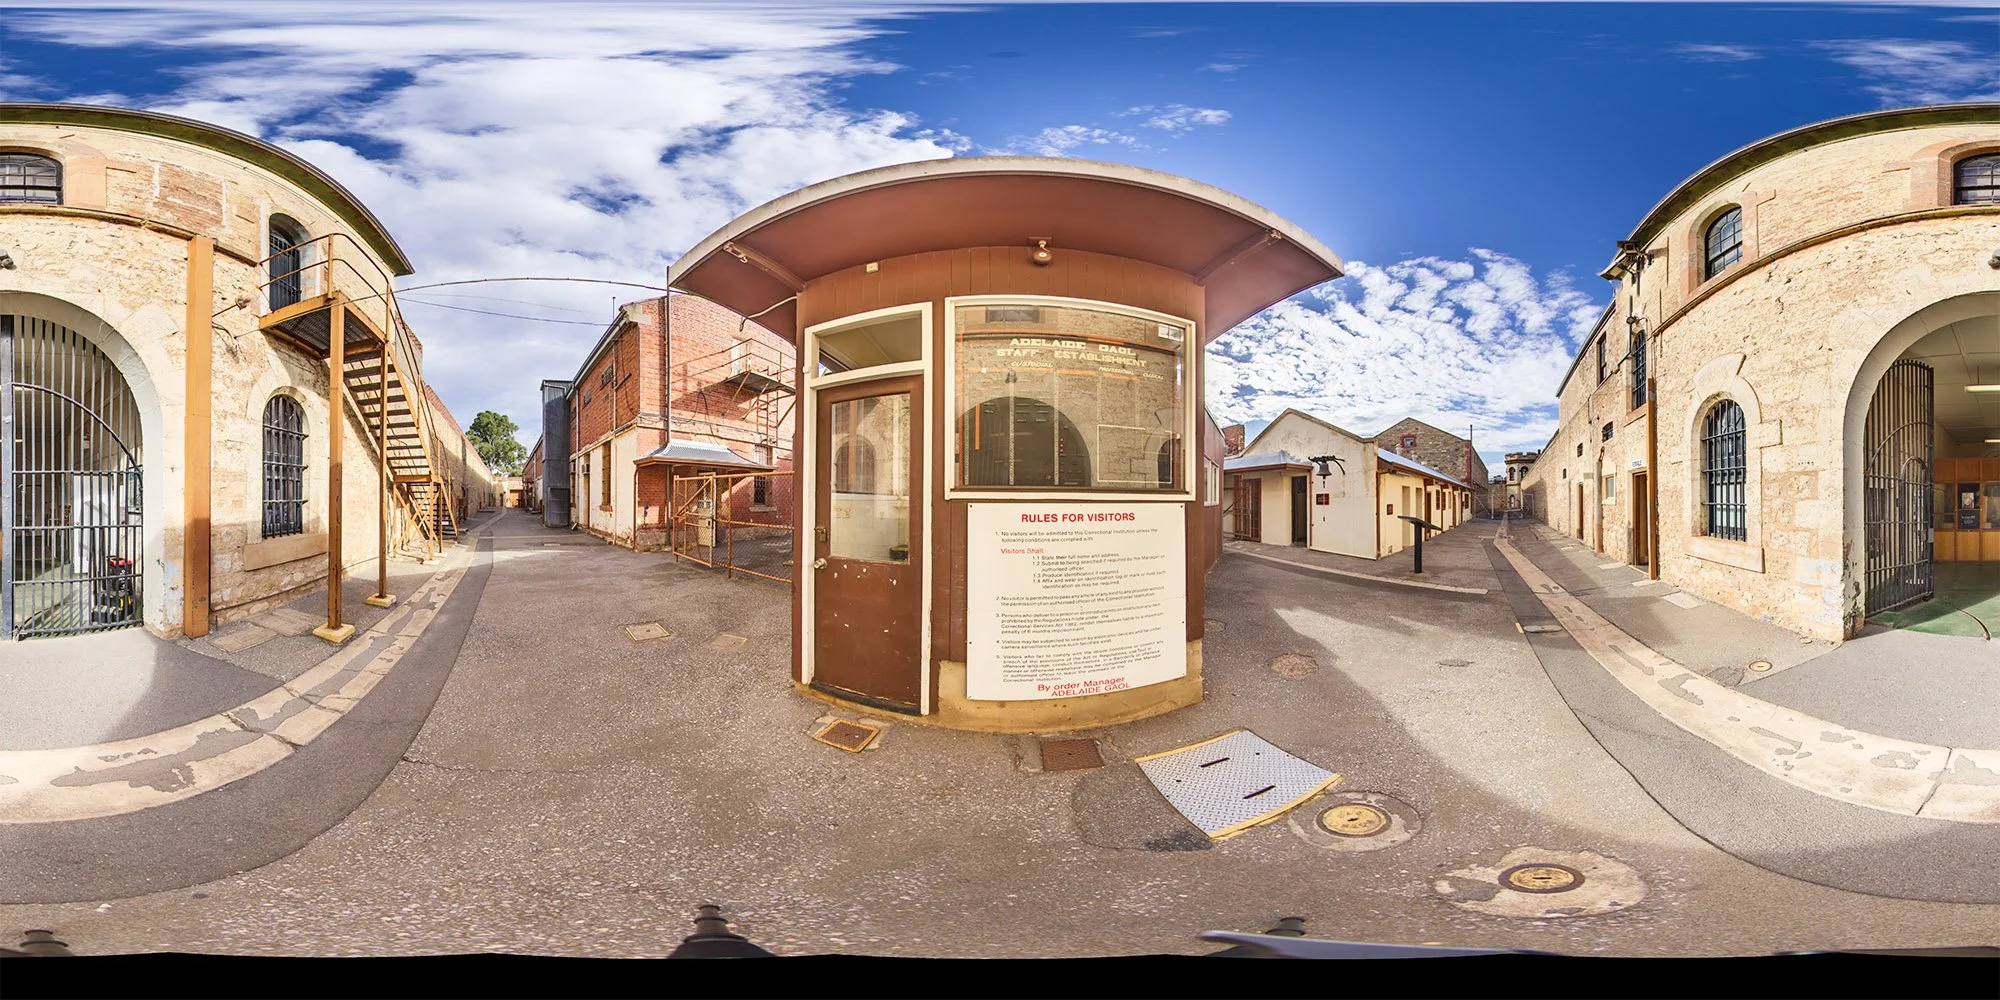
Figure #2: Equirectangular
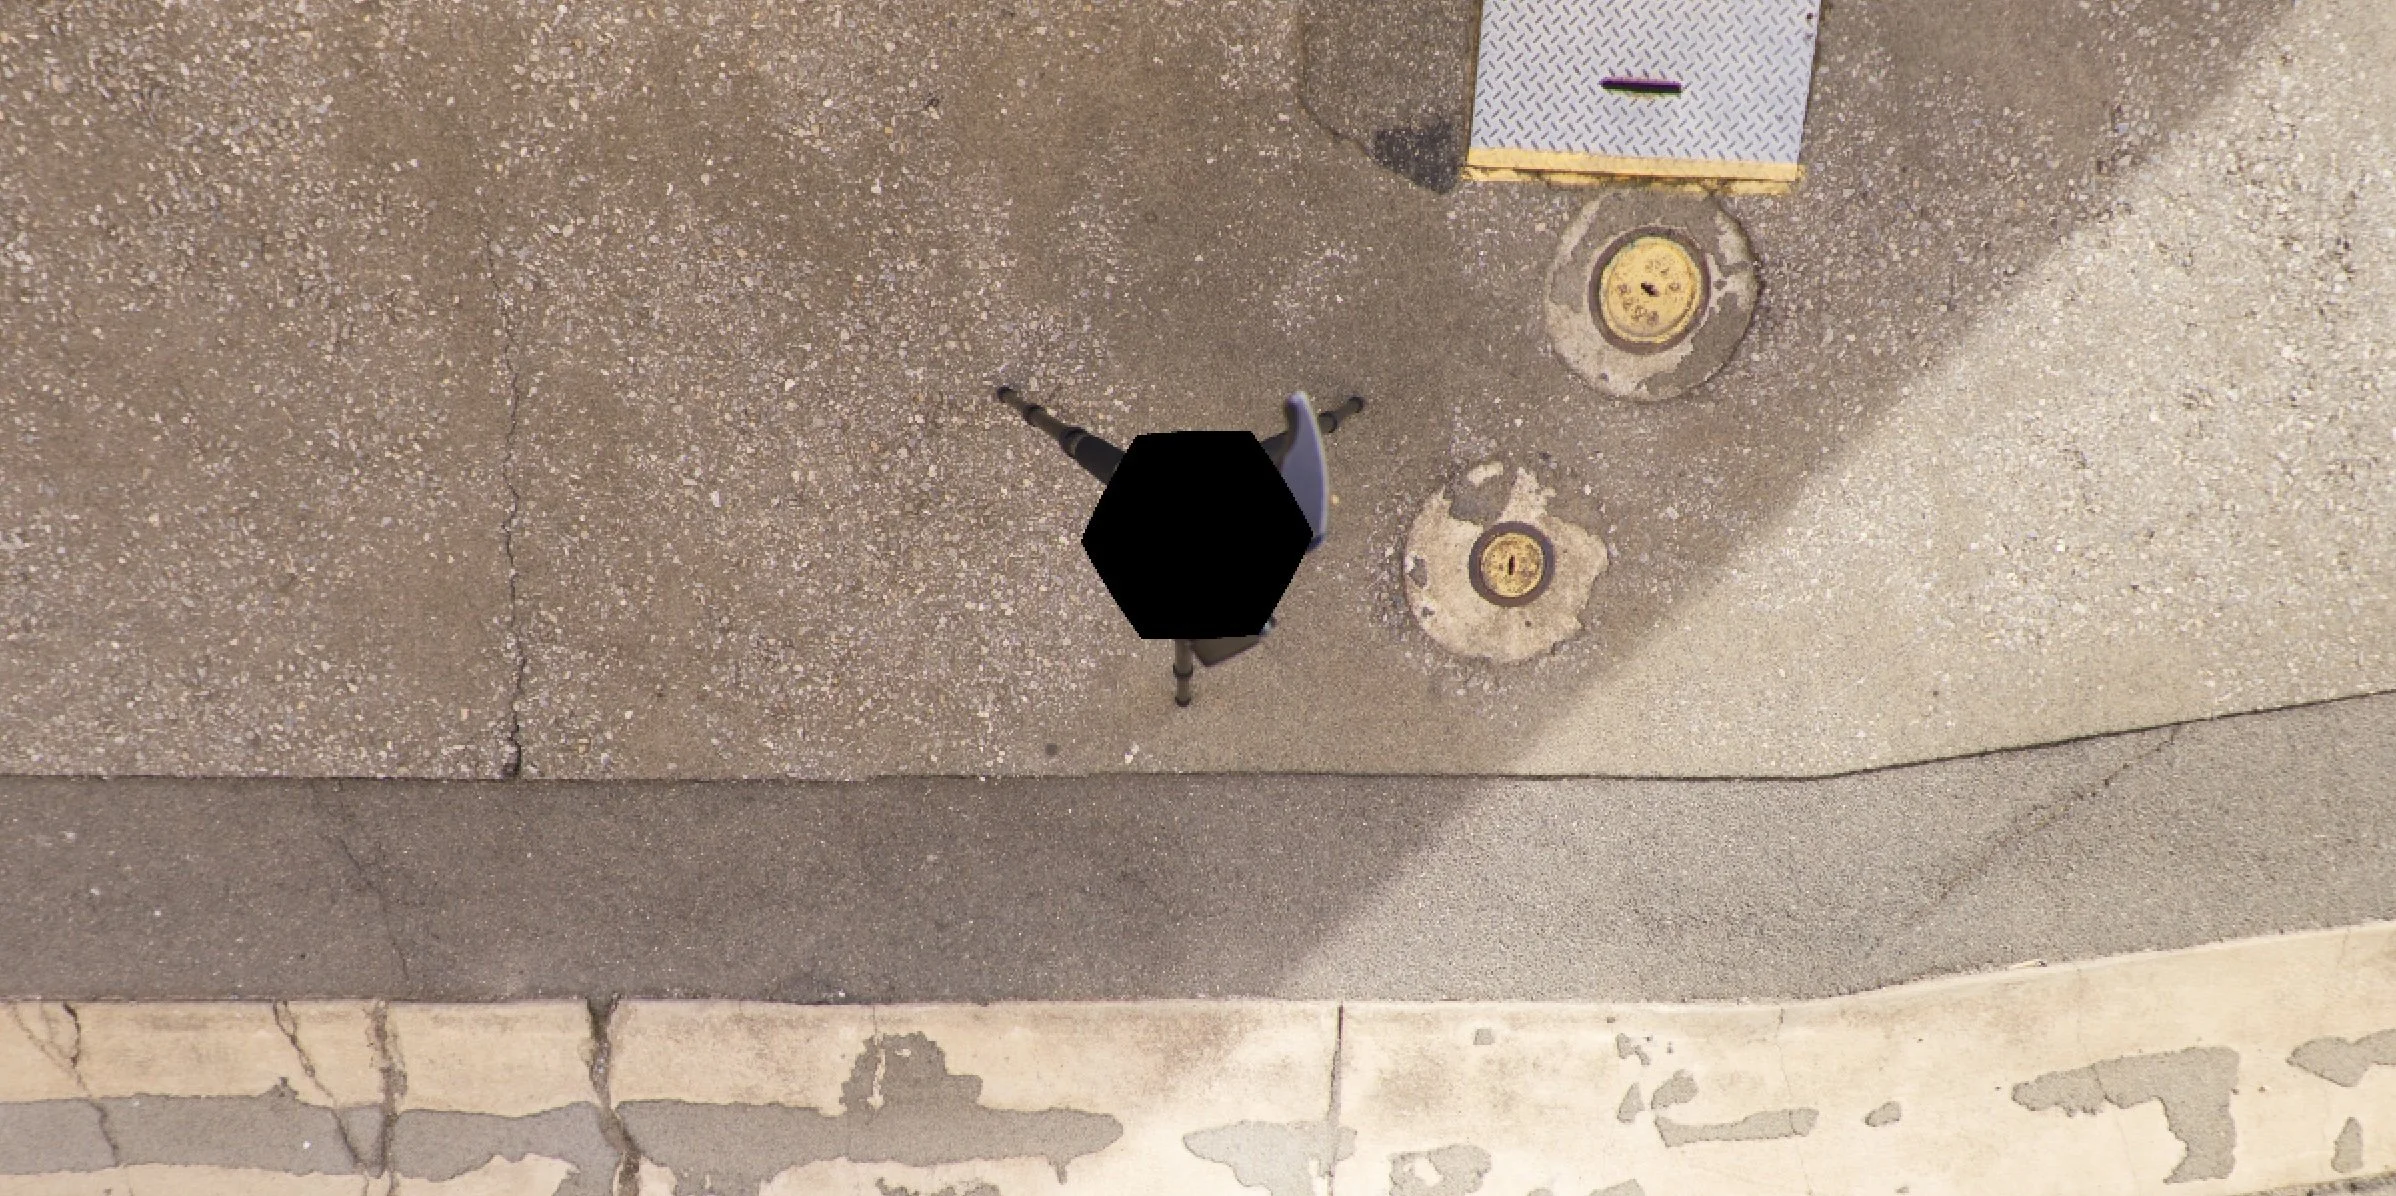
Figure #3: Nadir orientation
1. Open the image into Affinity App (V3)
2. Select the “Background” layer
3. From the main menu select Pixel > Live Projection > Equirectangular (figure #4)
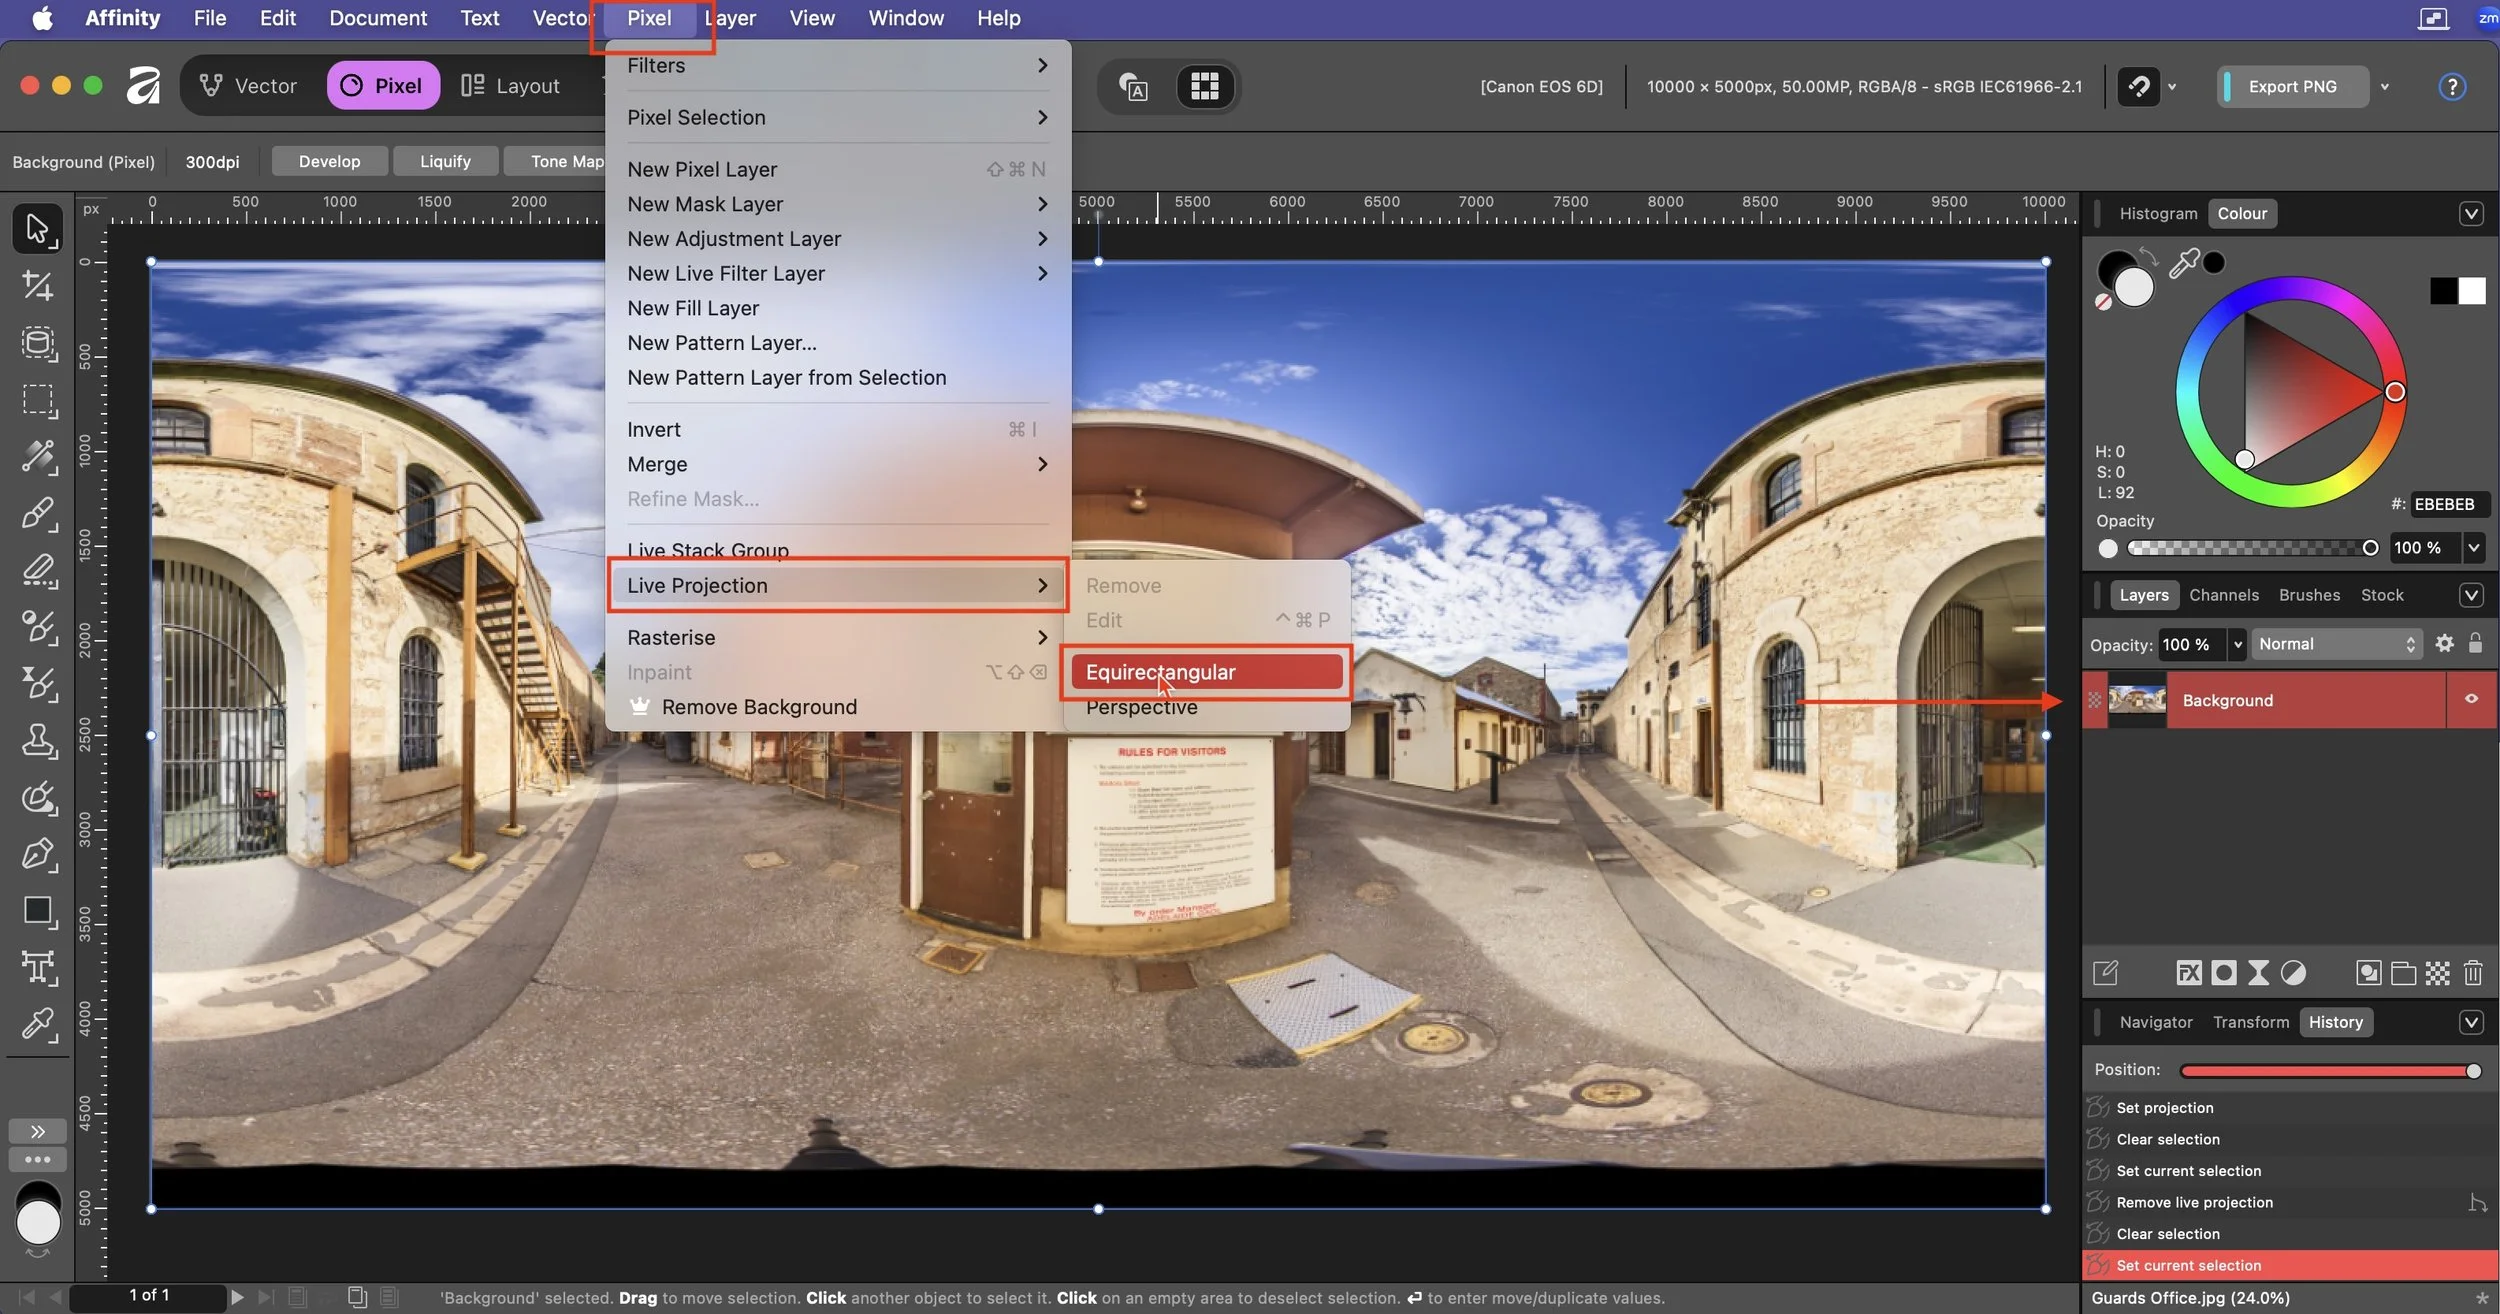
Figure #4:
Note: once we are in Live Projection mode the image behaves like a standard equirectangular image in a 360˚ viewer and there is a small 4-arrow cursors that allows you to drag the image around (figure #4)

Note: at the top right there are Heading (pan), Pitch (tilt) and Field of view (fov) edit fields. You can enter a value or use the slider to change the value. (figure #5)


Figure #5: Heading (pan), Pitch (tilt) and Field of view (fov) edit fields
4. Pan to the Nadir, use the Field of view slider to zoom into the image (figure #6)
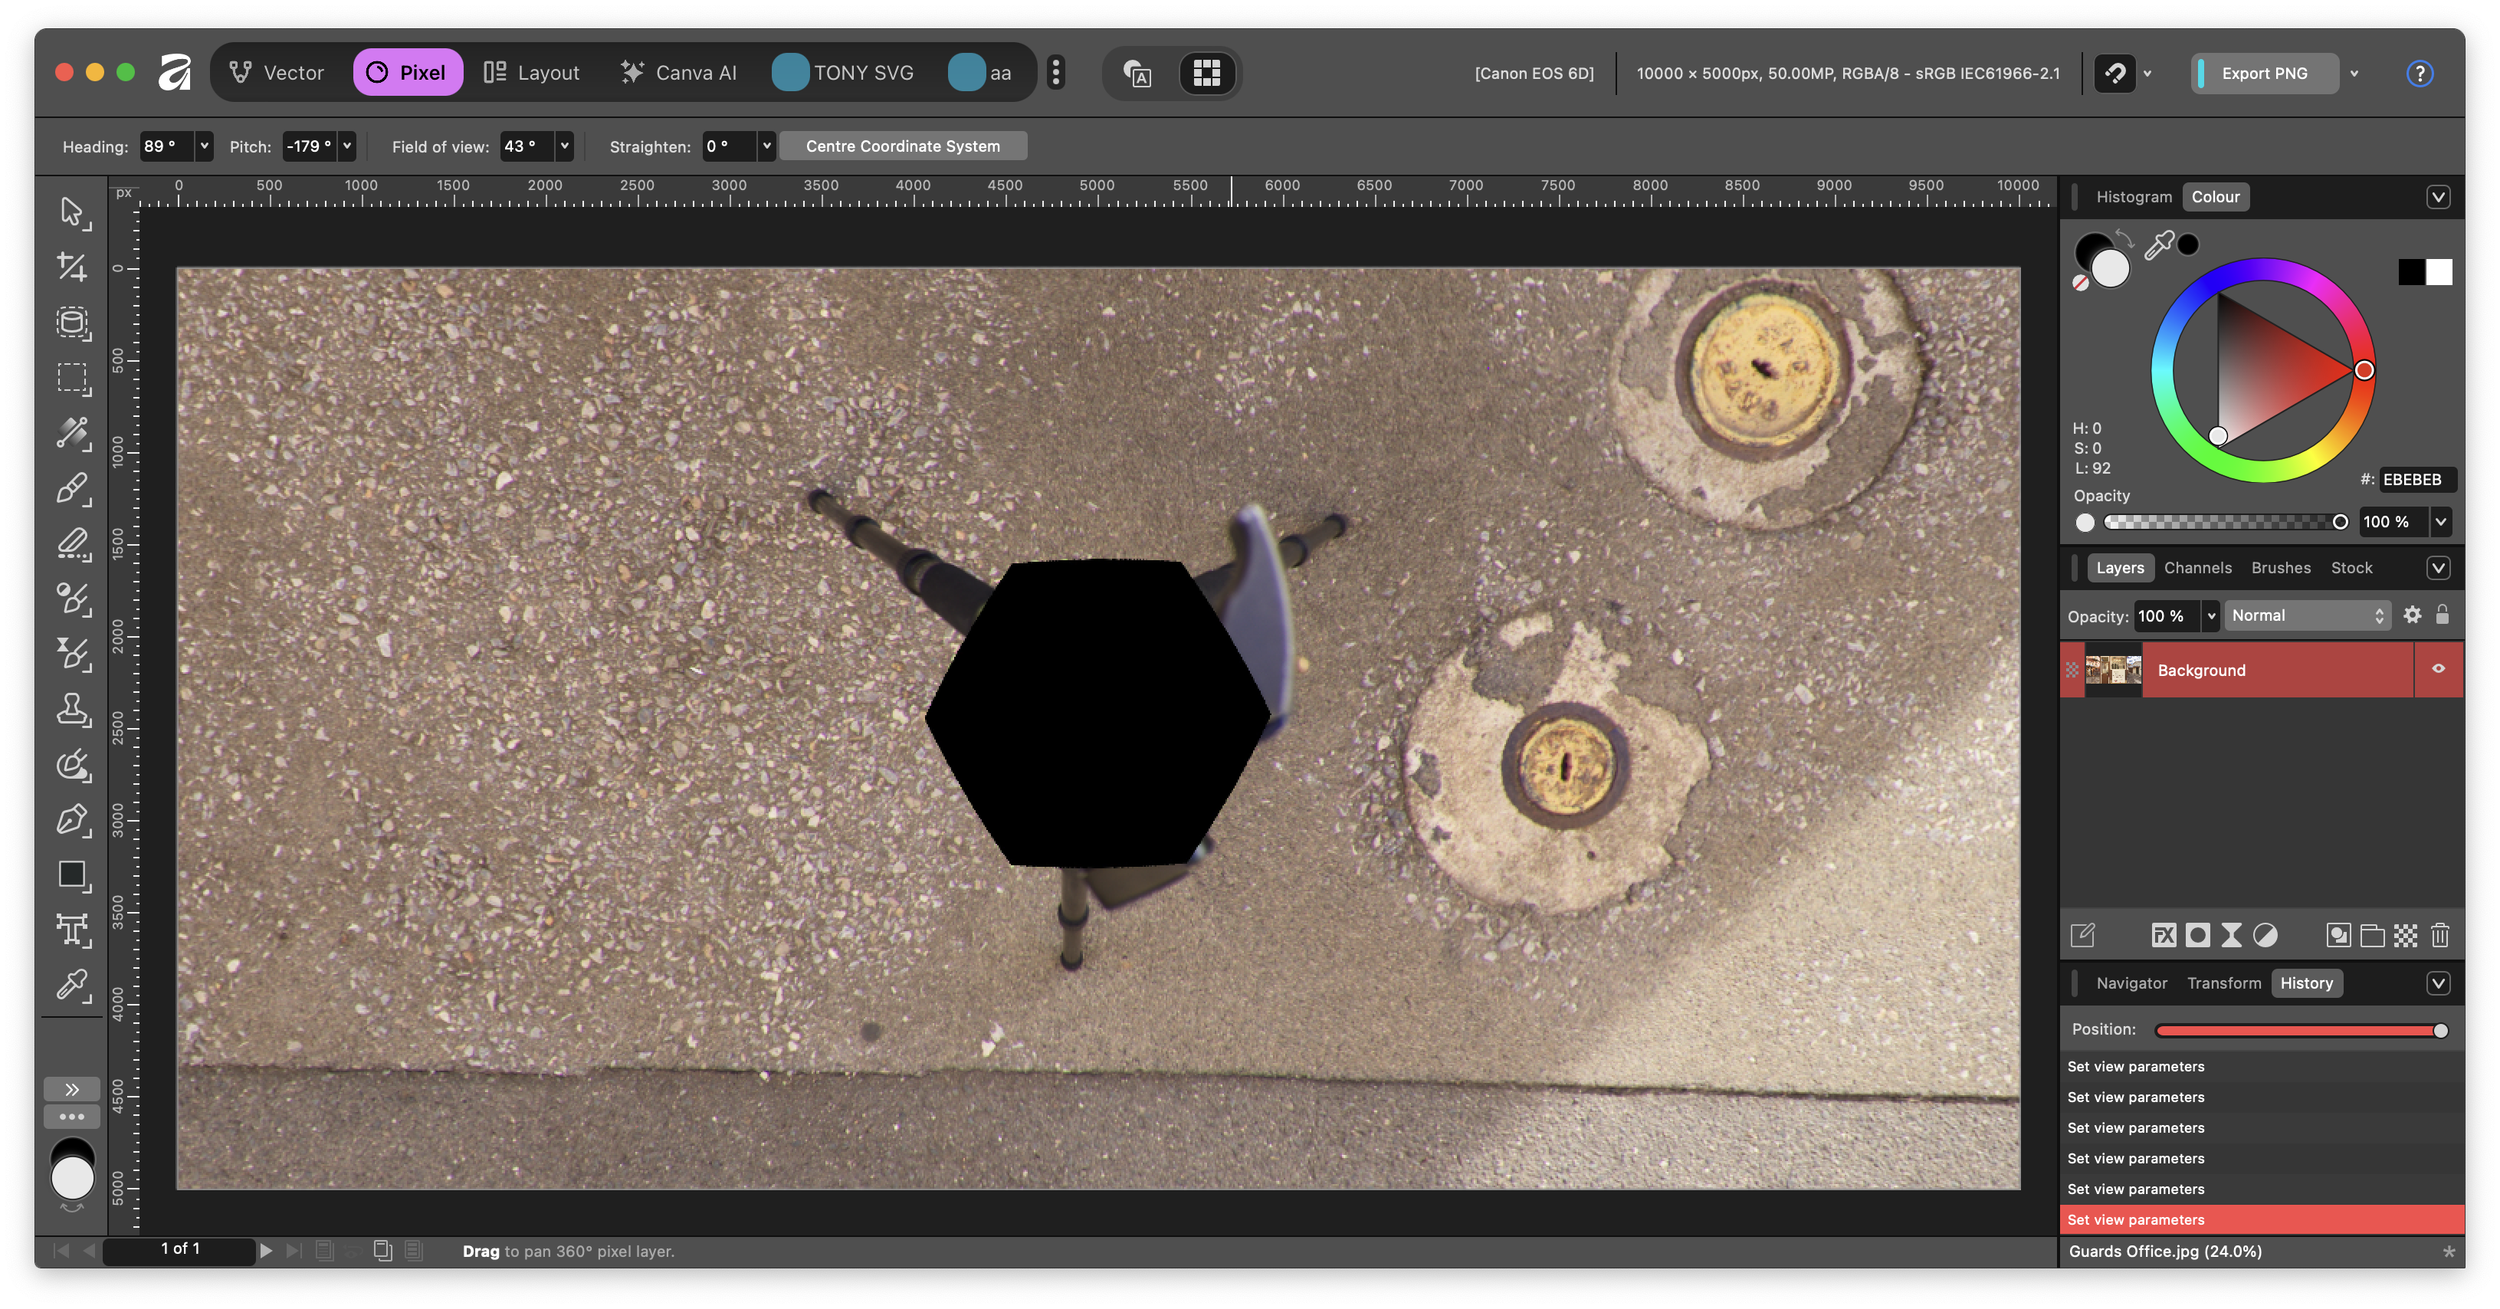
Figure #6: Nadir and zoomed in view
Remove the Tripod ⇑
Note: to remove the tripod we will be using the Inpainting Brush Tool. (figure #7)
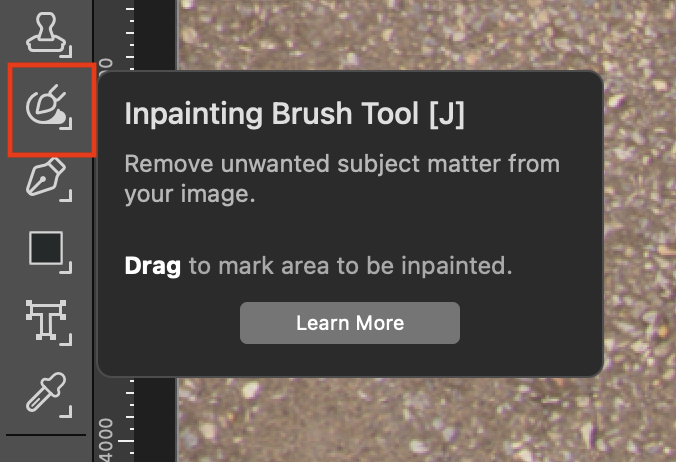
Figure #7: Inpainting Brush Tool
This retouching tool will remove unwanted objects, blemishes, or damaged areas from an image.
It works by analyzing the surrounding content and automatically generating new pixels that seamlessly blend with the background, effectively filling the painted-over area. It is Affinity's primary equivalent to features like Photoshop's Content-Aware Fill or Spot Healing Brush.
1. Use the brush to paint over the area you want to remove (figure #8)
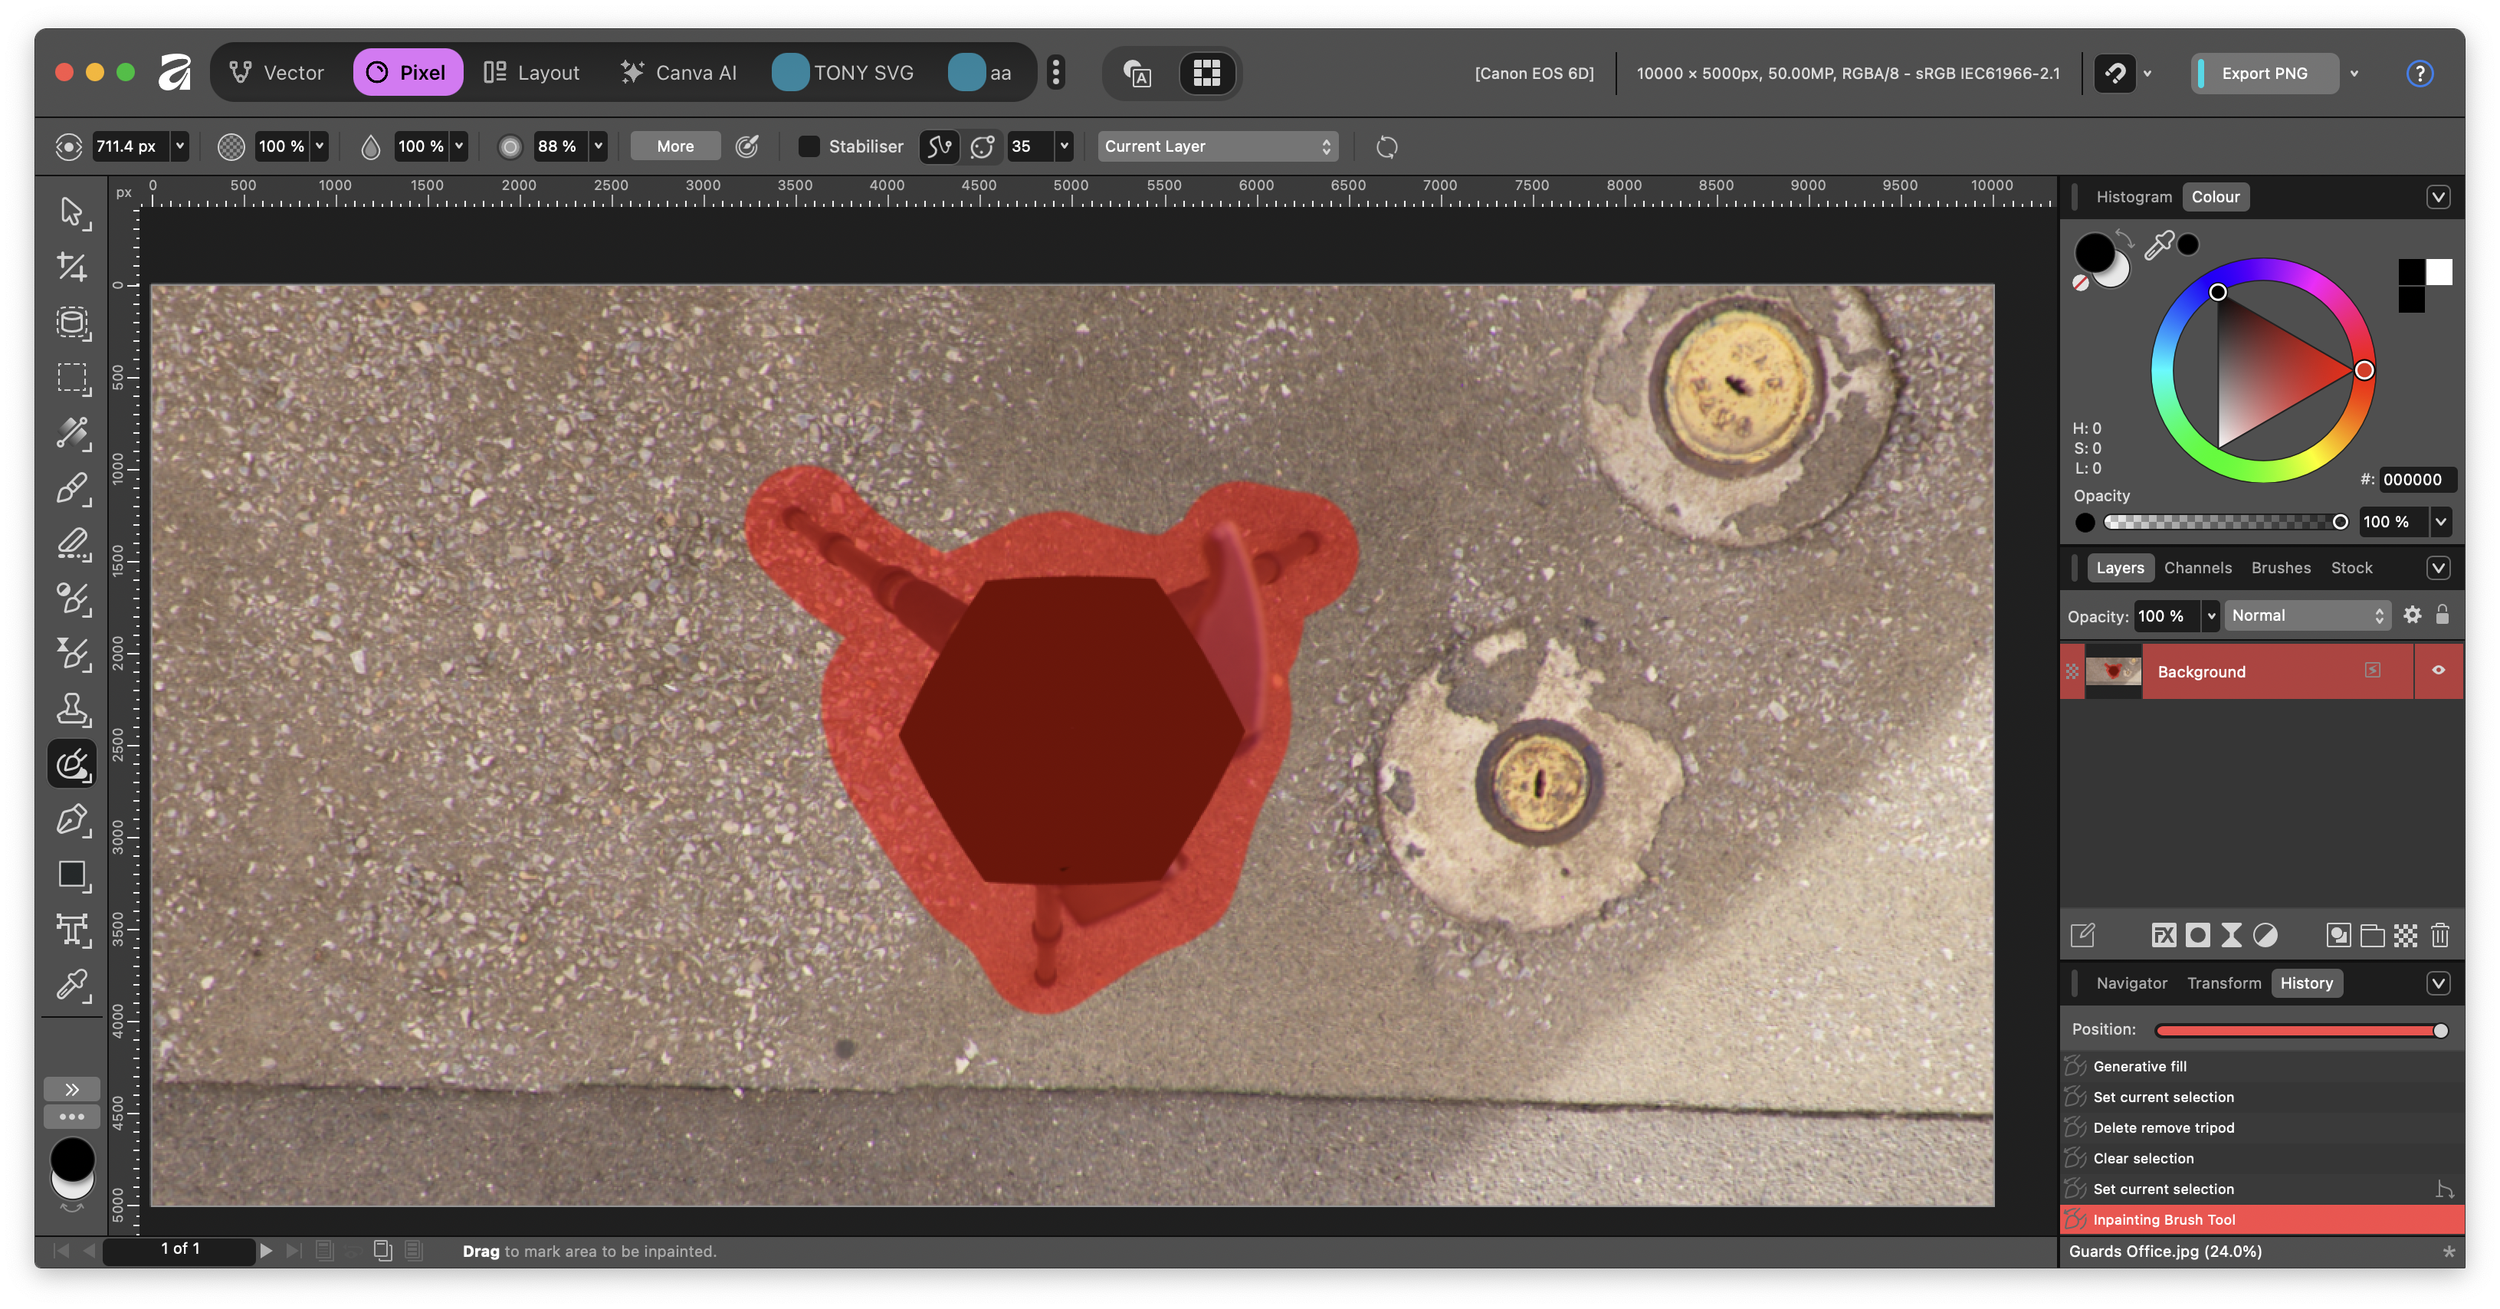
Note: once you release pressure on the brush the removal will begin. Additional painting can refine the result. (figure #9)
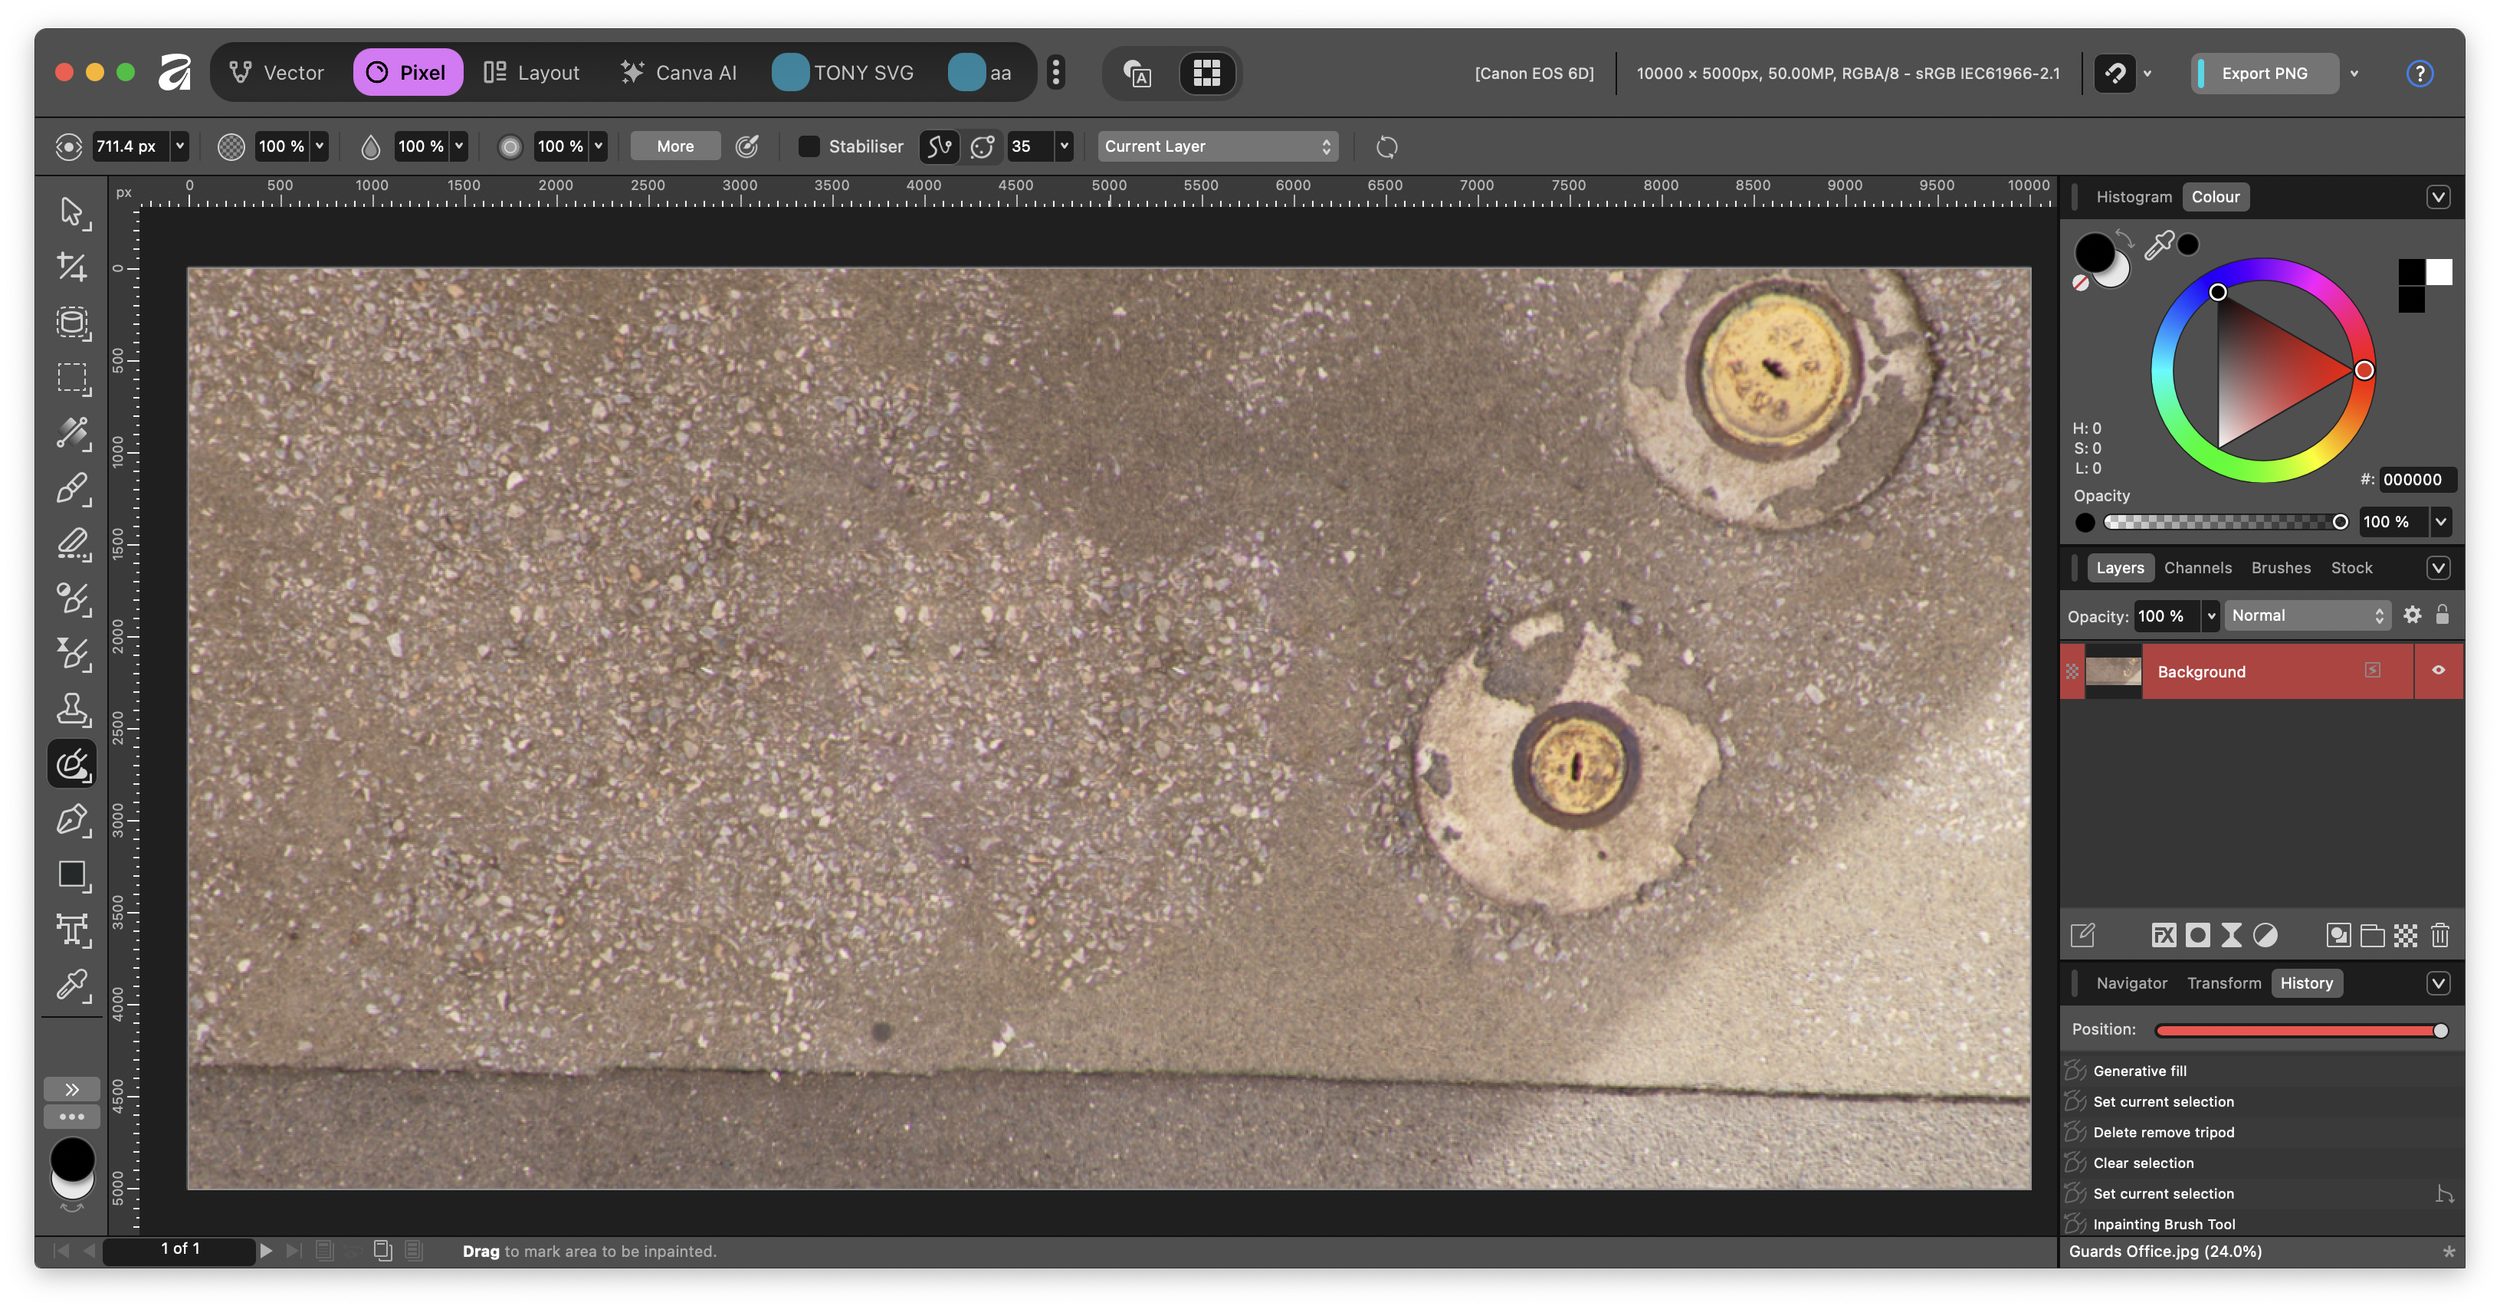
Figure #9: Tripod removed
Remove Live Configuration ⇑
Note: After applying a tool to the image the ability to pan/tilt/or zoom in 360 is gone. To edit in another area you need to do the following:
1. Select the “background” layer
2. Selecting Pixel > Live Projection > Remove to return to the original image view (figure #10)
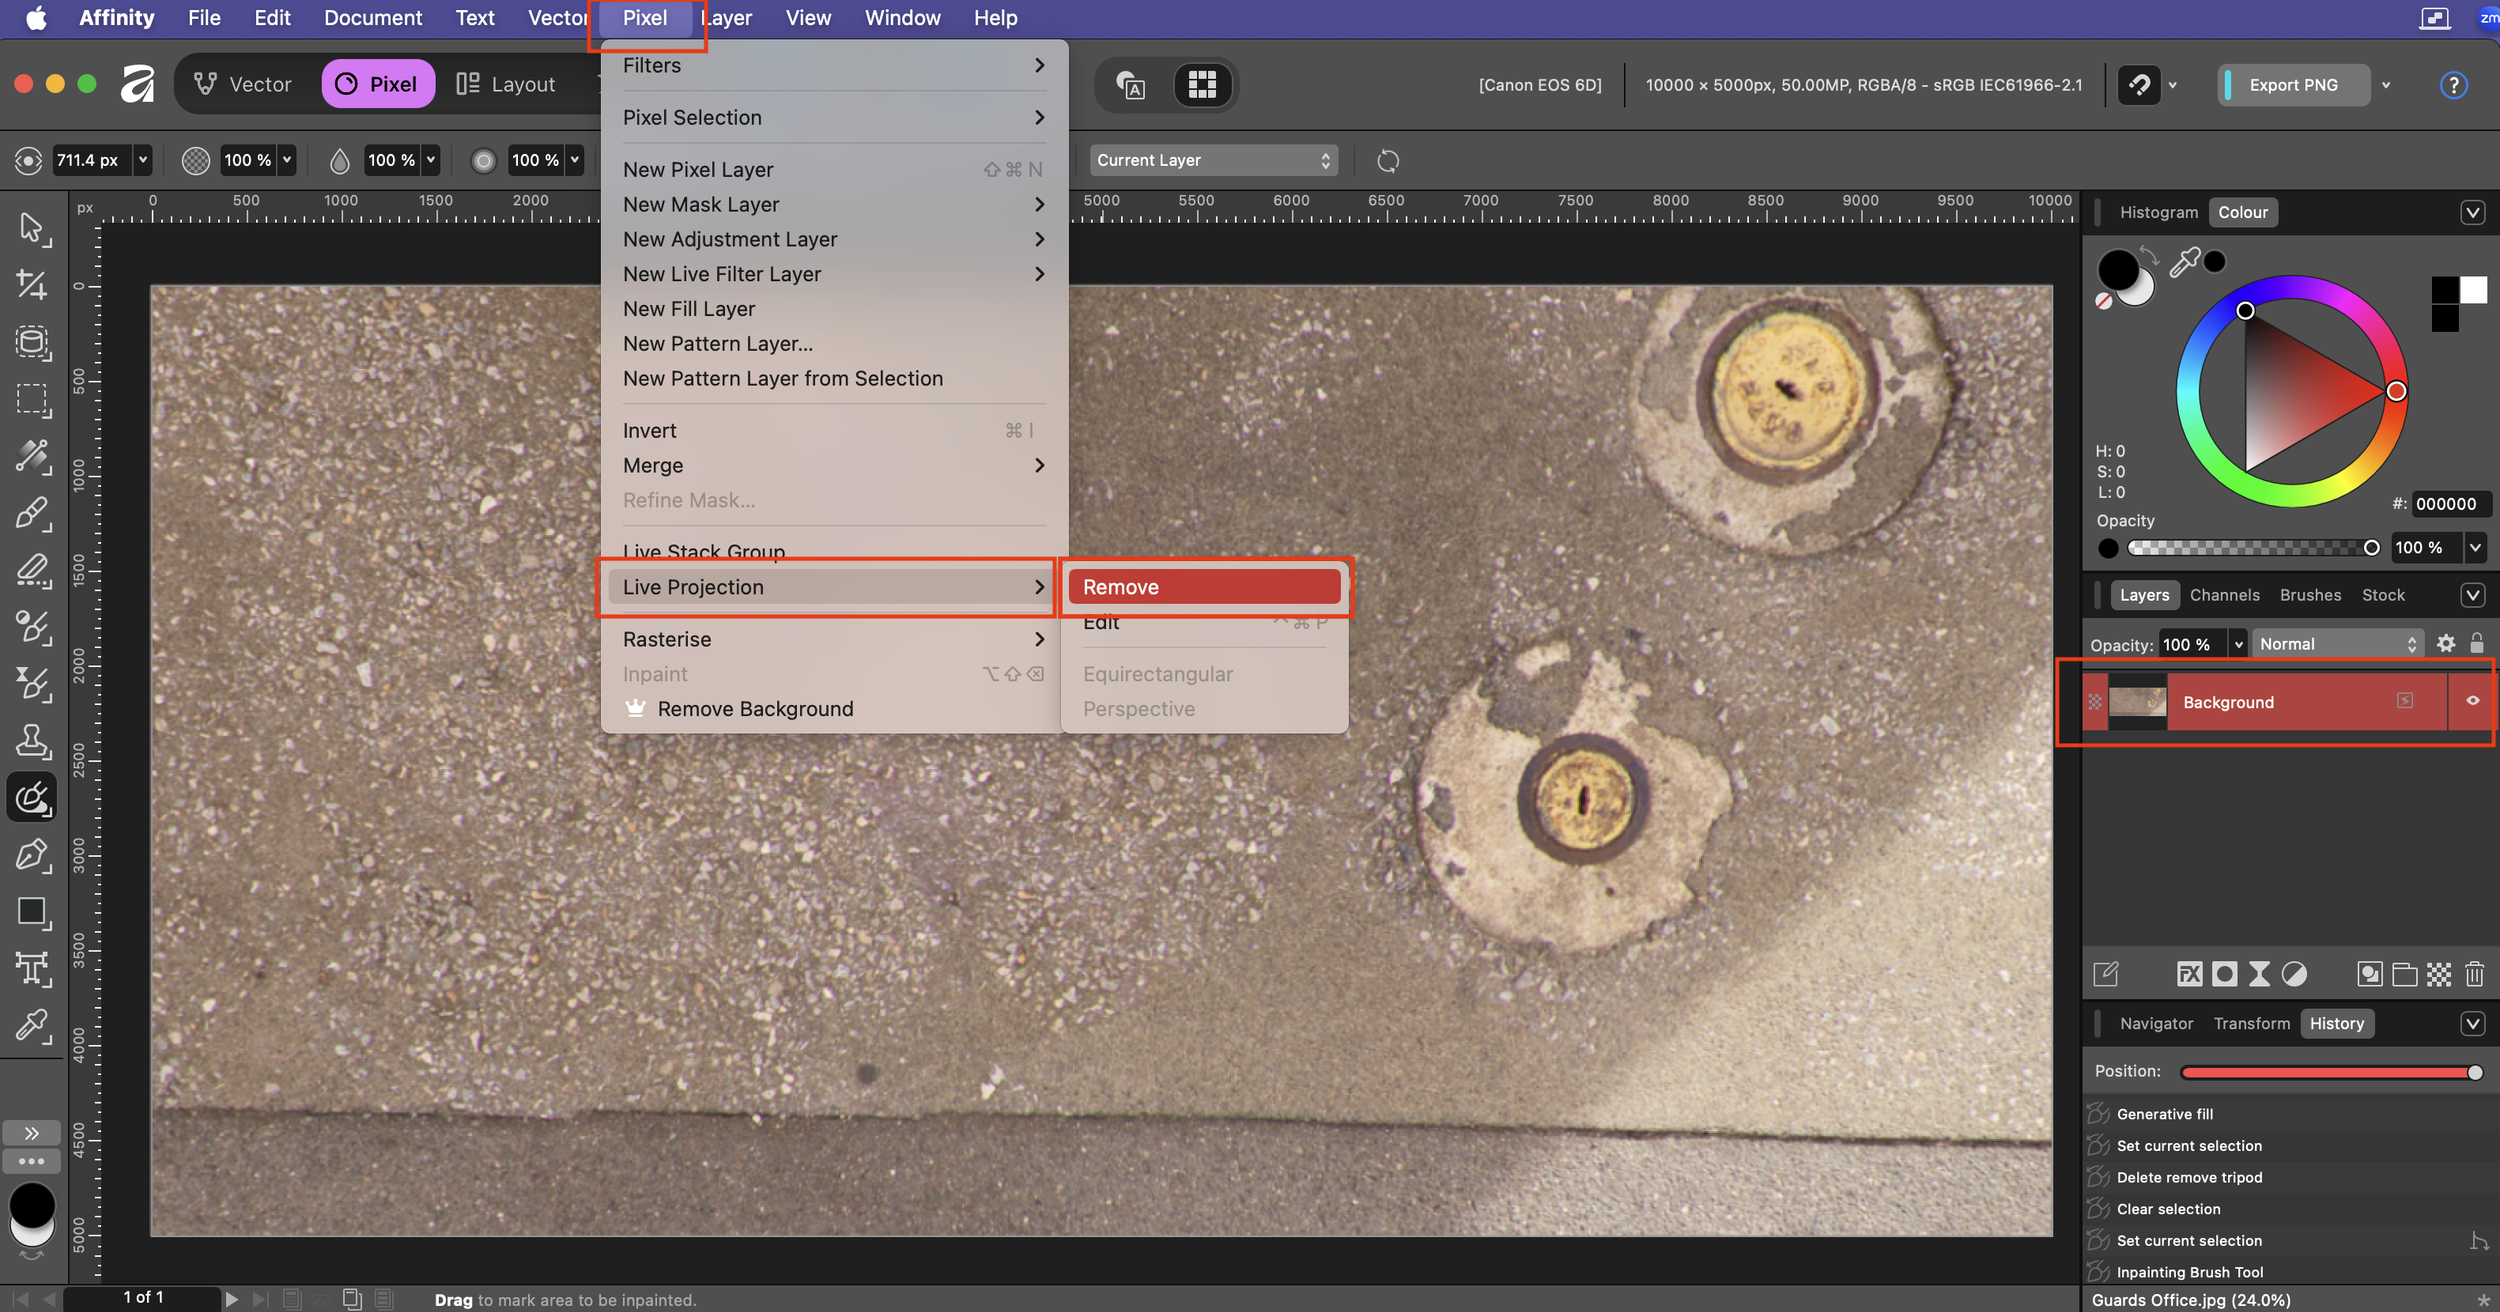
Figure 10: Live Projection > Remove
Note: the image has been updated and the tripod is no longer visible (figure #11)
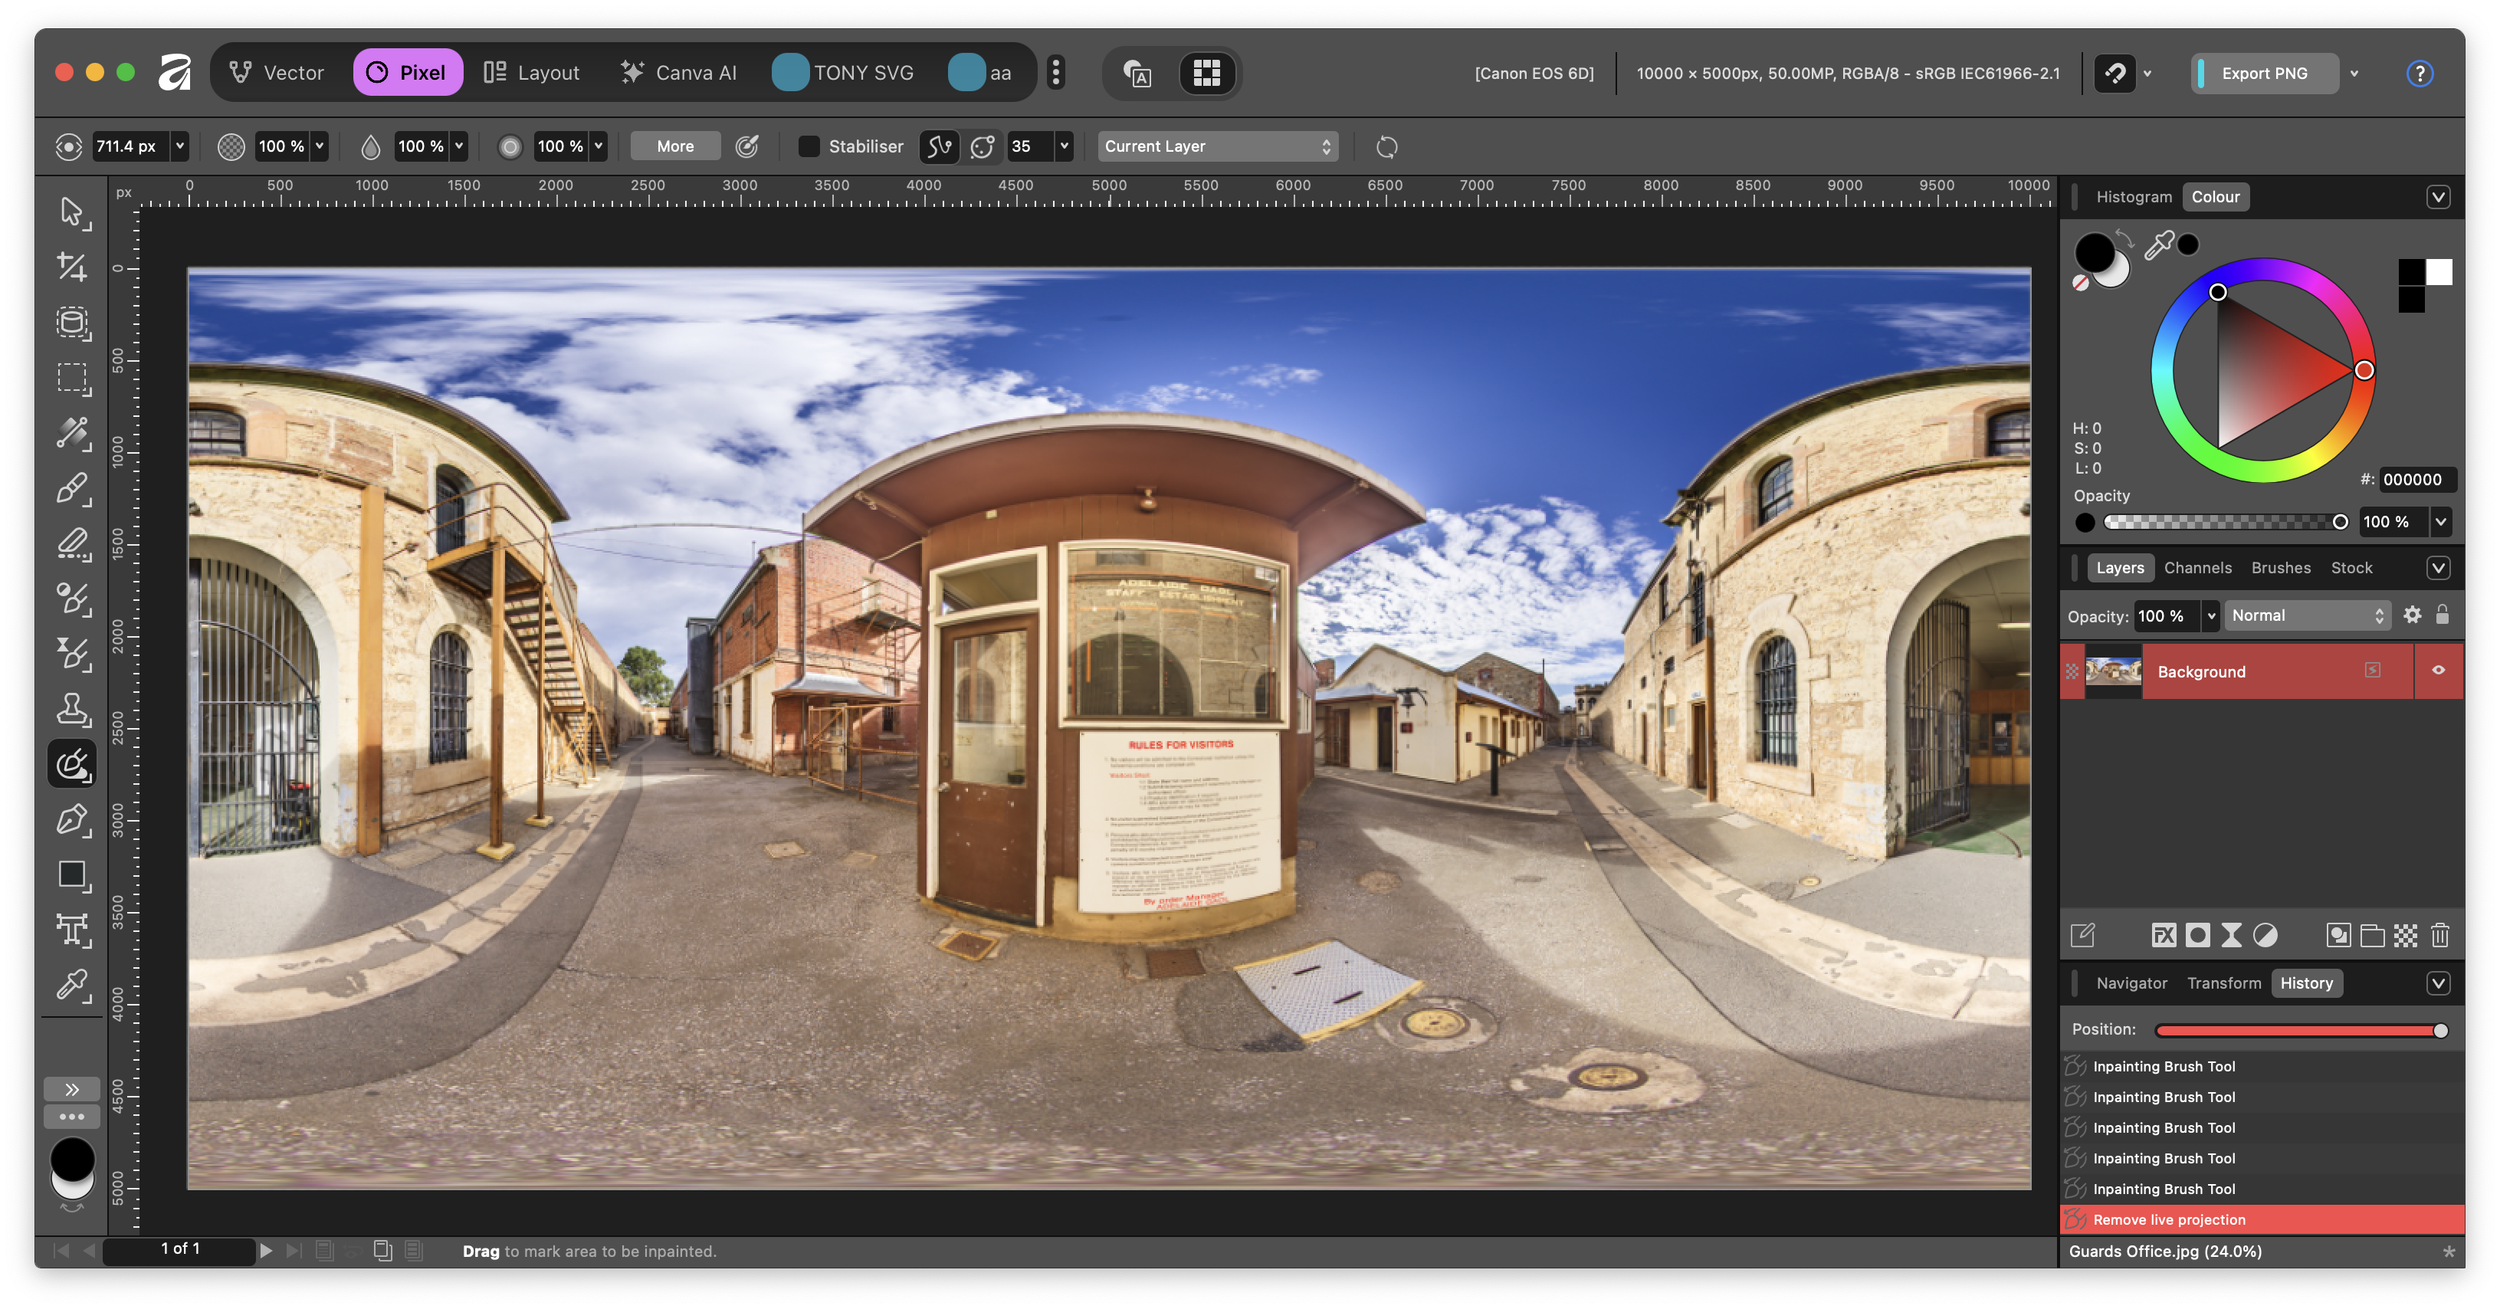
Figure #11: Tripod no longer visible
3. Reselect Pixel > Live Projection > Equirectangular and you are ready to edit a new region of the image
Note: a slight mismatch in the stitch line near the wires (figure #12)

Figure #12: Slight mismatch
Affinity V3 - A bad bug - UPDATE ⇑
Good news, Canva/Affinity have just released an update Affinity V3.02 and I’m happy to announce that the “Merge Down” bug has been fixed and the following workflow is now available in this version!
At this point I’d use a polygon selection tool to select an area and then paste into a new layer (so I don’t have a hole in the original layer), rotate the cutours so the wires line up and repeat for both wires.
Something like this… (figure #13)
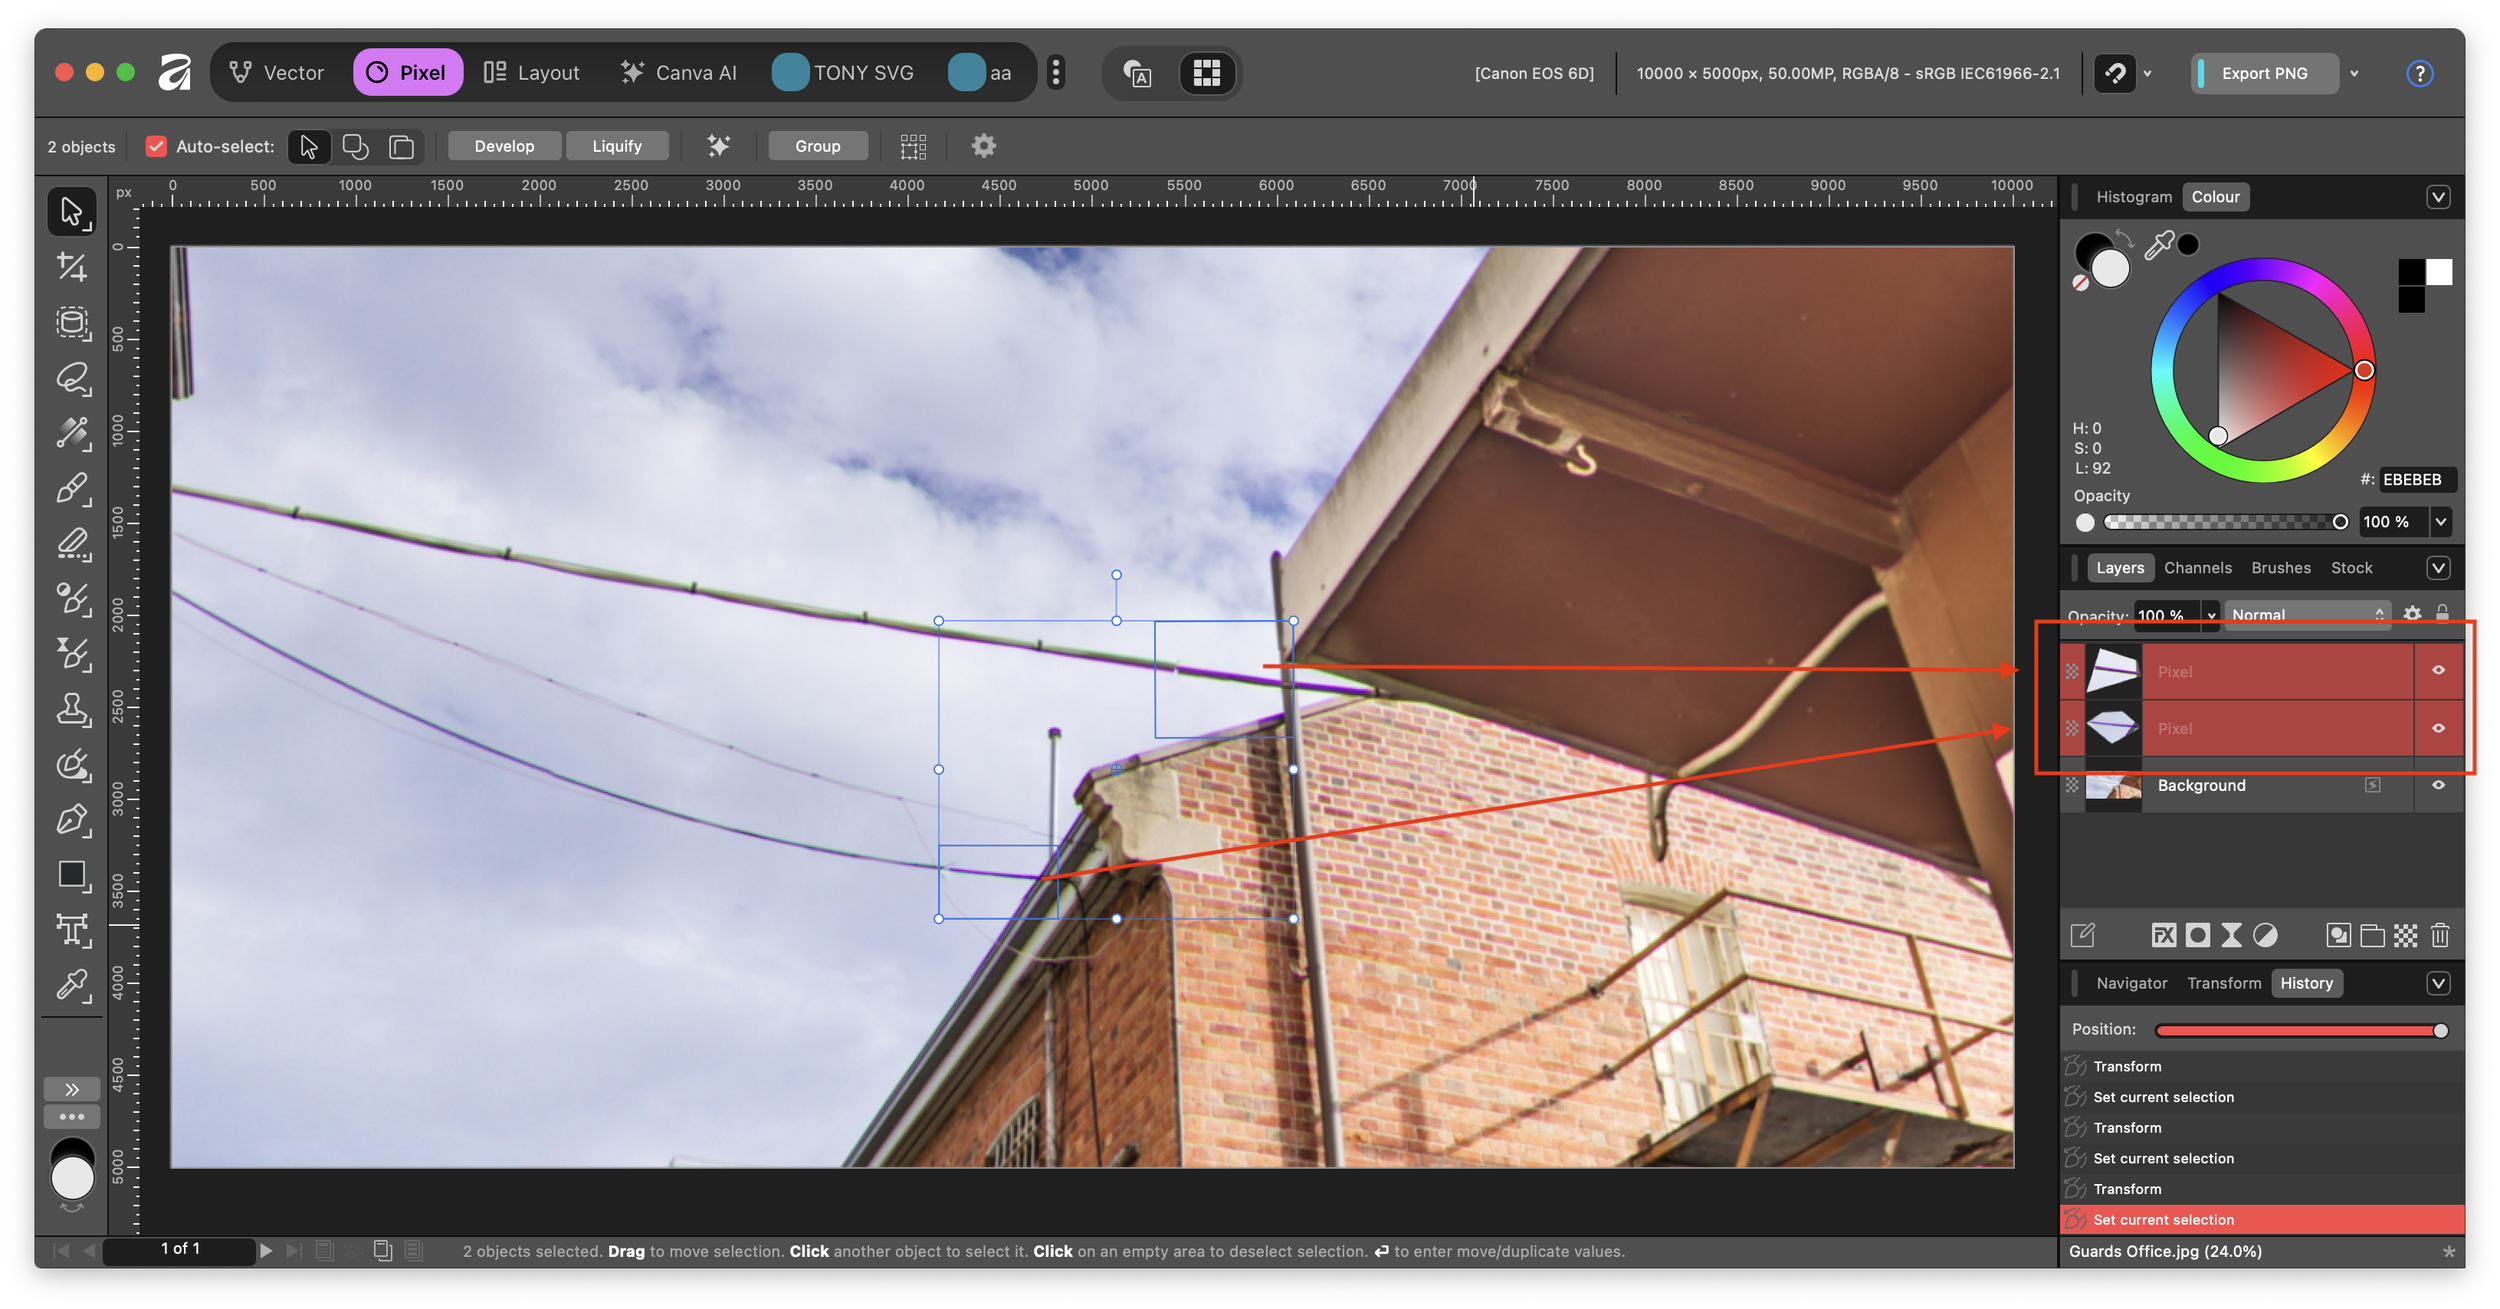
Figure #13: Selections in new layers
At this point if I have the background layer selected I can still see the Remove option in the Live Configuration menu.
My next step would be to Merge Down the two edit layers one at a time.
OH NO! Once I merge down the two layers the Remove option is no longer available and I cannot get the retouched image back into the original Equirectangular image.
Note: I have reported this bug to the Affinity Team, so hopefully it will be fixed in a future release. Fixed in Version 3.02!
For now these are our options:
1. Create the selections and do not cut and paste into new layers.
2. Use a brush that works on the background layer such as a Clone Brush or the Inpainting Brush Tool
3. If it is available to you, use Affinity Photo V2 where Live Configuration is working with multiple layers.
Hey there! 👋 ⇑
If my tutorials have made your tech life a little easier (or a lot less confusing) consider buying me a virtual coffee ☕️ or even lunch 🍔 Retirement means more time to help you, but sadly, less income for snacks. Click the Donation button 🙌 and thanks for the love!
