
Update: 4th January 2025 - Using Profiles in the terminal window
One of the main issues encountered with hosting 360˚ panoramas on AWS buckets is the time it takes to upload the thousands of multiresolution tiles that make up the panoramas. Using the AWS Console to upload 360˚ Panorama projects can be incredibly slow however using AWS CLI the speed of the upload process can be dramatically increased.
Using CLI also negates the need to open up the console to update files as the project evolves or changes.
Note: this 3 part tutorial requires you have administration access to an AWS Account
Part 1: Install takes you through Download, Installing and Testing the AWS CLI Application
Part 2: Configure shows you how to create an Identity Access Management (IAM) user, collect configuration data and configure the CLI.
Part 3: Upload shows how to upload your local files to your S3 Bucket/s and highlights some other useful Command line operations.
Part 4; Download shows how to download a single file or a complete folder from your S3 Bucket/s.
Getting Started
1. Open the Terminal app if it’s not already open
Note: if you have not configured a Profile please continue. If you have a Profile please jump to step #Profile 2
2. Enter the command ‘aws configure’ if AWS is not already showing it’s configured
Note: after you enter a Command line always select the ‘return’ key to implement it
3. Continue with ‘return’ until all the aws configure parameters are displayed and the terminal is showing the prompt (figure #1)
Figure #1:
4. To view all of our s3 buckets enter the command line ‘aws s3 ls’ (figure #2)
Note: I have 2 S3 buckets s3360panos and s3threesixtypanos
Figure #2: List of all our S3 buckets
5. To see the contents of a particular bucket, enter the command line ‘aws s3 ls “the bucket name”’ (figure #3)
Figure #3: Contents of the bucket s3360panos
Profile 2. Enter the command export AWS_PROFILE=’your profile name’
Note: my prompt will be export AWS_PROFILE=awspano
Profile 3. Enter return (figure Profile #1)
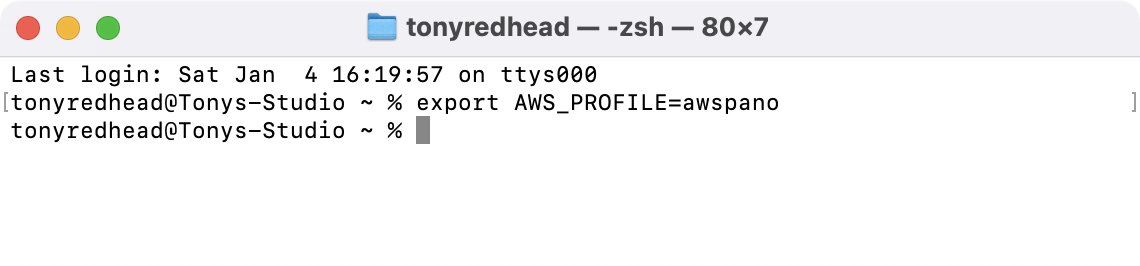
Figure Profile #1: Enter the profile awspano
Profile 4. To view all of our s3 buckets enter the command line ‘aws s3 ls’ (figure Profile #2)
Note: I have 2 S3 buckets s3360panos and s3threesixtypanos

Figure Profile #2: List of all our S3 buckets
Profile 5. To see the contents of a particular bucket, enter the command line ‘aws s3 ls “the bucket name”’ (figure Profile #3)

Figure Profile #3: Contents of the bucket s3360panos
Add local files to the S3 Bucket
In order for you to follow along with me, I have provided a tutorial folder Yellow_Submarine.zip containing a small Pano2VR project that you can download here and unzip.
Note: to upload local content we need to identify the location of the content so we can reference it within the Terminal App
Tip: A simple way to load a local folder and set it as the directory is to hold down the Command Key at the same time Drag and Drop the folder onto the Terminal App (figure #4)

Figure #4: Command, Drag and Drop
Note: this will automatically change the current working directory to that of the folder (figure #5
Figure #5: Directory changed to the Yellow_Submarine project folder
1. To view the contents of the current directory (Yellow_Submarine) enter the command ‘ls’ (figure #6)
Figure #6: Contents of the Yellow_Submarine folder
Note: there are different ways to move the content from the local drive to the S3 bucket. We will look at and test Copy (cp) and Sync (sync)
The cp command is used to copy files from either local to a bucket or one bucket to another bucket.
The sync command is to synchronise directories and S3 prefixes. It recursively copies new and updated files from the source directory to the destination.
What is the difference between cp and sync?
Using
aws s3 cpcommand will require the--recursiveparameter to copy multiple files.The
aws s3 synccommand will, by default, copy a whole directory. It will only copy new/modified files.In a nutshell, if the files haven’t been copied to the s3 bucket then cp and sync will operate in the same way. Both will copy all of the files to the S3 bucket.
If the local files have been copied and the sync command is used again only local files that have changed will be uploaded. This applies to local files whose size is different than the size of the S3 object, the last modified time of the local file is newer than the last modified time of the S3 object, or the local file does not exist under the specified bucket and prefix.
So sync is great if you are working on a project, change the skin or add new elements. In this case you use the aws s3 sync command and only those files that have changed are uploaded.
Moving forward we will use both commands
7. Let’s copy the contents of the Yellow_Submarine folder to your S3 bucket and place them in a subfolder called Yellow_Submarine by entering the command aws s3 cp . s3://s3360panos/Yellow_Submarine --recursive (figure #7)
Note: we are not using the name of the local directory in the command. As we are already in the directory we use a period ‘.’ after ‘cp'. In order to copy all the files, we use --recursive to copy more than once.
Figure #7: Copying the contents of the Yellow_Submarine folder to the s3 bucket
The Terminal screen fills up with the list of files being copied
Note: if you look down the list of files being uploaded you will see a .DS_Store file included. A .DS_Store is a Mac file that stores custom attributes of its containing folder. Usually benign there could be a possible security issue with the files on a web server. To that end, we will add a command that excludes the file from upload.
Thanks to Marco Swaer for highlighting this issue :-)
8. We will delete the folder Yellow_Submarine by entering the command aws s3 rm s3://s3360panos/Yellow_Submarine/ --recursive (figure #8)
Figure #8: Removing the folder Yellow_Submarine and it’s contents
9. And repeat the copy process but this time we will enter the command aws s3 cp . s3://s3360panos/Yellow_Submarine --recursive --exclude “.DS_Store” (figure #9)
Figure #9: Copy command with --exclude “.DS_Store”
Note; you can see in the list of uploading elements that the .DS_Store isn’t displayed
10. Now we will upload the files by syncing the contents of the Yellow_Submarine folder to the same location by entering the command aws s3 sync . s3://s3360panos/Yellow_Submarine --exclude “.DS_Store” (figure #10)
Figure #10: Sync shows no results
Note: nothing happens because sync only uploads files that don’t exist in the S3 bucket already or are different from the ones already there.
So to see a sync command in operation we must modify one of the files
9. Open the local version of the preview.jpg file in Preview and set the size to 650px (figure #11)
Figure #11: Resize the preview.jpg file
10. Save it back into the Yellow_Submarine folder and overwrite the original one. Repeat the command aws s3 sync . s3://s3360panos/Yellow_Submarine --exclude “.DS_Store” (figure # 12)
Figure #12: Updated just the resized preview.jpg uploaded vis sync
10. Let’s check the content of the s3 Bucket and folder Yellow_Submarine using the command aws s3 ls s3://s3360panos/Yellow_Submarine/ (figure #13)
Note: the timestamp on the preview.jpg file is different to the other files reflecting the fact that it was uploaded via the sync command
Figure #13: Updated timestamp for the preview.jpg
11. The last thing we will do is review the project in our default browser. To do this we use a command composed of ‘bucket name’ + ‘.s3-’ + ‘default region‘ + ‘.amazonaws.com’ + ‘directory/’ + ‘index.html’
In my example, the command is open https://s3360panos.s3-ap-southeast-2.amazonaws.com/Yellow_Submarine/index.html (figure #14)
Figure #14: Command to open the project in the default browser
This brings us to the end of Part 3: Upload and the end of the tutorial.
Quite a journey and we have only briefly touched on just a few of the numerous commands that can be used with AWS CLI and S3.
For more check out Gaurav Gupta’s AWS S3 CLI Commands page.
Summary
"Hey there! 👋 If my tutorials have made your tech life a little easier (or a lot less confusing), consider buying me a virtual coffee! ☕️ Retirement means more time to help you, but sadly, less income for snacks. Click the Donation button 🙌 and thanks for the love!"
