In response to a post on the Pano2VR forum, Easiest way to make 360 appear on my URL, I thought I'd look into what steps are required to set up a subdomain and have it point to an Amazon S3 bucket.
Most of my 360˚ panoramas are hosted on S3 and then posted into Squarespace using the Code Block and an iFrame. The domain expedition.photography is hosted with GoDaddy so this step-by-step is based upon their domain management console but I should imagine it's quite similar to other domain hosting platforms.
Occasionally I want to provide a URL that points directly to a project folder within a bucket. In this case, the original bucket is panos.expedition.photography it contains a project folder RU-Outdoor-Dining.
The S3 url is: https://s3-ap-southeast-2.amazonaws.com/panos.expedition.photography/RU-Outdoor-Dining/index.html
But I want it to be: http://panos.expedition.photography/RU-Outdoor-Dining/
Note: this tutorial assumes you have an account on Amazon S3 and know how to access and manage your domains.
Note: Masking the long URL is restricted to HTTP only. If you want or need to use HTTPS then you will need to use CloudFront. For more information I found this blog Creating a Static Website using Go Daddy, AWS S3 and Cloudfront.
Getting Started
There are two parts to masking your S3 url, the first is creating and naming a bucket in S3 to match the subdomain, the second is creating the subdomain and pointing it to the S3 bucket url.
The subdomain I want to use is panos.expedition.photography
Update 5 January 2021: On November 11th, 2020 Amazon announced the release of the new S3 Console. The change is wide-ranging and has a number of significant changes in regard to the interface.
This tutorial has been updated to reflect the changes to the User Interface and the workflow.
Creating and naming a bucket in S3
For information on creating a bucket and naming it please refer to the tutorial, ‘Configure S3 for 360˚ Panoramas’ section Step #3 Create your first Bucket. Follow the tutorial to the end of Step #5 and then return here, where you are now ready to move on to the next step, setting up the Subdomain.
GoDaddy Subdomain
1.Log into your GoDaddy account and navigate to your domains
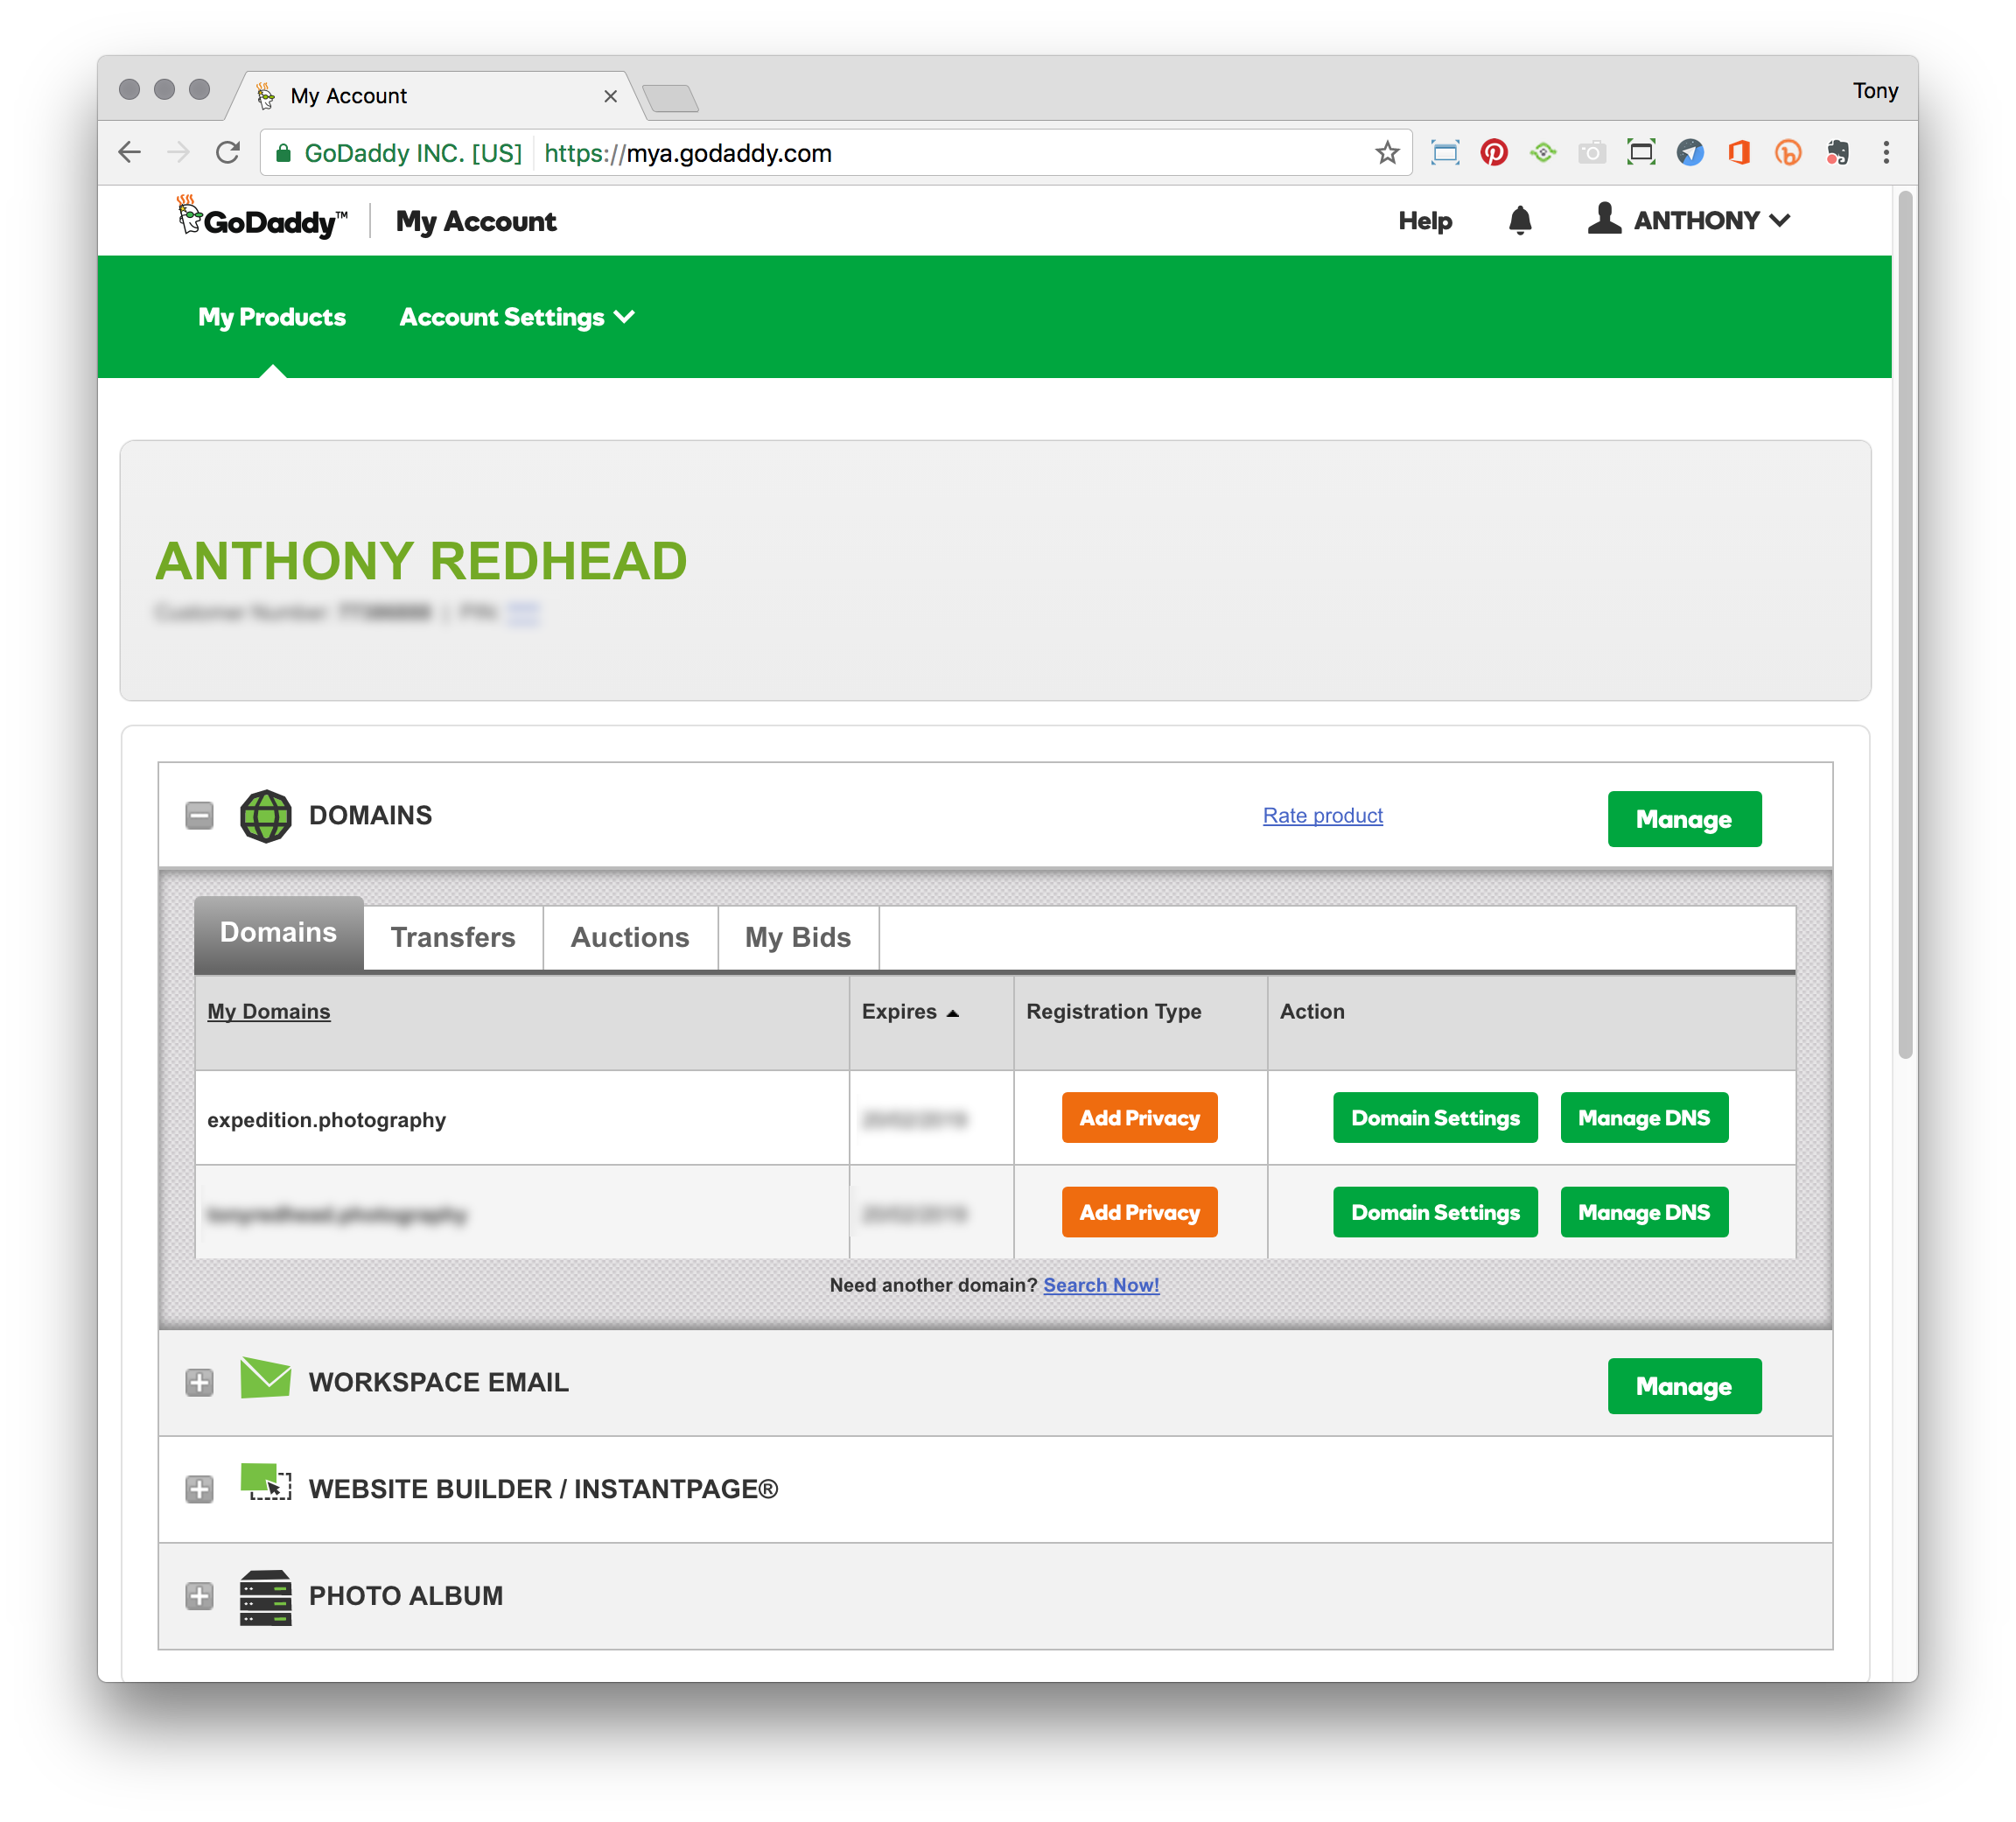
2. Select 'Manage DNS' to open the Records options

3. Scroll down the page until you see the Add link

4. Select 'Add' to open the Type options

5. From the 'Select' dropdown menu select CNAME

6. In the CNAME record field add your Host name, in this case panos, for Point to use the url you copied in step 6 S3 and then click 'Save'

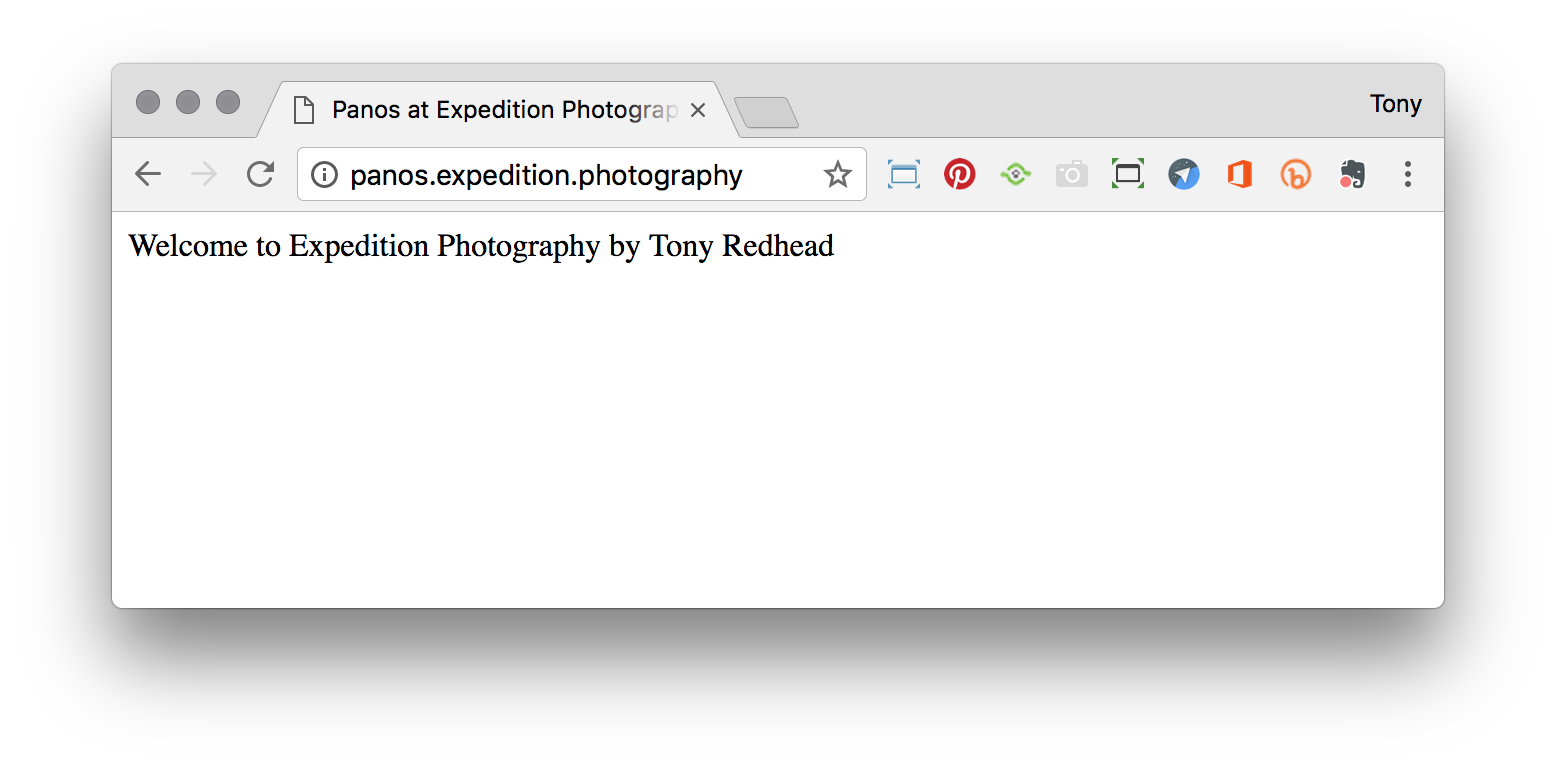
7. Create a simple .html document, like the example below. Name it index.html and upload it to the root level of the bucket you just created.

8. Normally they say to wait an hour for the subdomain to propagate through the domain servers but I tested it straight away by using the URL http://panos.expedition.photography and it worked perfectly
8. You can now upload your projects and files to the bucket, create url's that point to those different projects and files within the bucket and you can iFrame them in Squarespace or send the url directly to a client.
Summary
I hope you have enjoyed the tutorial and it has helped you to achieve the best possible project outcome. If it has please take a second to consider a donation so that I can continue to add more tutorials.
