Now that we have explored the options within a working gallery by adding different file formats and audio we can move on to Multilanguage support.
MSG already contains the logic to play multilanguage audio based on the users choice but there are some additional modifications and setup needed.
Project Overview
In this tutorial, we will add and configure the project by;
Note: Click on any image to enlarge it
Step 1 - Review the Audio Project Files ⇑
In the Tutorial folder > Tutorial Assets there is a folder named ‘4 Languages’. (figure #1)
Figure #1: 4. Languages folder
Inside the folder are six .mp3 files representing the frog, dog and cat in both English (_en) and Spanish (_es). (figure #2)
Figure #2: English/Spanish audio files
In addition there are two more folders named ‘MSG_Component_Loaded_translations’ and ‘MSG_Component_translations’. Both folders contain text used within the project (.pot) and the Spanish translations (es.po). (figures #3 & 4)
Figure #3: Translation folders
Figure #4: Translation files
Language files in Pano2VR come in two variations, one that contains the text associated with the skin and the other text associated with the project.
When you generate language files the skin translations are saved in a folder in the same location as the skin (.ggsk) file and incorporate the name of the skin in the folder name. In our case <skin-name>_translations.
On the other hand project translations can be saved in a custom location and be given a custom name.
For this tutorial I have provided both the skin and project language files generated and translated.
Note: Pano2VR works with a translation tool, Poedit. It is free and available across all operating systems. Rather than go through the whole process of adding mulitlingual support I’ve referenced two excellent webinars, by Martin Hopkins, from the Garden Gnome Youtube channel, Translation Part 1 & 2.
Step 2 - Configuring the Language Files ⇑
1. Copy the two language folders from the 4. Languages folder into the Project_Files folder (figure #5)
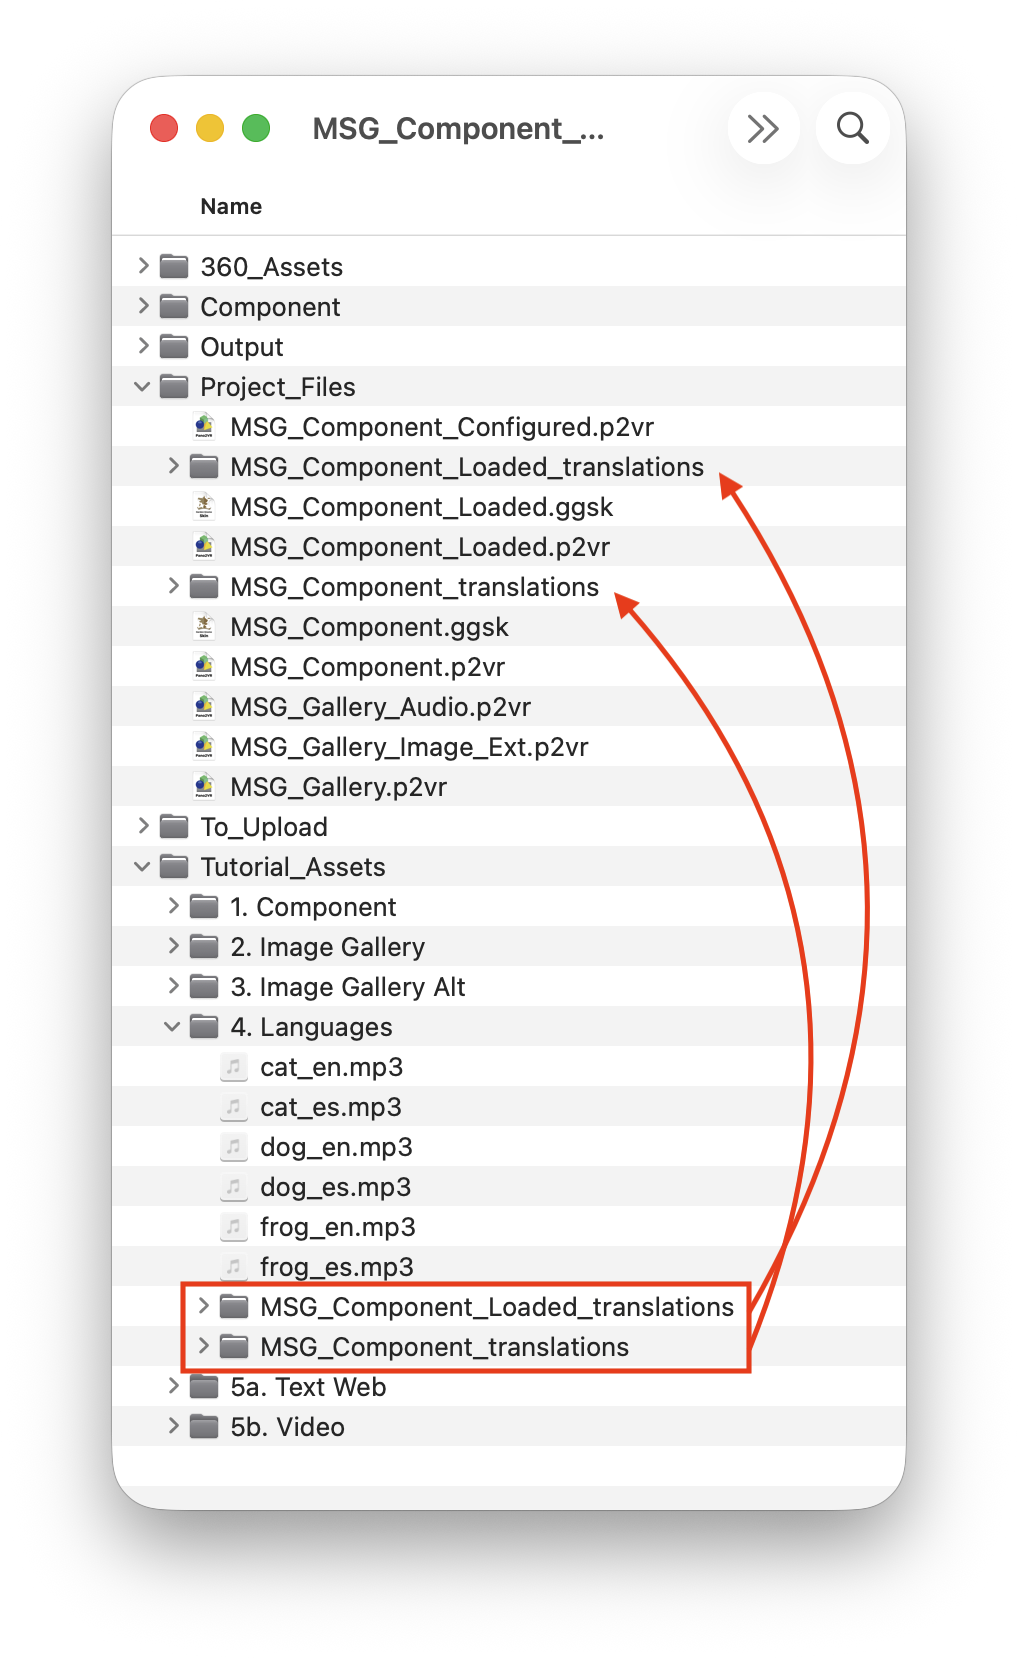
Figure #5: Copy translation files
2. Open the MSG_Gallery_Image_Ext.p2vr project
3. In the Project window open the Properties - Project > Translations tab (figure #6)
Figure #6: Translations panel
Note: as I am based in Australia the Project Language has defaulted to English > Australian with the ISO 639-1 language code ‘en-AU’. All of the text elements in both the project and skin are written in English.
So for the tutorial we will set this value to English > Main which changes the language code value to ‘en’. This is important because my audio language files are named _en (english) and _es (spanish).
You may be asking, why in the tutorial part 2 when we added the files to the 'To_Upload > gallery > animals folder the audio file was named ‘dog.mp3’ with no language code specified?
The reason is that when language is not activated in a tour, MSG simply loads the available .mp3 file regardless of the language its recorded in. But when language is activated we need each individual language .mp3 to contain the relevant language code value.
3. Set the Project Language: to English <Main> | en
4. Click on the Translations Folder icon and set the destination to Project_Files > MSG_Component_Loaded_translations
Note: as soon as you make those changes you will see that the Translations table has changed and the Project translation is now ‘en’ and the Title is English, and a new translation file es.po has been added with the language code ‘es’ and the title ‘español de España’ (figure #7)
Figure #7: Updated Translations panel
5. Click in the Title field and change English to ‘EN’ and change español de España to ‘ES’ (figure #8)
Figure #8: Updated Titles
Note: these are the titles that will appear in the UI buttons that change the language.
Step 3 - Configure the Interface ⇑
1. In the Output panel open the Edit Skin Configuration window
2. Check ‘Show Language:’ and check ‘Enable language’
3. Select OK to confirm changes (figure #9)
Figure #9: Edit Skin Configuration settings
4. Save the project as MSG_Gallery_Language.p2vr
Step 4 - Testing the languages ⇑
1. In the Tutorial_Assets > 4. Languages folder copy all of the .mp3 files into the To_Upload > gallery > animals folder. (figure #10)
Figure #10: Copy language files
2. Publish the project
Note: When the project opens you will see a ‘Language’ icon at the bottom.
3. Click on the icon to reveal the EN/ES buttons (figure #11)
Figure #11: Language buttons
4. Select ES and the UI elements change to display Spanish titles (figure #12)
Figure #12: UI Elements showing Spanish translations
5. Click on the hotpsot to open the gallery
The gallery now displays the text in Spanish and if you click on the ‘play’ button the audio is now spoken in Spanish (figure #13)
Figure #13: Spanish translations and Audio
Pano2VR Language Webinars ⇑
The MSG Component supports multiple languages in text fields and audio files. In this next step we will incorporate multiple languages Spanish and English. This step requires the translation tool, Poedit. It is free and available across all operating systems.
Rather than go through the whole process of adding mulitlingual support I’ve referenced two excellent webinars from the Garden Gnome Youtube channel, Translation Part 1 & 2.
In addition to the Webinars here are links to the document pages on the Garden Gnome website related to multilingual support.
Creating a Multilingual Project: https://ggnome.com/doc/pano2vr_7/guide/translation/
Translating Skins: https://ggnome.com/doc/pano2vr_7/workspace/skin-editor/
Summary ⇑
We now have a gallery that supports multiple images, text and audio in multiple languages. In the next tutorial we will explore ‘text’ only and ‘web’ popups.
