The Patch Tool in Pano2VR is one of the most powerful tools in the application and one that is used on a daily basis to retouch or to add "Tripod Caps" to cover the nadir as a retouching or a branding element.
In this tutorial I will show how to create a Tripod Cap that can be applied across several panoramic nodes. In addition, the Tripod Cap, created in Adobe Illustrator and Adobe Photoshop, is editable and changes applied to it will automatically be applied to the patch within Pano2VR.
Creating the Tripod Cap
Tools: Adobe Illustrator & Photoshop
Using a vector based program create your tripod cap image. In this example I have
figure #1: Tripod Logo in Illustrator
1. Using a vector based program create your tripod cap image. (figure #1)
In this example I have created a logo with distinct layers that can be individually edited
2. Save the file and
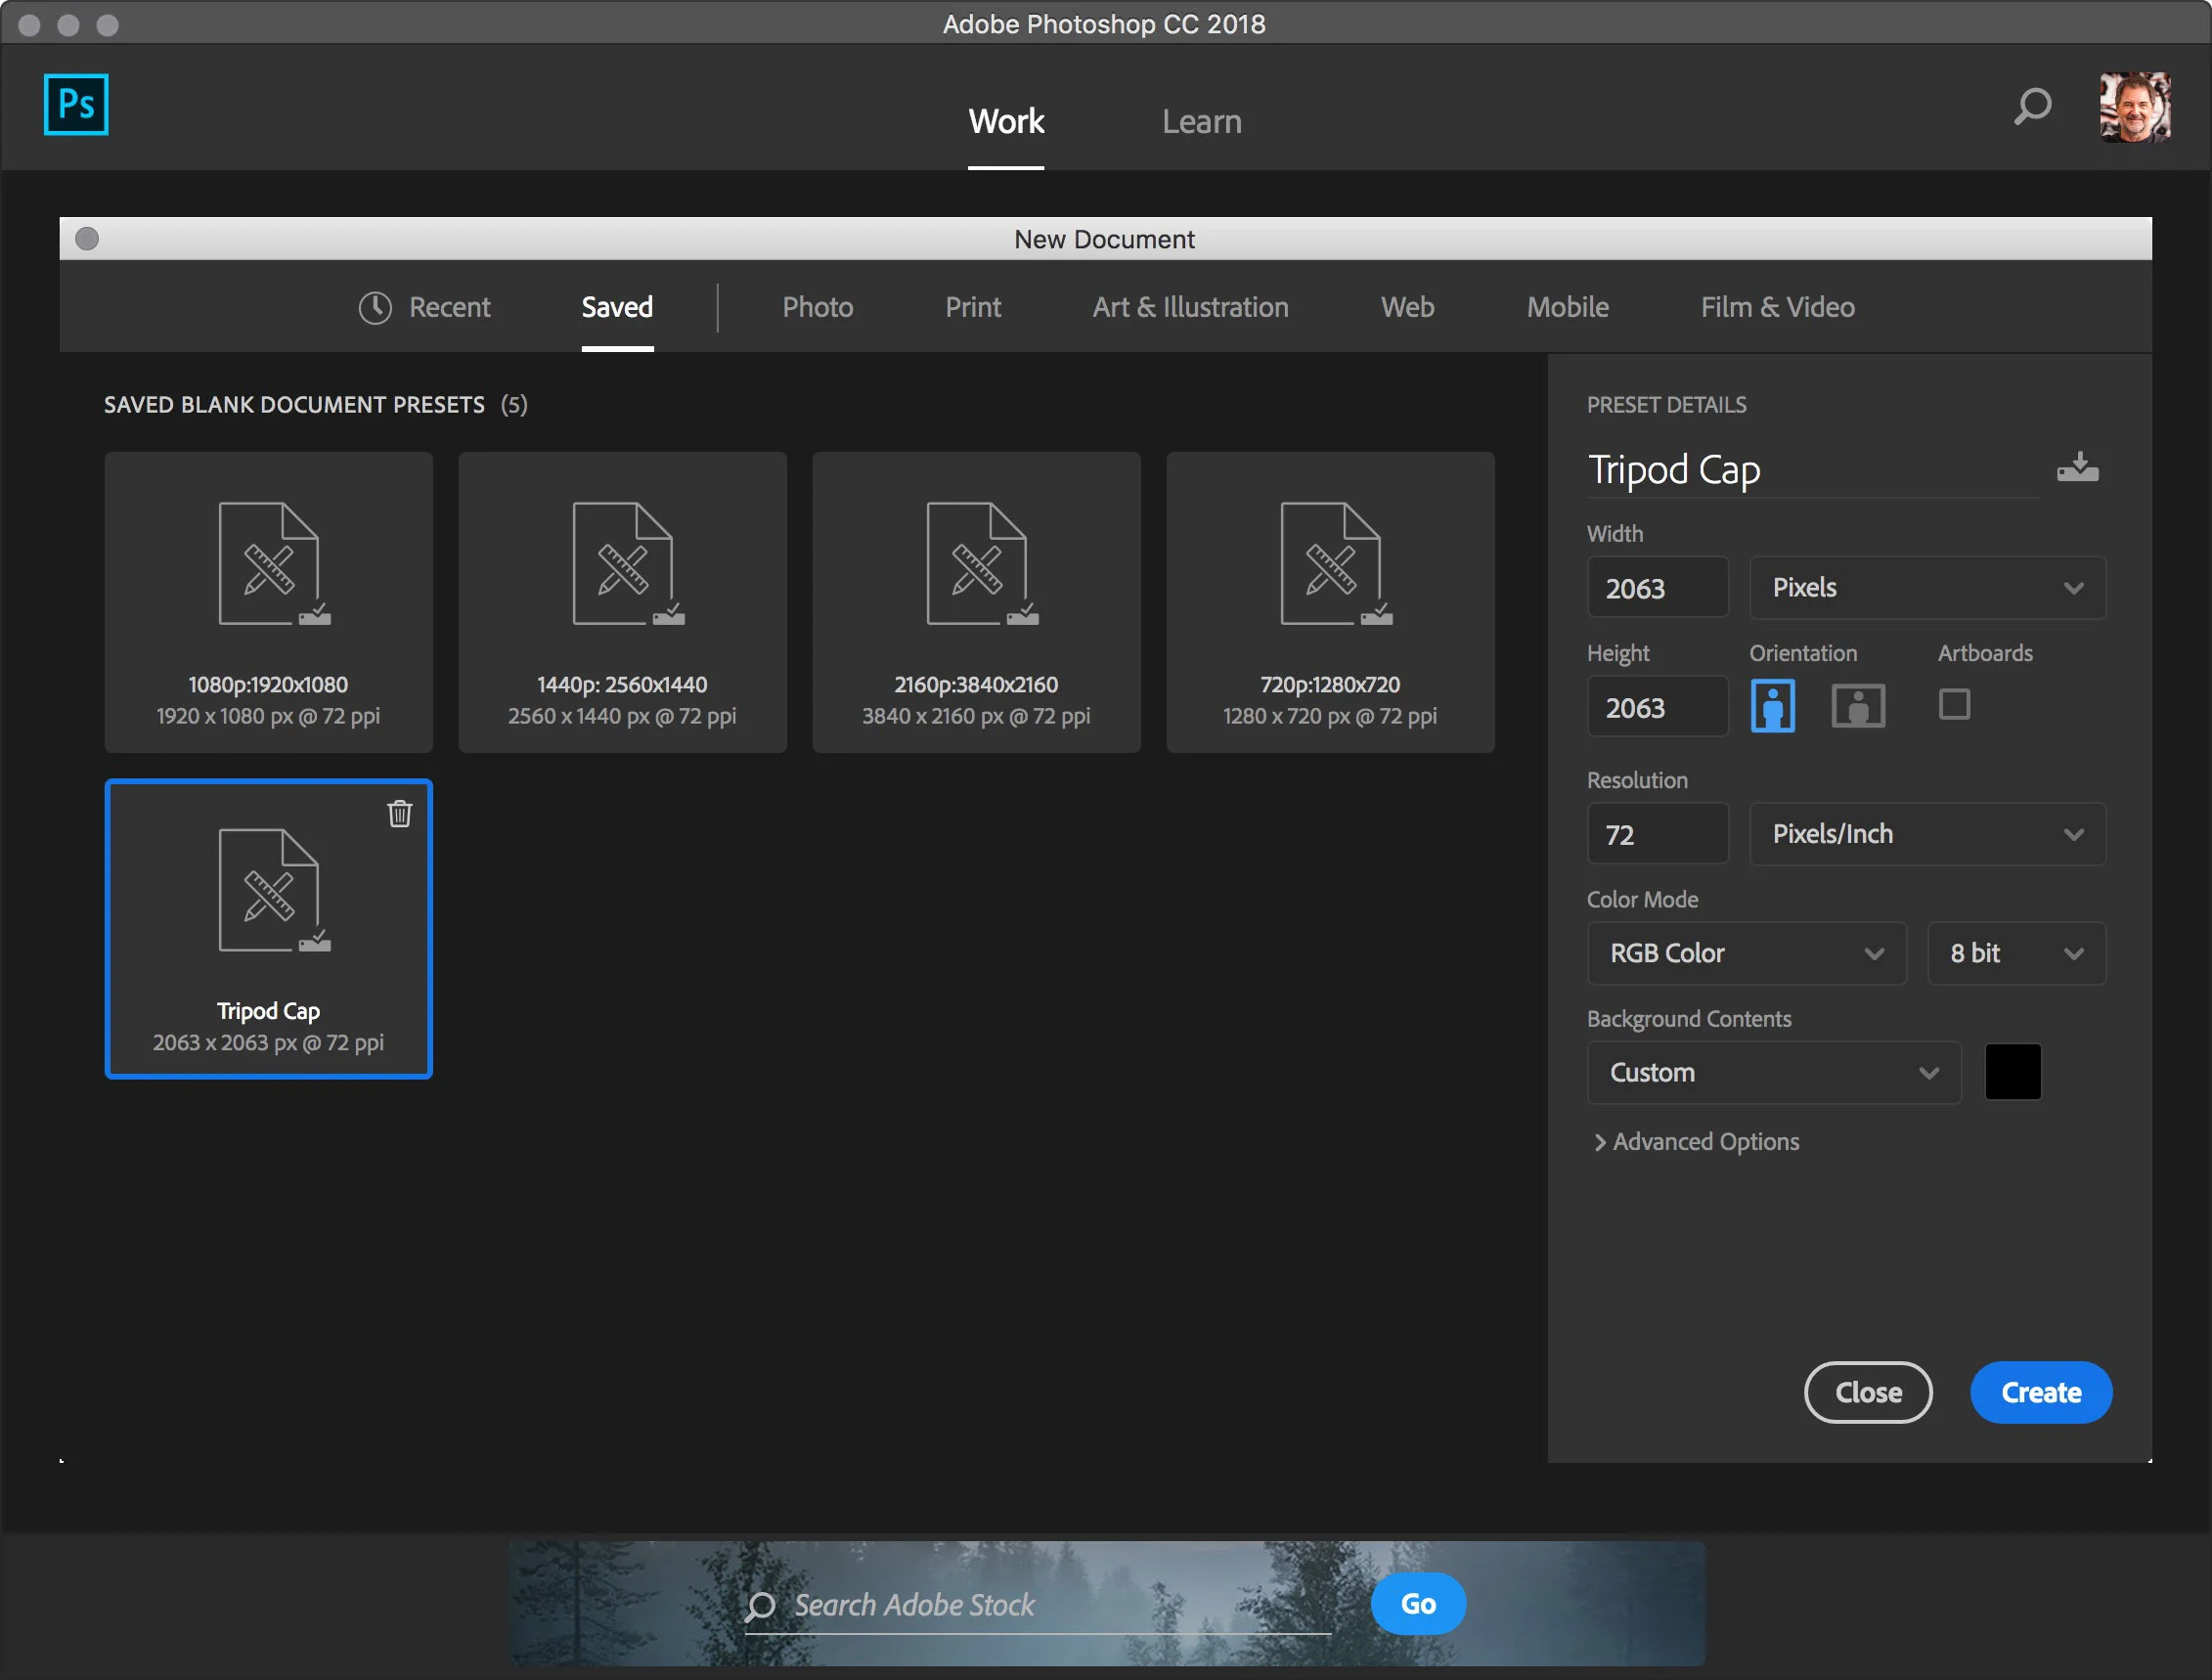
figure #2: Create new document in Photoshop
3. Open Photoshop
4. Create a new document that matches the size of your illustrator image (figure #2)
I've saved a preset called "Tripod Cap" and I've selected it for my document
5. Select Menu/File/Place Embedded
figure #3: Open as Smart Object
6. Select 'Okay' to open the file as a Smart Object (figure #3)
7. The illustrator file is placed into the document as a Smart Object (figure #4)
Smart Objects preserve an image's source content with all its original characteristics, enabling you to perform nondestructive editing to the layer.
figure #4: Smart Object in Photoshop
8. The final step is to save the file as a .psd file
Adding the Tripod Cap to all Panoramas in a Tour
1. Open Pano2VR and create you tour as usual
In the example below I have 3 panoramas linked to each other with node hotspots so you can move between the nodes
2. Rt Click in the "Tour Browser" window and select 'Edit Master Node' or select Menu/Tour/Edit Master Node (figure #5)
figure #5: Select 'Edit Master Node'
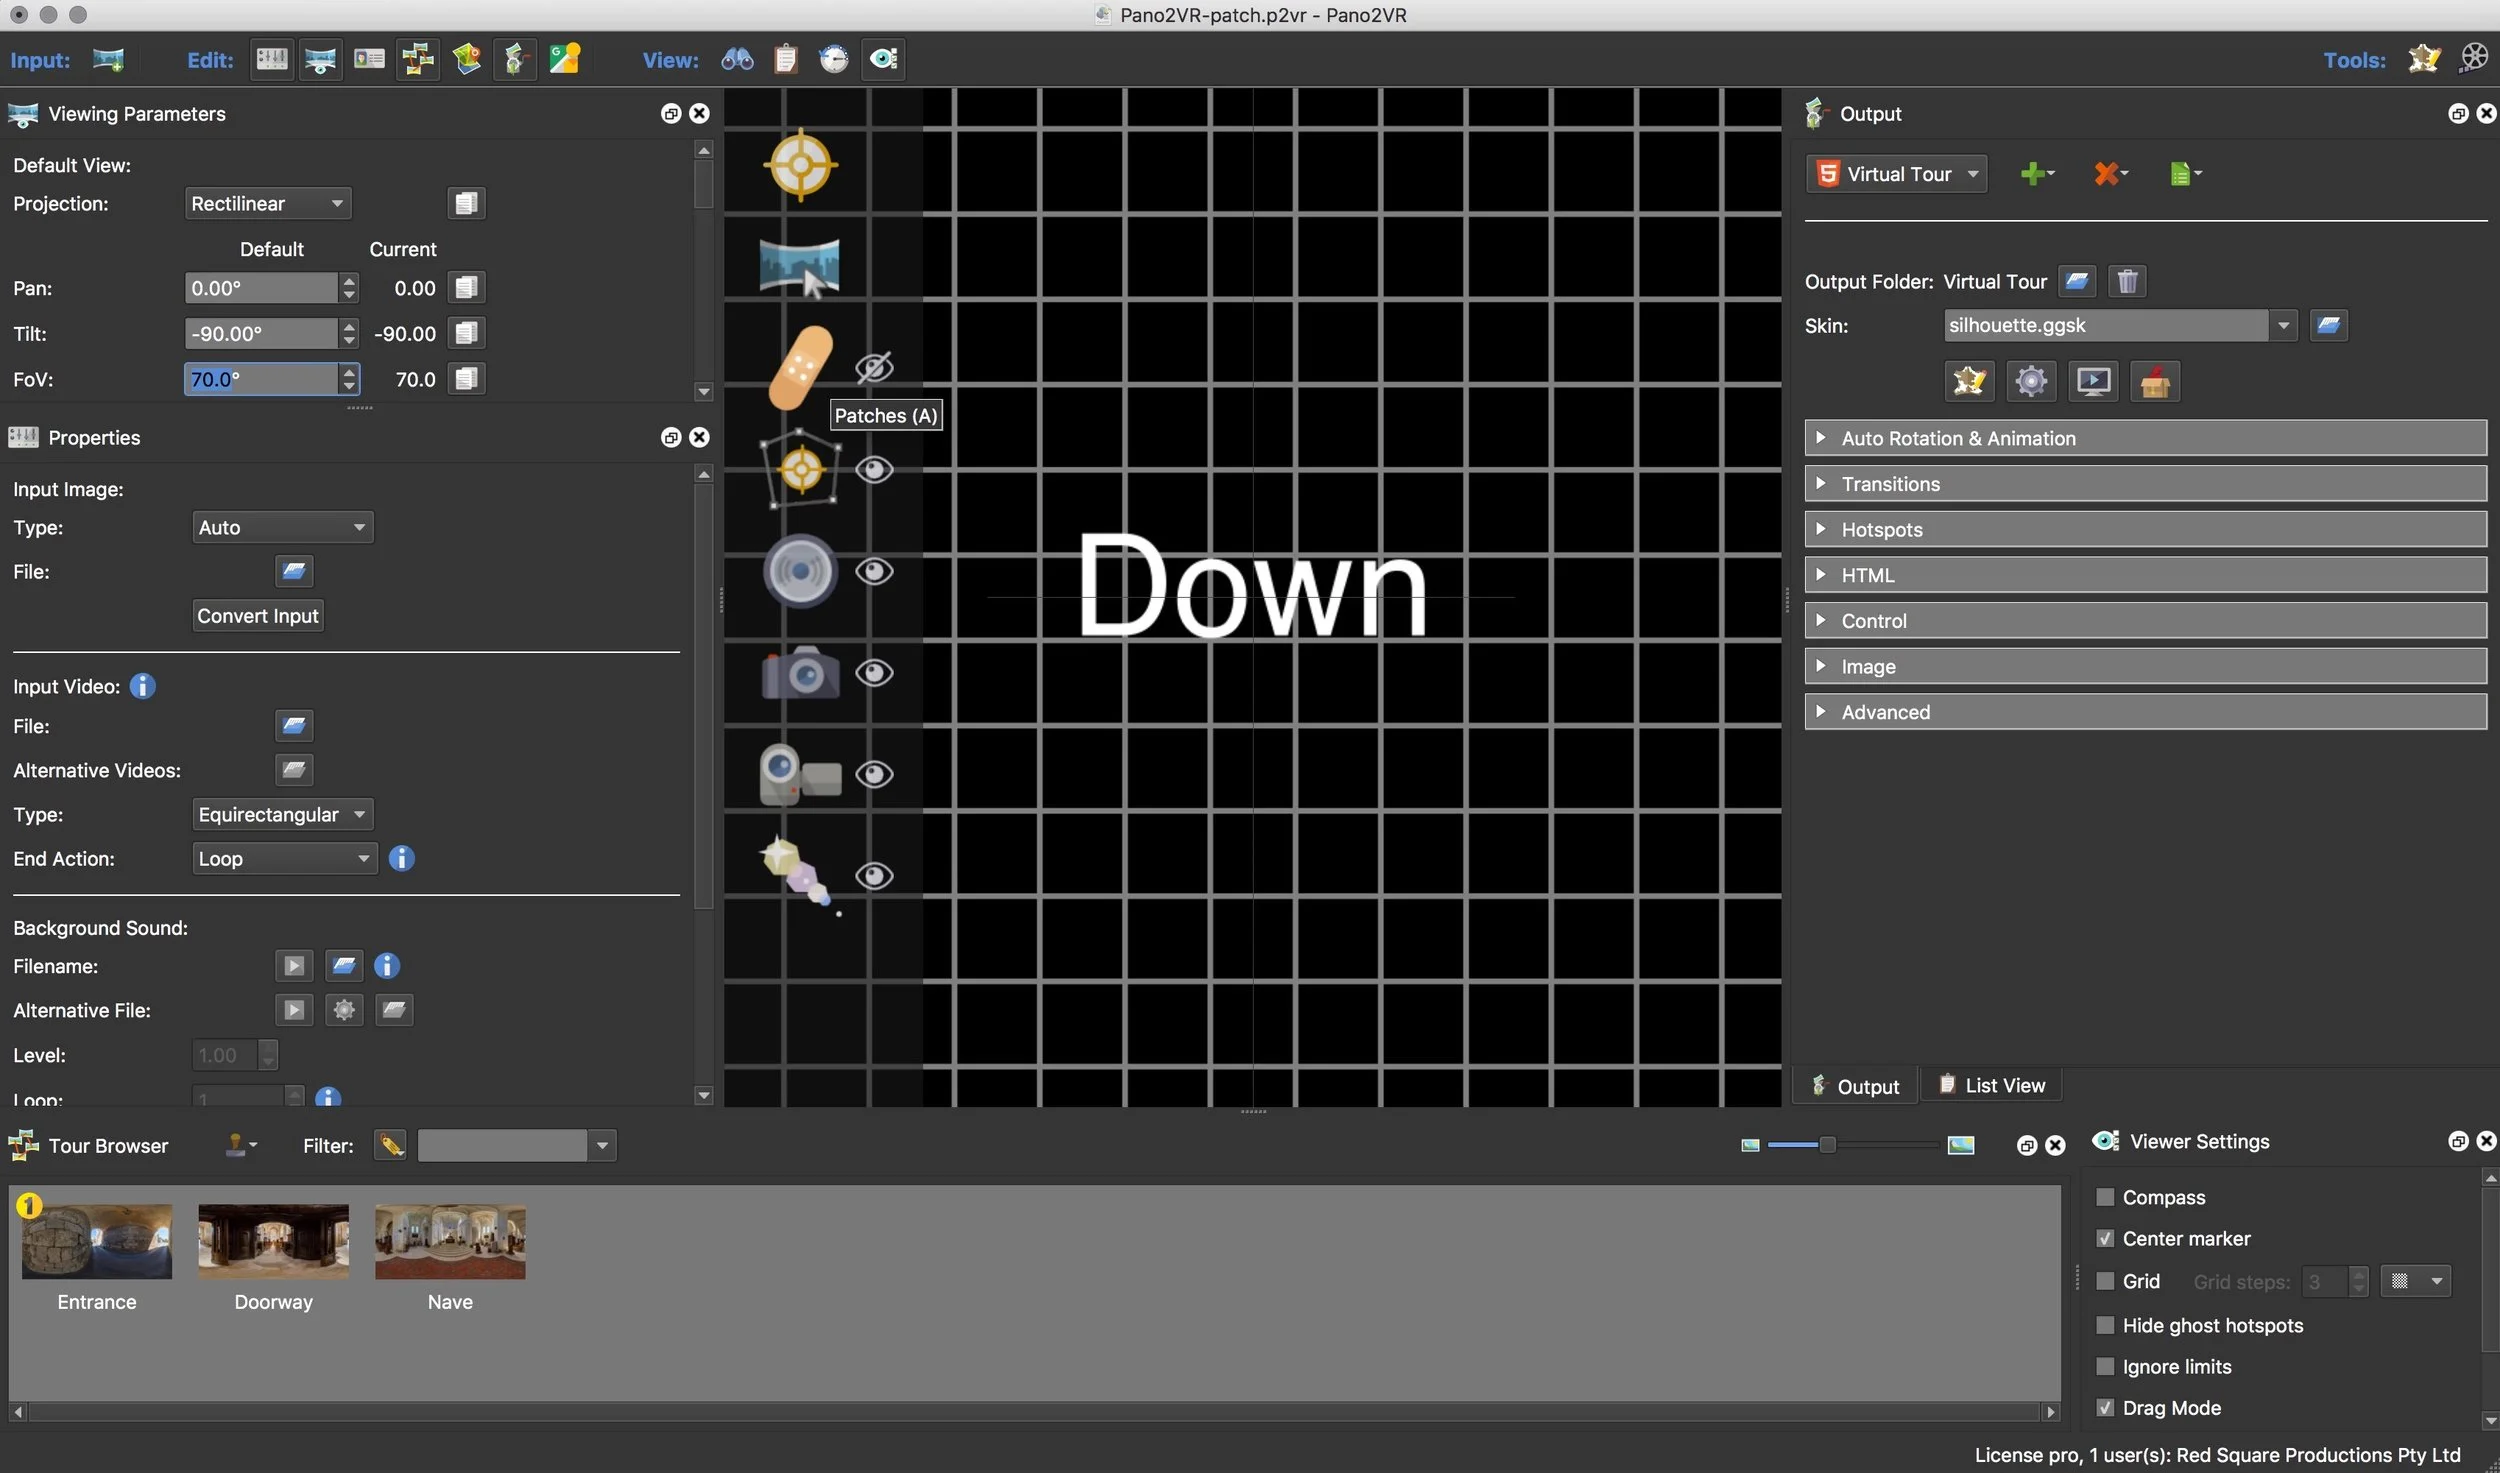
3. Change the "Projection" settings to Pan: 0.00˚, Tilt: -90.00˚, FoV: 70.0˚ to show the "Down" view of the Master Node (figure #6)
figure #6: The "Down" view of the Master Node
4. From the "Viewer Mode" select the patch (band-aid) option (figure #7)
figure #7: Select "Patch" option
5. Double-click in the Viewer to add the patch (figure #8)
The patch will be represented by a checkerboard. You can move the patch by clicking and dragging the center until it locks to the centre of the Nadir
figure #8: Patch added to Master Node
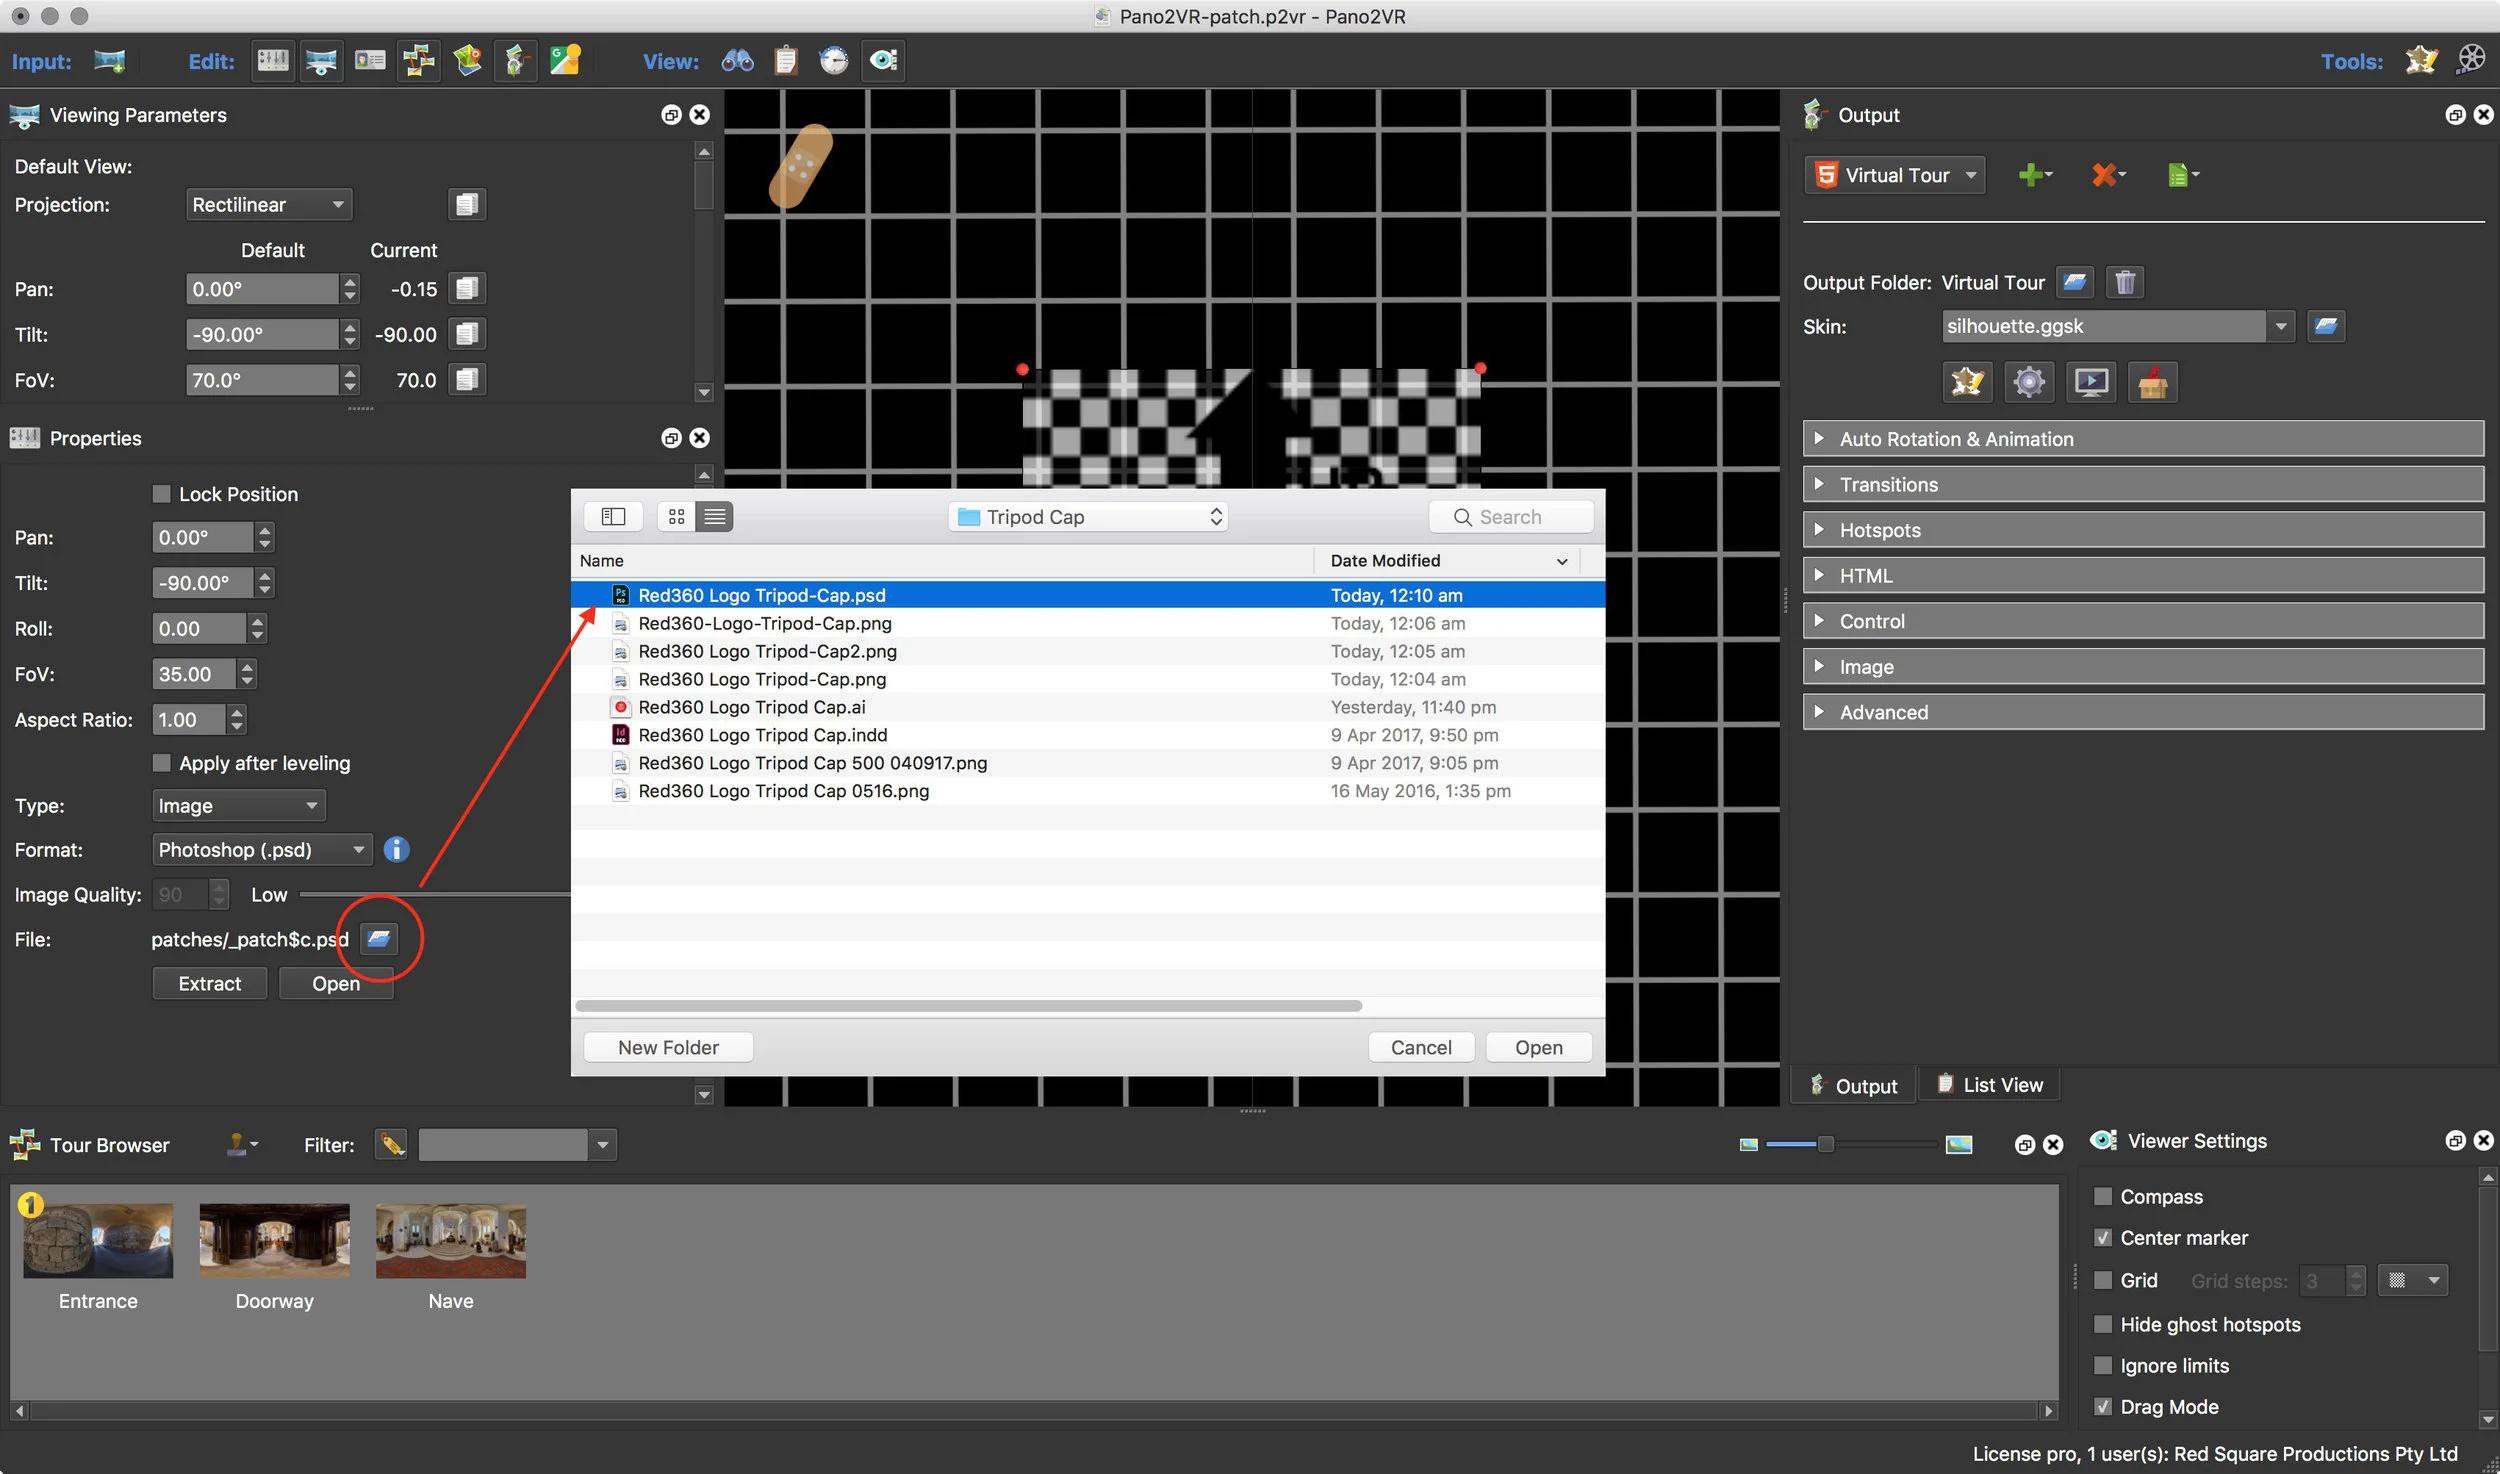
6. In the Properties Panel click on the small folder at the end of the File: entry. Locate the saved .psd file and select 'Open' to load the image into the patch (figure #9)
figure #9: Loading the image
7. The selected .psd file is loaded into the patch (figure #10)
figure #10: Tripod Cap loaded into the patch
8. The patch image can be resized by dragging on the red dots or by setting an number in the Properties: FOV (figure #11)
In this example I've set the patch FoV to 20.03
figure #11: Patch resized
9. To exit the Master Node simply click onto one of the nodes in the Tour Browser window or select Menu/Tour/Exit Master Node. The Tripod Cap is now visible in each of the tour nodes. See the Virtual Tour below...


