About the Tutorial
In Part 1. this tutorial takes you, step-by-step through the process of calculating your multi-resolution tile and level sizes to create the perfect set of tiles for your project. In Part 2. I look at extracting the high resolution tiles, renaming them and in Part 3. re-assembling them to restore your equirectangular image.
The tutorial is based on the Macintosh OS and shows a Mac only program for renaming the tiles. At this time we are still looking for a suitable Windows application and would appreciate any feedback or recommendations.
Update 5/02/18: Yet another free Windows application has been brought to my attention, it's called Bulk Rename Utility
Update 27/03/18: Another free Windows application has been brought to my attention, it's called Advanced Renamer.
Update 26/02/18: There is a free Windows application called Faststone Image Viewer that has renaming functions. Here is a link to the tutorial Image Sorting and File Renaming
Note: this tutorial assumes a working knowledge of Pano2VR V5.2.3
This tutorial is broken down into 3 parts, this is Part 2: Extracting and Renaming the Tiles. The parts of the tutorial are;
Part 1. Create the Tile Size and Levels
Part 2: Extracting and Renaming the Tiles
Part 3. Reconstructing the Panorama
Part 2: Extracting and Renaming the Tiles
In this part of the tutorial we are going to look at the best way to set up our tiles so we can easily extract them from the project and rename them.
Naming Convention
As you have seen in Part 1. there is a distinct naming convention for the tiles. To recap here is the final Tile output from Step 1 (figure #1)

figure #1: Tile output from Part 1
As you can see from the image above the structure is node1/cf_0/l_3/c_0 this can be broken down to:
node1 = node number of the panorama
cf_0 = cube face 0
l_3 = level 3 (levels start at 0)
c_0 = column 0
Note: This structure makes it difficult to rename the files as each column contains the same number of files with exactly the same names. If we try to copy all the tiles to one folder we will only have the option to replace or skip (figure #2)

Figure #2: Copy options
Fortunately Pano2VR allows us to choose different tile structures or make our own. Under the 'Output/Advanced' dropdown there is a section 'Multiresolution/Filename' and a dropdown with several different structures.
Update: June, 2020: A bug in the Multiresolution Filename prevents us from using %C in the string so I’ve created a new one until the bug is fixed.
In this example we will create our own structure as follows;
tiles/$n/cubeface_%c/level%L/row_%00Y_col_%00X.jpg
Old version: (tiles/$n/cf_%C/l%L/cf_%C_%00Y_%00X.jpg)
This breaks down to
$n = panorama name
cubeface%c = cubeface_0, 1 etc
level%L = level_1 (levels start at 1)
row_%00Y_col%00X.jpg = row_004_col_001001.jpg
1. Copy the new structure and paste it into the Multiresolution filename in the 'Output/Advanced/Multiresolution/Filename' dropdown (figure #3)

figure #3: Paste new structure into Filename
Note: you don't have to save it, when you save the project it's automatically saved
2. 'Save' the project
3. Click on the small 'trash can' (Erase Output Folder) in the 'Output/Output Folder' section and 'select yes' to the warning modal window.
Note: this will clear out any Pano2VR created files from the project folder and will generate a clean set of tiles (figure #4)

figure #4: Erase output folder
4. 'Output' the project
5. In the output folder navigate to 'Tiles/*Name of your Panorama*/cf_1/l4' (figure #5)

figure #5: New tile folder structure
Note: As you can see from the image rather than have each column of tiles in a separate folder they are all in one folder and each 'column' is identified by the number 001. In turn each 'image' in the column is identified by the number 001-007.jpg. This makes it much easier to rename the entire cube face of tiles using a single sequence command.
Renaming the tiles
On the Macintosh I recommend the renaming application 'NameChanger'. I use it all the time and it is perfect for the task we need it to perform and it's free! You can find out more information on the application and download it to your desktop from https://mrrsoftware.com/namechanger/
1. Copy the entire 'l4 folder' to a location outside of the project folder and rename it 'Cube1_l4'
2. Launch 'NameChanger' (figure #6)

figure #6: Name Changer application
3. With the application active select 'Menu/NameChanger/Preferences' and check 'Renaming Options: Hide extensions by default' and 'Warn before removing file extensions' (figure #7)

figure #7: Name Changer preferences
4. 'Drag and drop' all of the files from 'Cube1_l4' onto the 'NameChanger' window (figure #8 & #9)

figure #8: Select all files

figure #9: Drag and drop onto NameChanger
5. Select 'Sequence' from the dropdown menu in the centre of the window (figure #10)

figure #10: Select 'Sequence' from the dropdown menu
6. 'Configure' the Sequence as per the image below.
Note: As you make changes the results are shown in the 'Rename Filename' column (figure #11)

figure #11: Sequence configuration to create cube1-'sequence'
7. To make sure that you have all the correct tiles click on the 'Image Browser' button at the top right to open a window displaying all of the tiles in order (figure #12)

figure #12: Image browser view of the renamed tiles

8. Save the sequence configuration by selecting 'Menu/Renames/Save Current Rename/' and naming it 'Cube1' (figure #13)

figure #13: Save the Current Rename as Cube1
9. Click on the 'Rename' button to confirm the changes. (figure #14)

figure #14: Rename button
10. The files in the Rename Filename column are changed and the 'Rename Complete' message is displayed (figure #15)
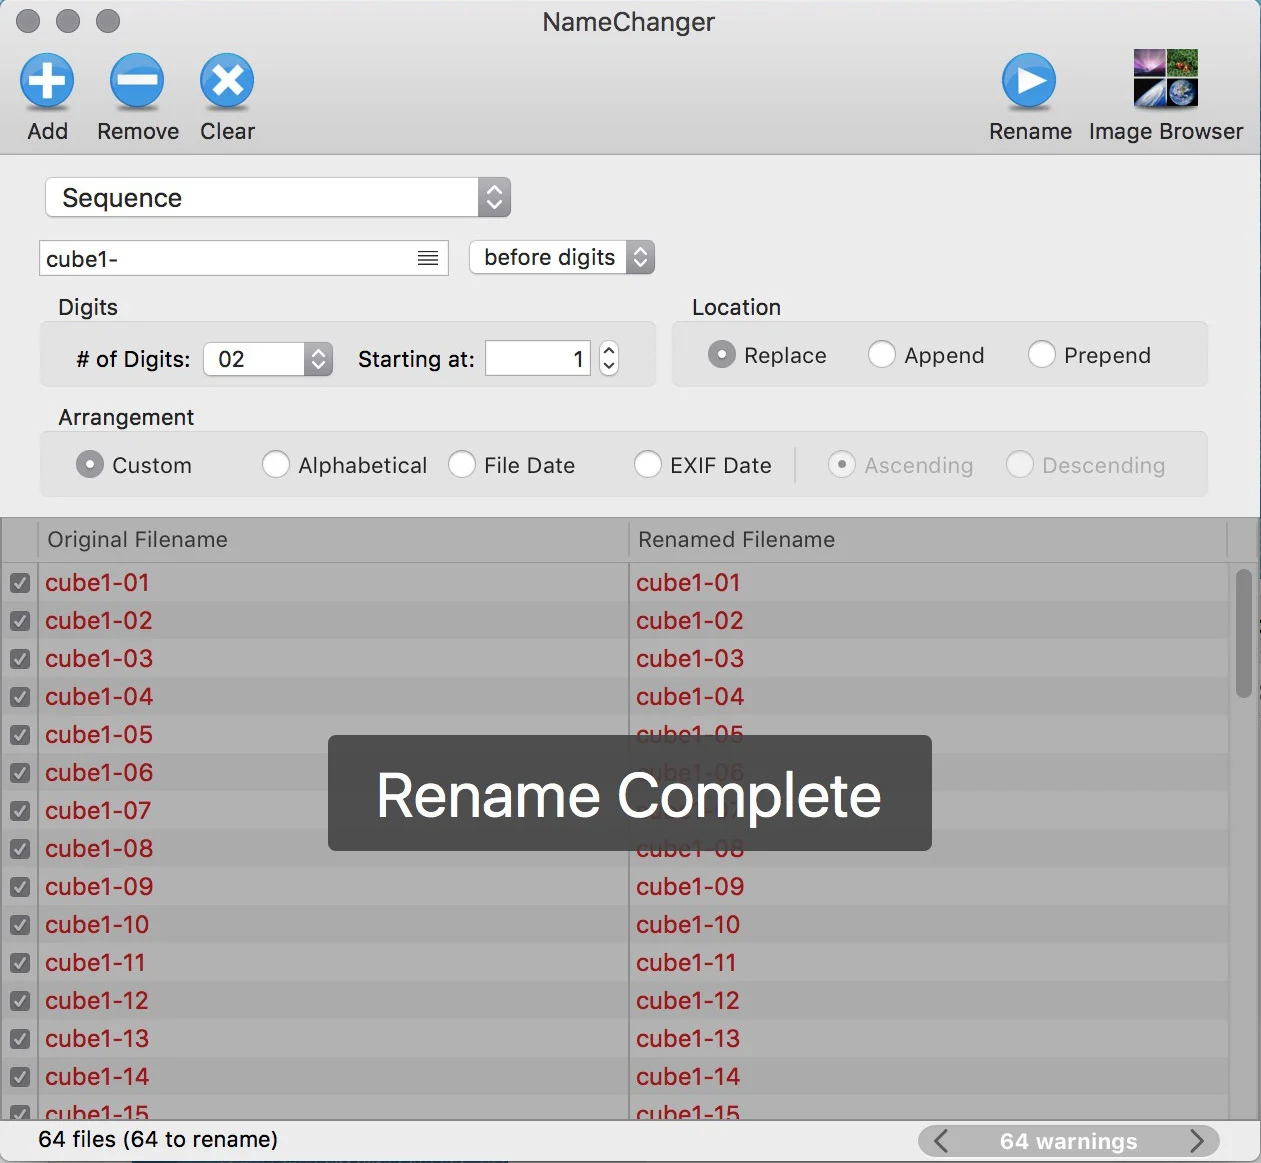
figure #15: Rename Complete
Note: You can ignore the 'warning' message
11. 'Navigate to the Cube1_l4' folder and you will see that the tiles in the folder have been renamed (figure #16)

figure #16: Cube1_l4 tiles renamed
12. In NameChanger select 'Clear' to remove the current tiles (figure #14)
13. Repeat 'step 1' and copy the remaining 5 Cube faces until you have 6 folders 'Cube1_l4 - Cube6_l4'
14. Repeat 'step #4' with 'Cube2_l4'
Note: if you don't close NameChanger between renames the Sequence option will still be selected
14. Change the rename from 'Cube1-' to 'Cube2-'
15. Repeat 'step #8' and 'Save Current Rename' the sequence configuration as 'Cube2'
16. Repeat steps #9 & #11
17. Do the same for the remaining Cube folders
That finishes Part2. Extraction and Renaming of this tutorial you are now ready to move onto the final Part3. Reassemble the Cube Faces.
