Overview - Part 9
In this section, we will look at Setting Project Colors using the Edit Skin Configuration window
Note: If you skipped Part 2: Adding Externalised Colors you will need to go back and finish the tutorial so you can follow along with me. Alternatively you can simply set up your own color theme by following Martin Hopkins video tutorial
Setting Colors
Note: The RPGT Component can be used across a range of tours and it’s useful to be able to match a client’s brand and color specifications without having to go into the skin.
We can do this by exposing colors, once again Martin’s tutorial is required reading!
In the tutorial to date I have the basic blue popup windows, background tint and colored Custom Images. I want to modify the colors of the popup windows and default hotspot images to match the colors in the Custom Images.
1. Start by removing the Camera and Image custom images
2. Open the RPGT_Tutorial_Simplex.p2vr project if it’s not already open
3. Select the Custom Image you want to remove, right-click on the link and select ‘Clear’ (figure #1)
Figure #1: delete the Camera custom hotspot Image
4. Open the Edit Skin Configuration window (figure #2)
Note: under Skin Colors the exposed elements are listed on the left. (figure #2)
The first element to change will be the default hotspot images.
I want them to match the brown and gold of the Australia map.svg whose colors have hex values of brown: #a85e00 and gold #ffac00
I sourced these values by opening the .svg in Illustrator. (figures #3)
Figure #2: Skin Colors in Edit Skin Configuration
Figure #3: Color picker in Illustrator
Note: The elements that make up the default icons are exposed to the Skin Colors with the names Hotspot BG:, Hotspot Icon: and Hotspot Shadow.
You can see that by selecting the ht_info_image element, clicking on the Color Tool and then the dropdown arrows. (figure #4).
Figure #4: ht_info_image element viewed with the Color Tool showing Skin Color values
6. Click in the Hotspot BG: Modifier square to open the Select Color window
7. Paste the hex code #a85e00 into the HTML: field (figure #5)
Figure #5: selecting the modifer to open the Select Color window
8. Select OK to close the Select Color window and update the Edit Skin Configuration Skin Colors (figure #5)
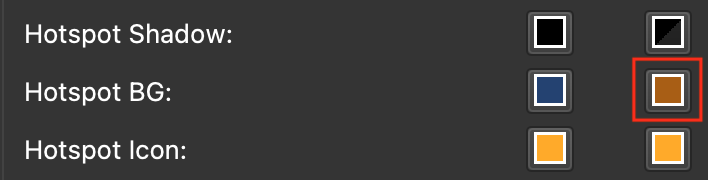
Figure #5: Hotspot BG: color updated
Note: as the Hotspot Icon is already the same color as the australia_map_shadow.svg we don’t need to change the Hotspot Icon.
However I do want to reduce the shadow effect! This is an interesting example because the color has been exposed including an alpha value. This means we can not only change the color of the element but we can also change the alpha value.
9. Click in the Hotspot Shadow: Modifier square to open the Select Color window
7. Set the Alpha Channel to 125 (figure #6)
Figure #6: Setting the Alpha Channel of the Hotspot Shadow modifier
9. Close the Edit Skin Configuration window
10. Output the project (figure #7)
Figure #7: ht_info_image element hotspot images updated with new colors
Note: The next step is to change the rct_popup_bg of the popup. The image below shows the exposed value of the element (figure #7)
Figure #7: rct_popup_bg element viewed with the Color Tool showing Skin Color values
11. Open the Edit Skin Configuration window
12. Click in the Popup BG: Modifier square to open the Select Color window
13. Paste the hex code #a85e00 into the HTML: field
14. Close the Edit Skin Configuration window
15. Output the project (figure #8)
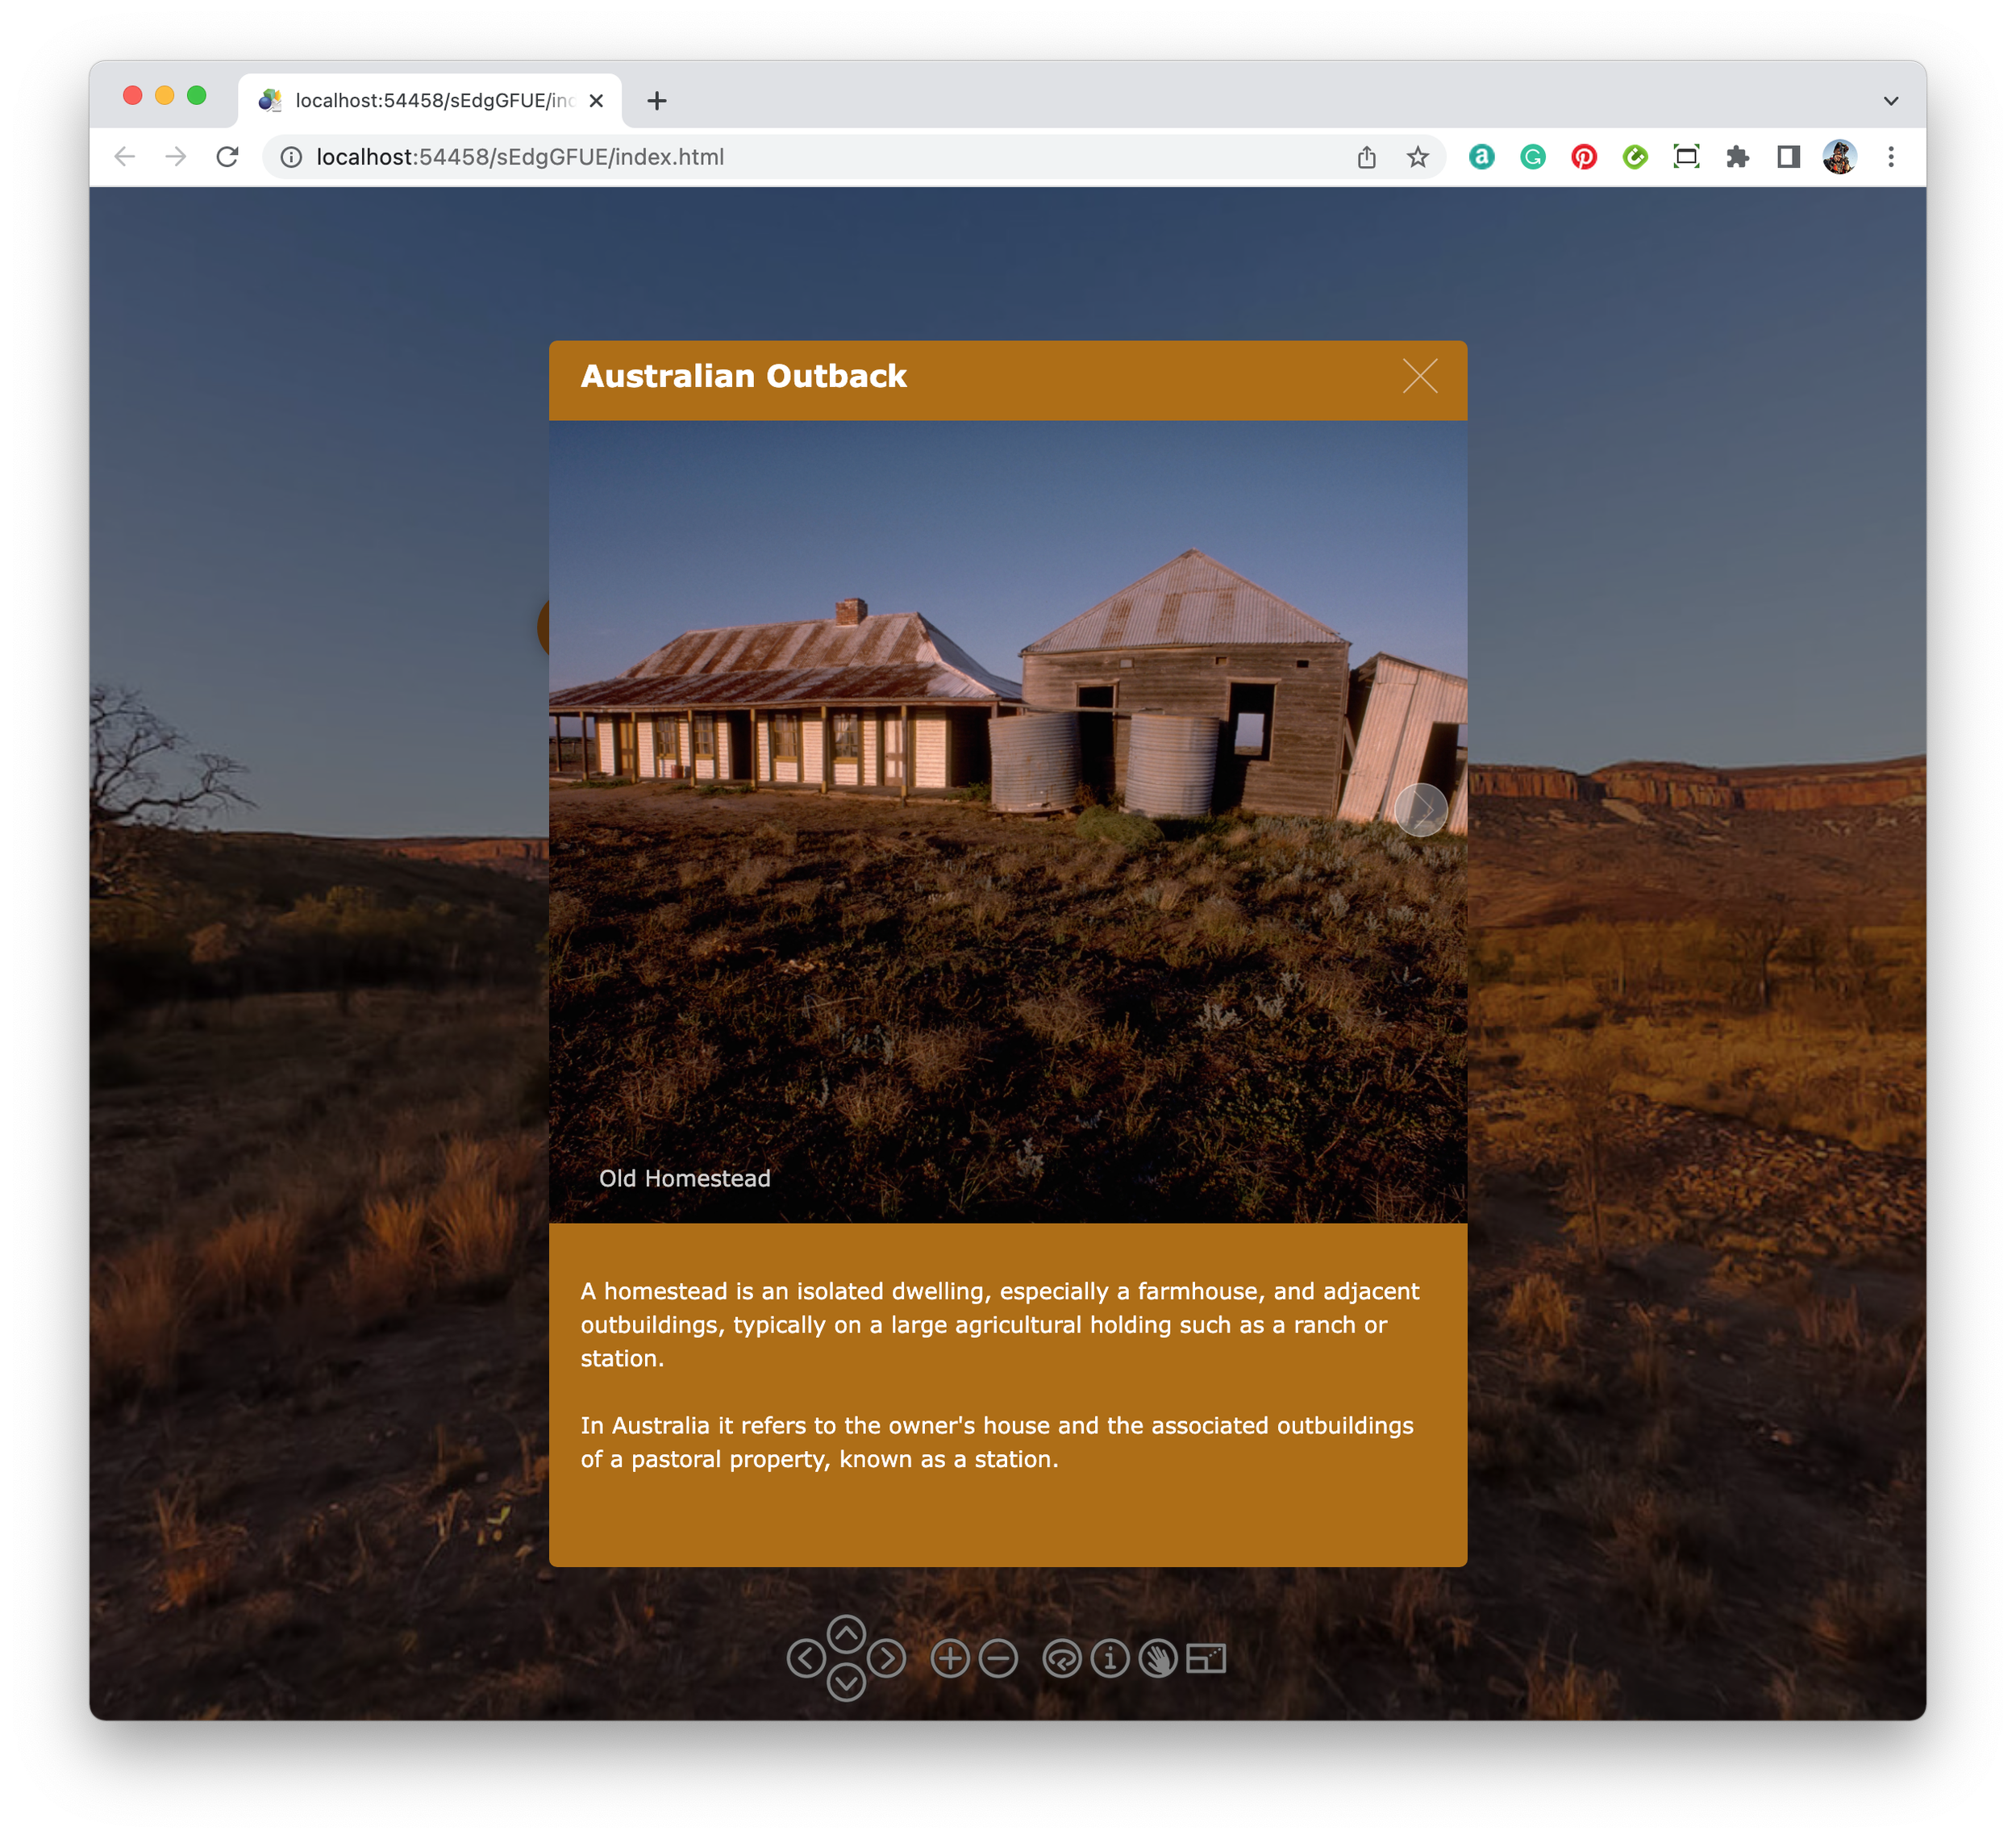
Figure #8: rct_popup_bg element updated with a new color
Note: The last step is to change the color of the rct_screentint. The image below shows the exposed value of the element. (figure #9)
Figure #9: rct_screentint element viewed with the Color Tool showing Skin Color values
16. Open the Edit Skin Configuration window
17. Click in the Screentint: Modifier square to open the Select Color window
18. Paste the hex code #f98100 into the HTML: field and set the Alpha channel: to 150 (figure #10)
Figure #10: rct_screentint element skin color modifications including color and alpha
Note: you can see the Alpha attribute in the Skin Color modifier window as a darker version of the base color
Figure #11: modifier showing Alpha attribute
19. Output the project
Note: This is the end of Part 9 move onto Part 10: Simplex & RPGT Interaction and Variable Previews
