Part 4: PhoneGap App Build and Deployment to iPad
This, step by step, tutorial describes how to use Adobe PhoneGap to create an app that you can install on your iOS device to play Pano2VR or Krpano projects offline. It can also be used to distribute apps to clients for use on their specified iOS devices.Finishing up
The tutorial is presented in four different parts, this is Part 4.
Note: This tutorial is designed for users on Apple Computers and iOS devices iPhone and iPad. In order to create a PhoneGap build containing your VR project you will need to have an Adobe ID, an Apple ID and an Apple Developer Account. If you have all of these then continue with this tutorial. If not please follow the step by step instructions in Part 1: ID's, Apple Developer and PhoneGap Build Accounts
Part 1: Adobe ID, Apple ID, Apple Developer Account
- Creating your Adobe ID
- Creating your Apple ID
- Signing up for an Apple Developer Account
- Setting up the Certificate
- Generating the Certificate Signing Request (CSR) file
- Creating the iOS Development Certificate
- Creating the .p12 Certificate
- Creating the App ID
- Register Devices
- Provisioning Profile
Part 3: Project and Required Files
- Assets
- Config.xml
Part 4: Preparation, Required Files, App Build and Deployment
- PhoneGap App Build
- Deploying to iOS
Before we start:
Finally all the hard stuff is behind us and we are ready to build our app. We will zip up our project file, log into Adobe PhoneGap Build, upload our project, assign the .p12 and mobileprovision certificates and then build the app. Finally using a QR code on PhoneGap we will download and install the app on our iPad.
Zip our project file
1. Go to the PhoneGap_Assets folder and locate the myapp projects
2. Right click on either the Pano2VR or Krpano folder and select "Compress myapp_(p2vr/krpano)" to create the .zip file. In my example I'll use the myapp_p2vr folder (figure #1)
figure #1: myapp_p2vr zip file
Create a new PhoneGap App
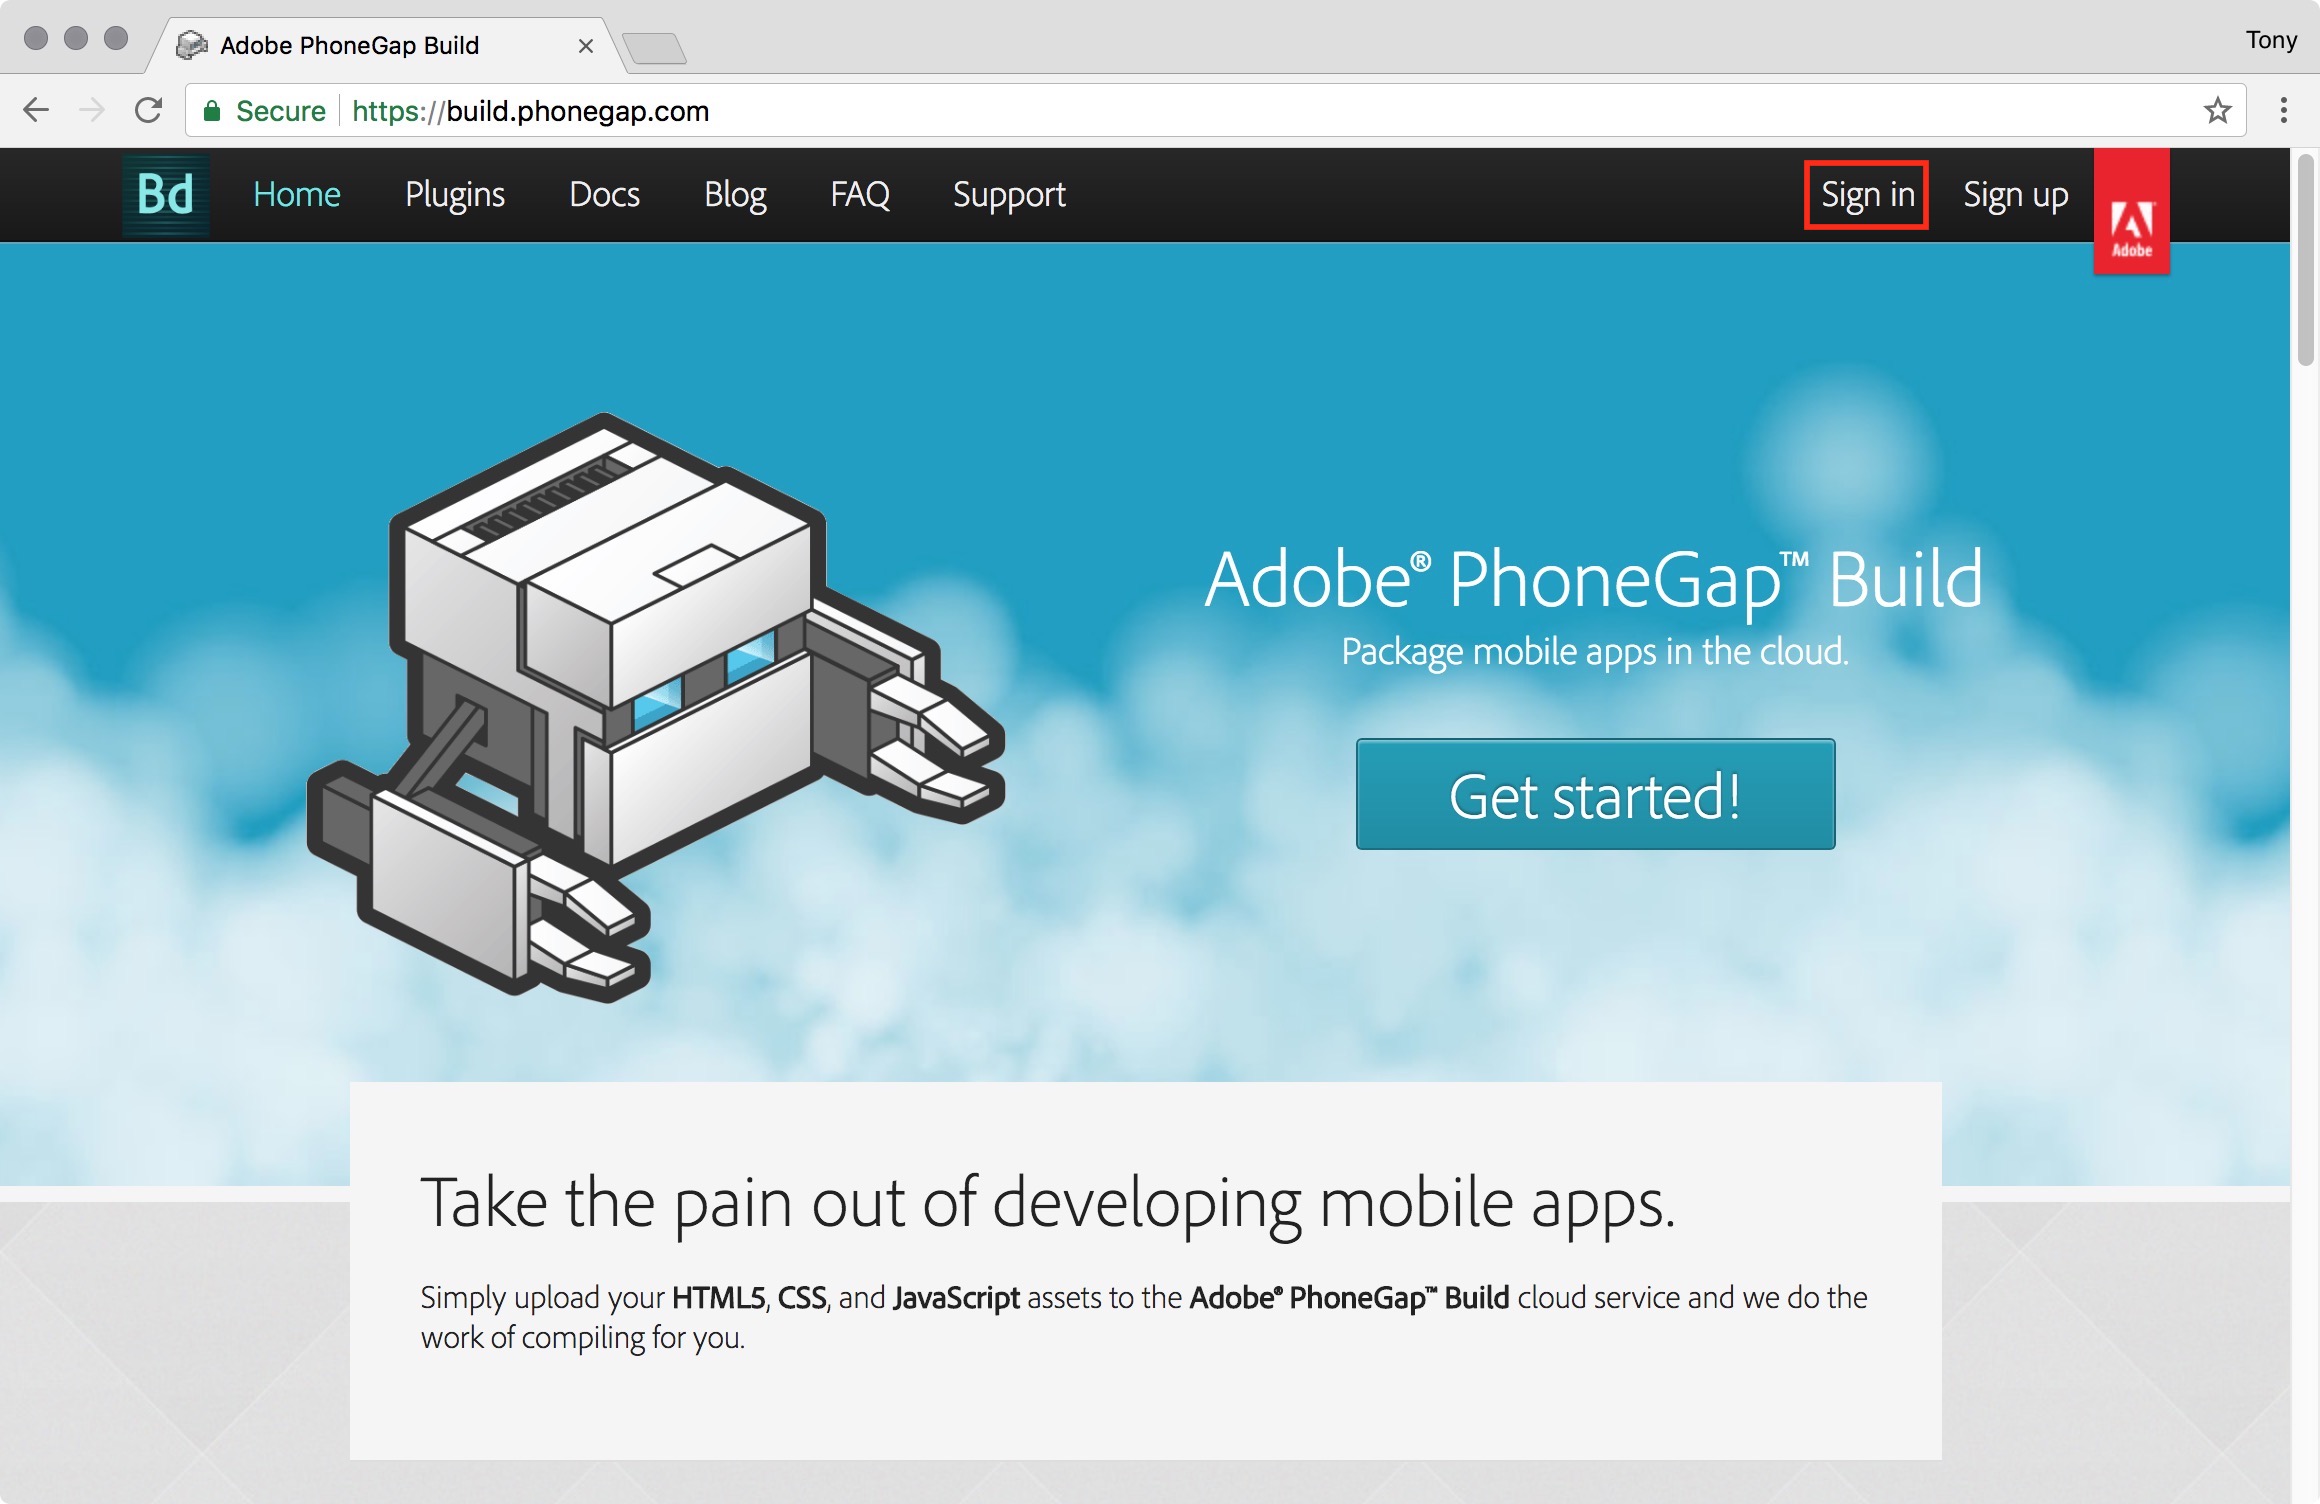
1. Browse to https://build.phonegap.com and Sign in to your account (figure #2)
figure #2 : Sign in to PhoneGap Build
Note: if this is your first time experience creating an app in PhoneGap the Your apps page will be empty
1. Click on 'Upload a .zip file' (figure #3)
figure #3: Your Apps page and Upload button
2. Browse to the Project folder and select the .zip file. In my case it will be myapp_p2vr.zip, select 'Open' (figure #4)
figure #5: Select the myapp.zip file
The page refreshes and the 'Uploading file' animation is played (figure #6)
Note: if you want to check progress of your upload in Chrome the percentage upload is displayed in the lower left corner of the browser
figure #6: Uploading the myapp_p2vr.zip file
When the upload is finished the page refreshes to show the App information screen. The icon and name of the app is shown along with other information about the app such as the App ID, Version etc. (figure #7)
figure #7: MyApp Pano2VR in PhoneGap
3. Click on the 'red' iOS button to expand the information screen and show additional functions. Before we can build the app we need to upload two of the certificates we have created previously. (figure #8)
figure #8: iOS button
Note: On the bottom of the screen it shows us that there is 'No key selected' and as a result there is an 'Error' (figure #9)
4. Click on the dropdown menu 'No key selected'
figure #9: No key selected
5. Select 'add a key ...' (figure #10)
figure #10: add a key...
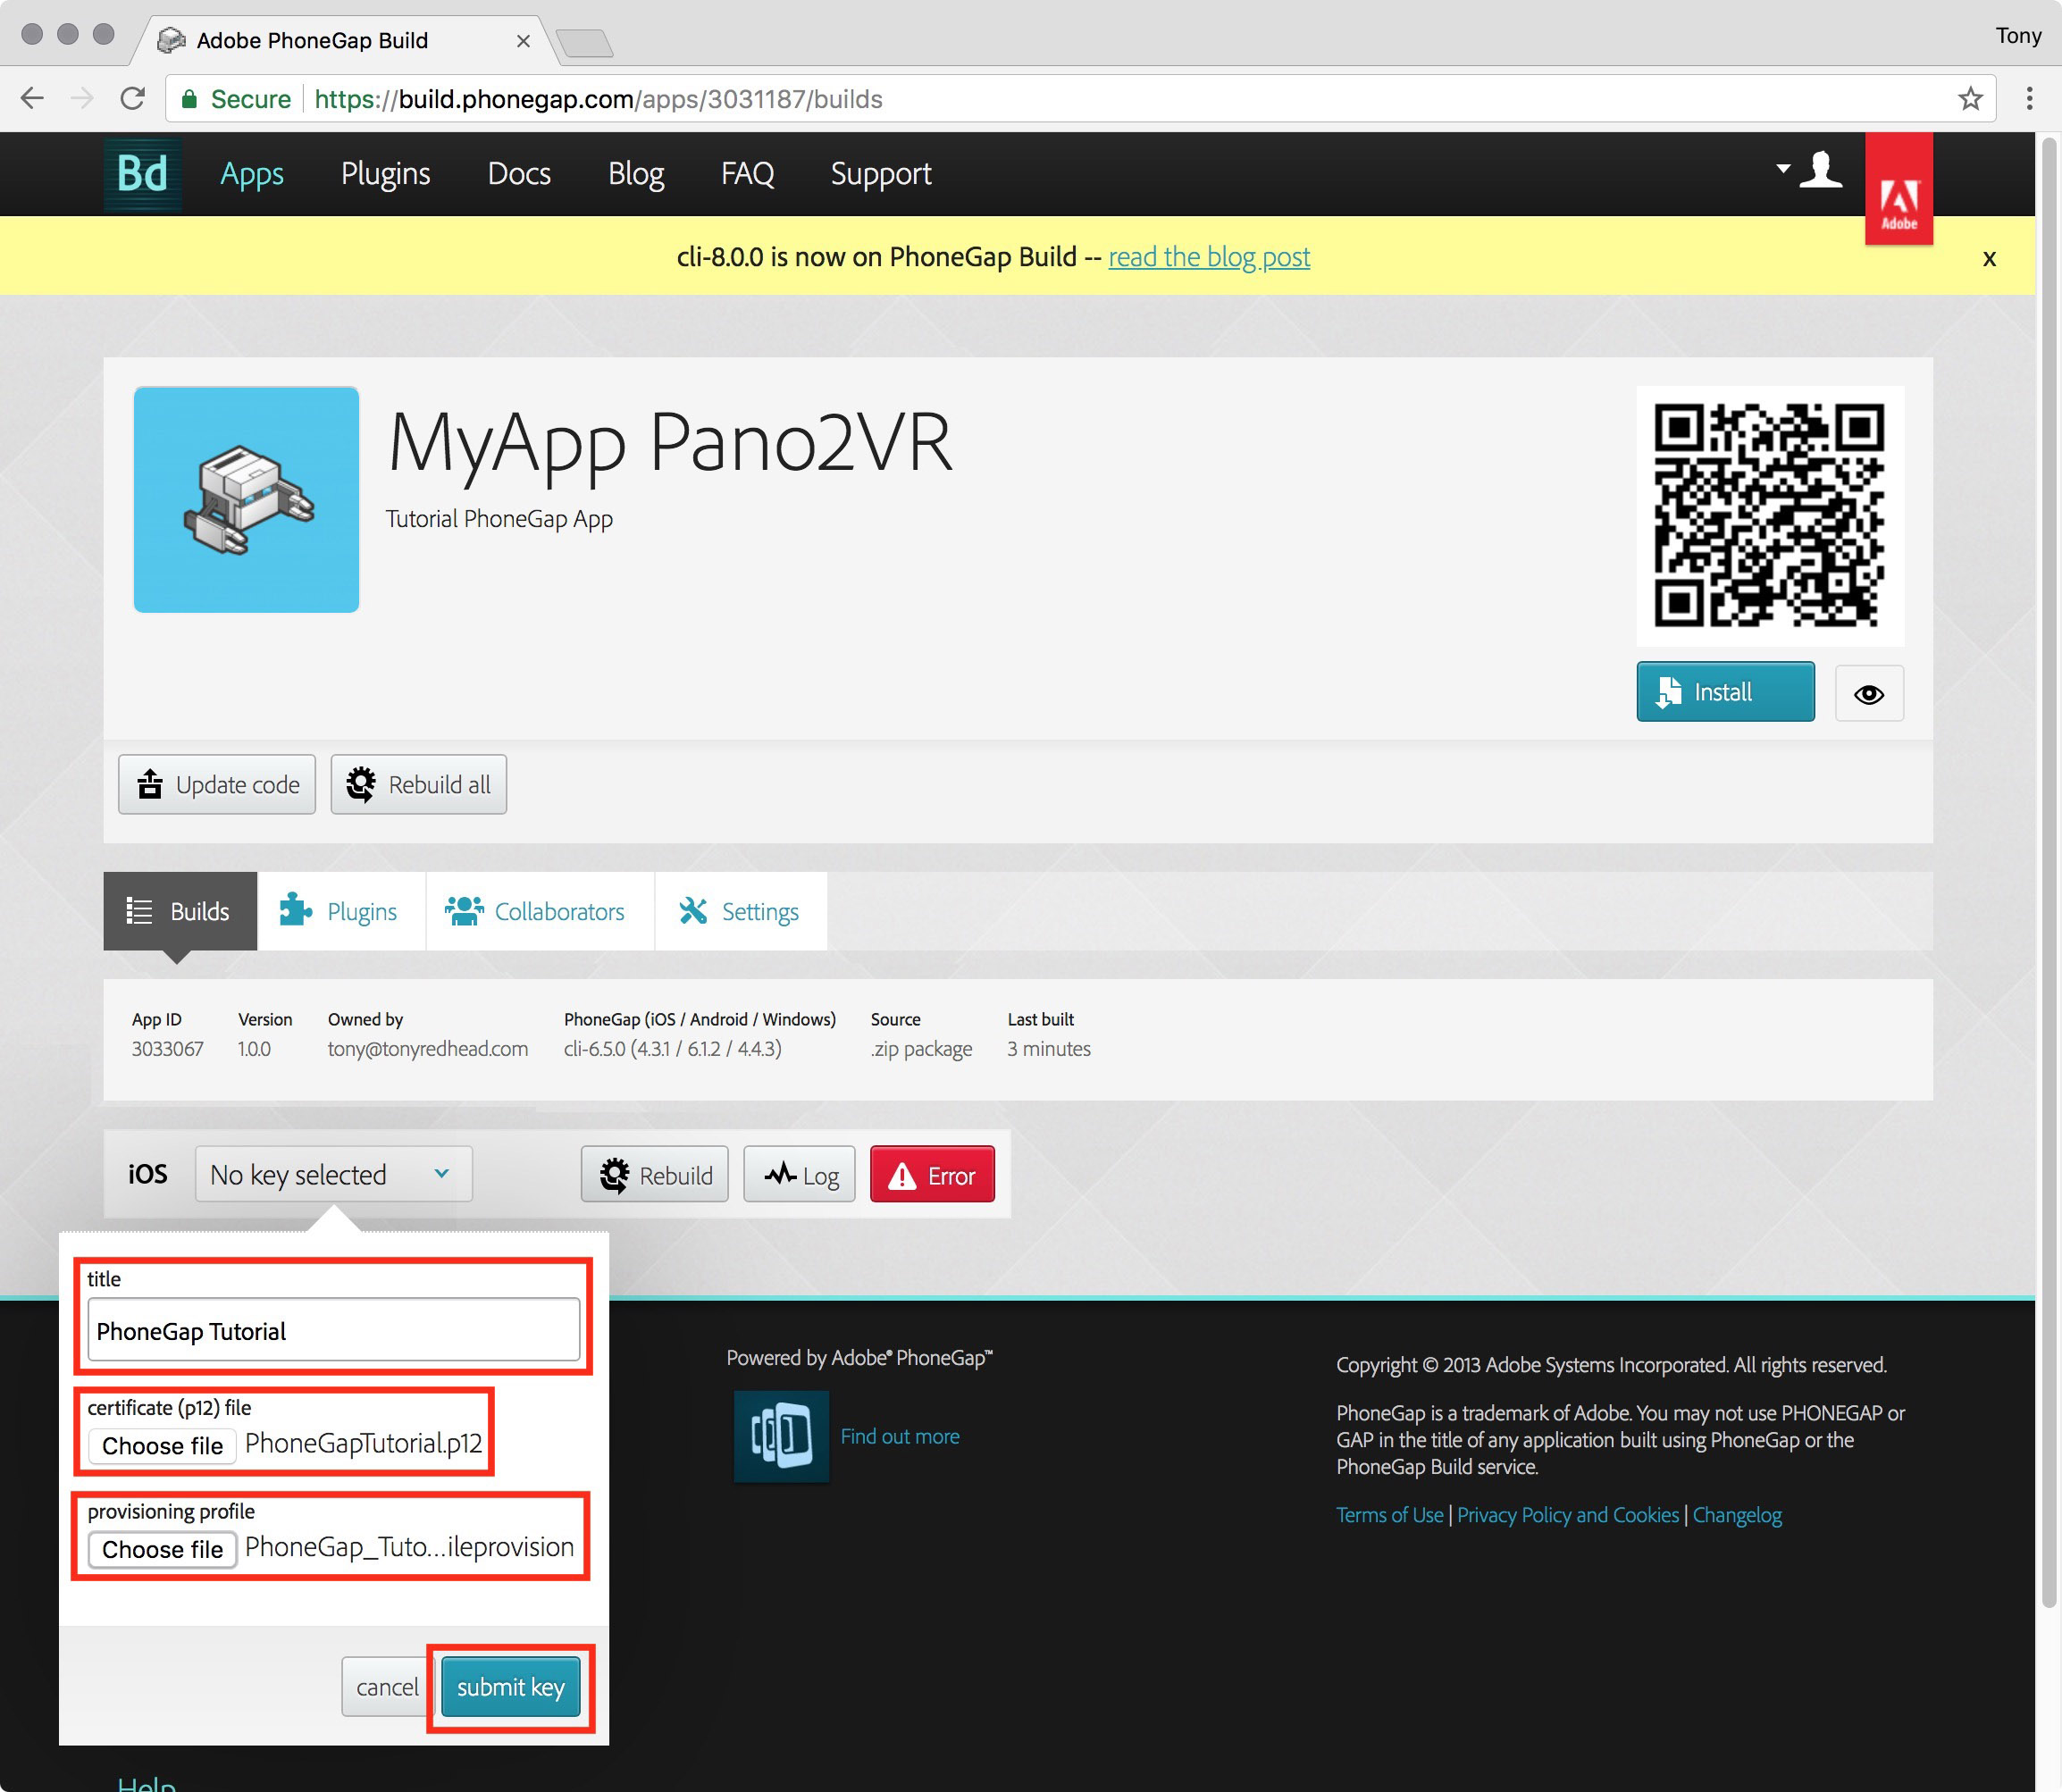
6. Add a name for the Key, Use PhoneGap Tutorial, under certificate (p12) file select 'Choose File' and select PhoneGapTutorial.p12 file, under provisioning profile select 'Choose File' and select PhoneGap_Tutorial_0301.mobileprovisioning file.
Once you've added in your certificates click on 'Submit Key' (figure #11)
figure #11: Adding in the certificates
Note: PhoneGap will try to install the keys but a locked symbol will appear in the Key window. Don't worry we have to unlock the certificates using the password we created back in Part 2b 'Creating the .p12 Certificate'
7. Click on the yellow 'Lock' button to open the key menu. Enter your password, check 'Set as your default key' and then click on 'Submit Key' (figure #12)
figure #12: Unlocking the Key
8. The iOS key now shows as PhoneGap Tutorial. Click on the 'Rebuild' button (figure #13)
figure #13: Rebuild
The page will refresh an animation and the notification 'pending' are displayed (figure #14)
figure #14: rebuild pending
Once PhoneGap has finished the build the page refreshes and the 'Error' button has gone and the build has been successful because we have an 'ipa' download button (figure #15)
figure #15: Rebuild successful
Install on your iPad
I find the fastest way to install the app on your iPad is to install a QR code reader app first. I use Scan - QR Code, Barcode Reader available on the iTunes App Store.
With the QR code app installed, open it and point your iPad camera to the QR code on your PhoneGap app. (figure #16)
figure #16: QR scan on the iPad
1. After scanning a page will open in Safari asking if you would like to install your app. Tap on 'Install' (figure #17)
figure #17: App install message
2. Swap back to the desktop and you will see that the app is starting to download and then fully install (figure #18 & 19)
figure #18: Installing
figure #19: Installed and ready to launch
3. Tap on the MyApp Pano2VR icon to launch it, your Pano2VR project is now running natively on the iPad (figure #20)
figure #20: Pano2VR project running natively on the iPad
Building More Apps
Now that we have put in place all the required logins, Apple Certificates creating additional iOS apps becomes very easy.
Because we built our App ID using a wildcard it means that in order to create a new app all we have to do is change the name of the app in the ID value in the config.xml file from com.phonegaptutorial.myapp to the name of the new app. For example if I've created a new Pano2VR or Krpano project called 'temple' then I'd change the ID value in the config.xml file to id="com.phonegaptutorial.temple" and then zip up the file.
The next steps would be to;
1. Login in to Adobe PhoneGap Build
2. Select '+ new app'
3. Upload the new .zip file
4. Click on the red 'iOS' button
5. Select the key 'PhoneGap Tutorial'
6. The new app is built and ready to be installed
This concludes Part 4, and the end of this tutorial.
If you've reached this point and you have successfully built your app, downloaded and installed it on your iOS device, congratulations. If you have any feedback,comments or issues on the tutorial I'd be very happy to hear them.
For those of you interested or working on Android I have a version of this tutorial specifically for Android.
Thank you,
Tony


