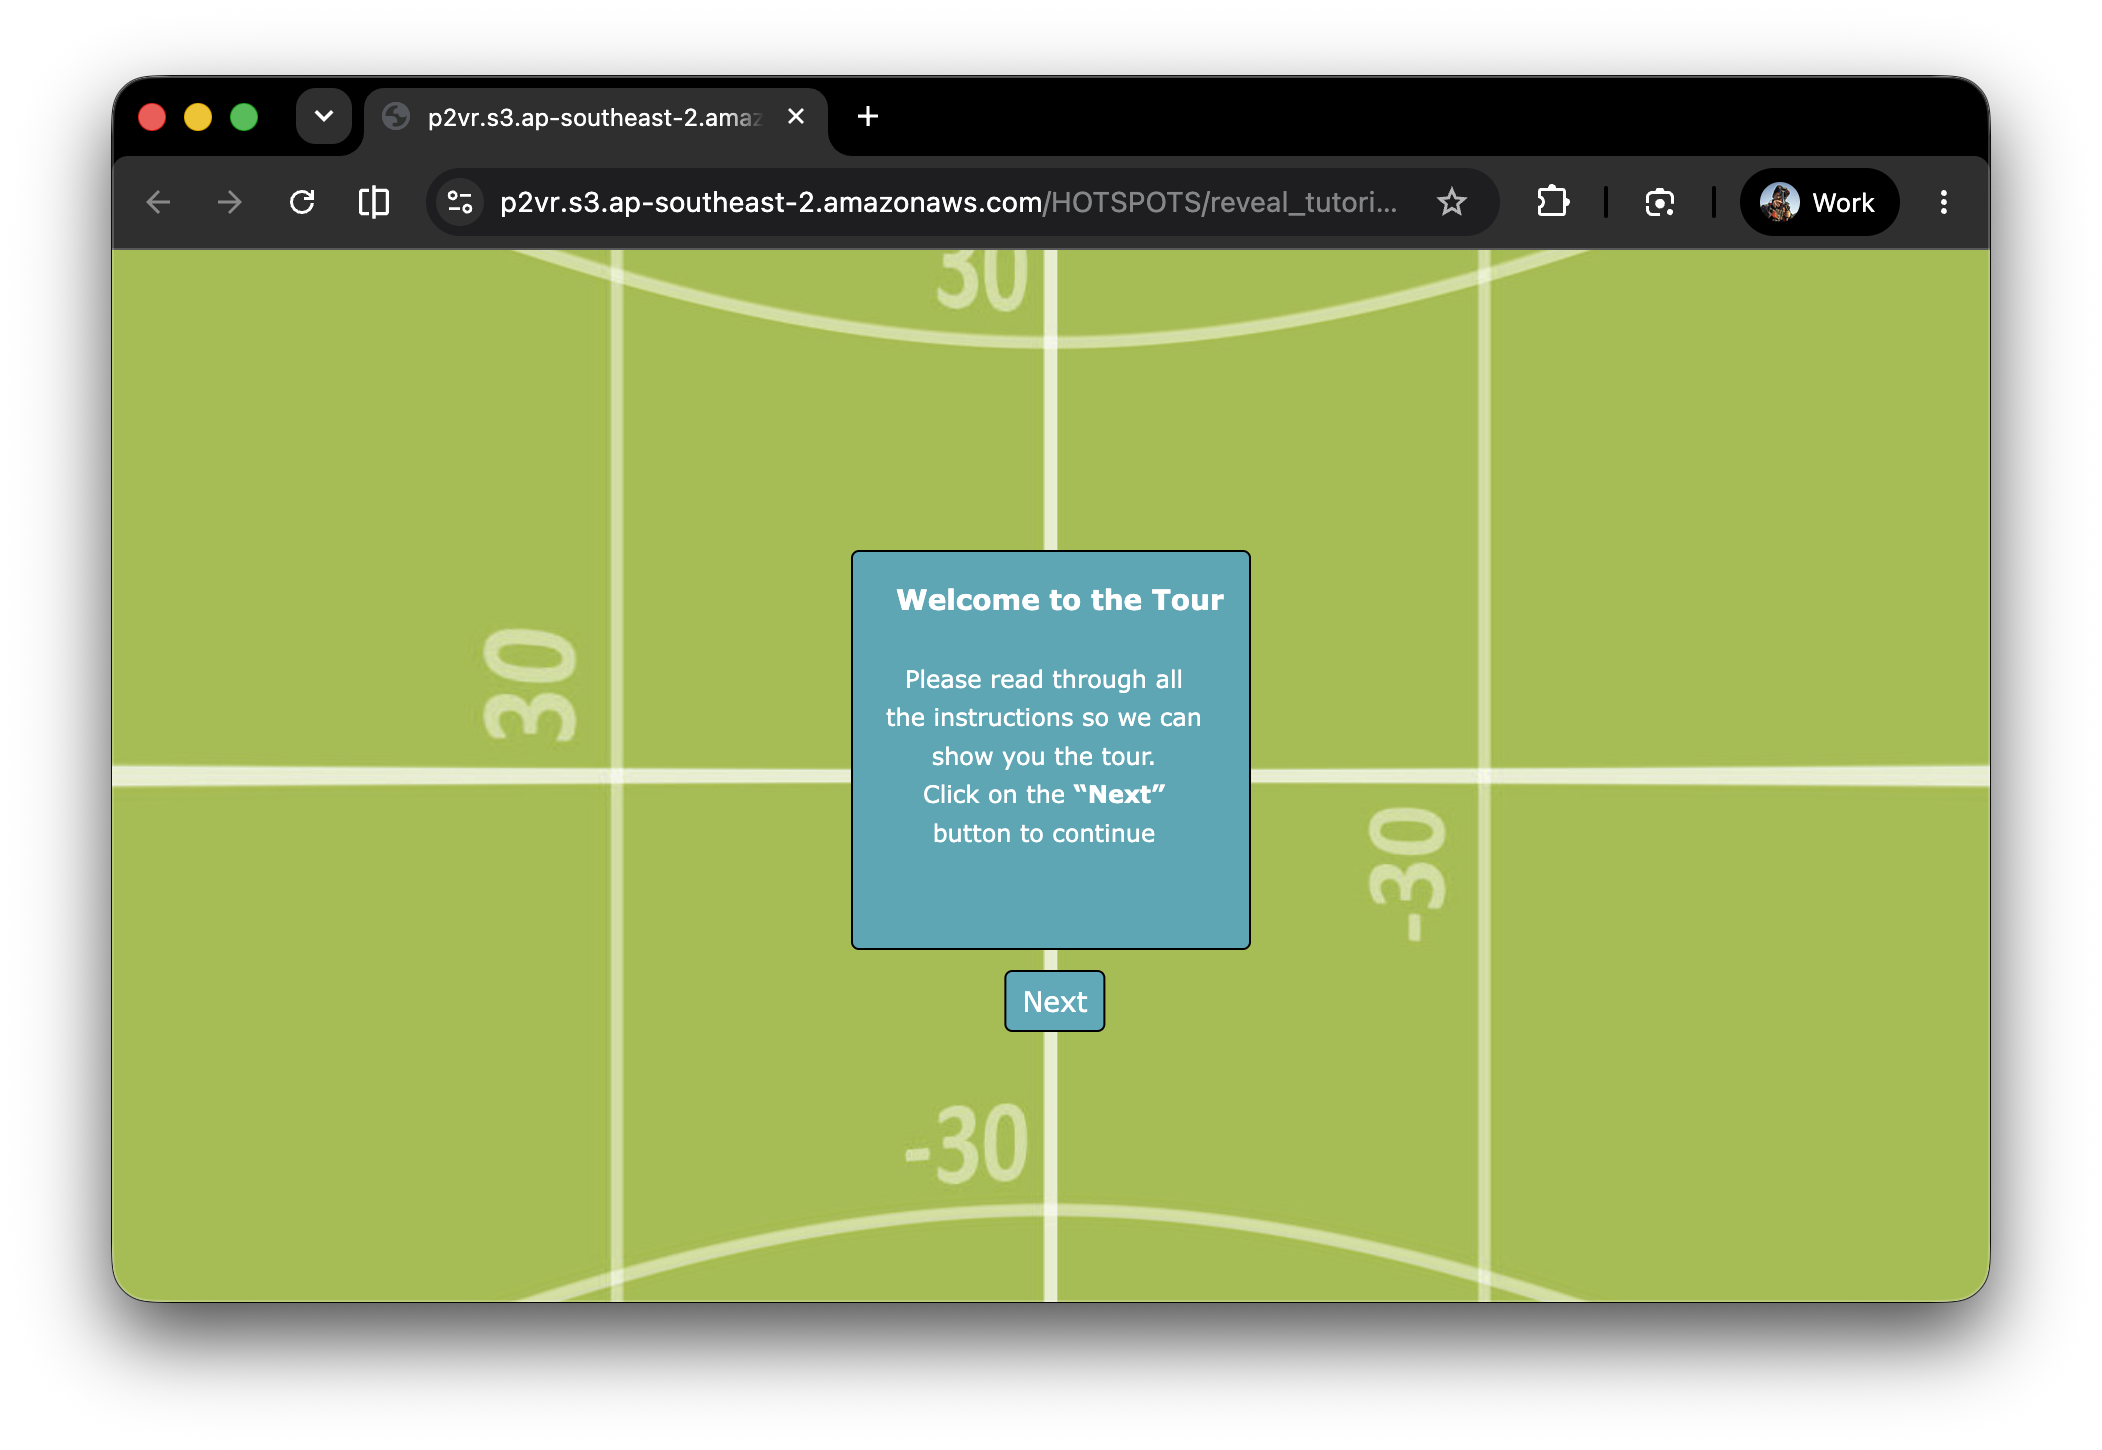
COLOR THE LOTTIE - Part 1 “Simply Red”

COLOR THE LOTTIE - Part 1 “Simply Red”

Usually, changing Lottie colors involves a frustrating dance of re-exporting files from After Effects, finding an external editing tool or wrestling with complicated JavaScript. It’s a lot of work for a button that just needs to turn red (then green, then black).

Welcome to the Global Shortcut.

In this section, we aren’t doing "surgery." We’re doing "Power-Washing." I’m going to show you how to take a single CSS class and use it to paint your Lotties in one go.

We’re going to:

  • The One-Class Magic: Drop a single word into Pano2VR and watch your Lottie icons suddenly gain "Physics"

  • The Paint Bucket Approach: How to force every layer of an icon to respect your brand colors without ever opening the source file.

  • The "Safety Net" Logic: How to set up a default look so that even if you forget to style an icon, it still looks like it belongs in your tour and not like a random clip-art accident.

This is the "Set it and Forget it" method. It’s fast, and it’s clean.

COLOR THE LOTTIE - Part 2 "A Deep Dive"

COLOR THE LOTTIE - Part 2 "A Deep Dive"

"More than Red": A Lottie Deep Dive

You find the perfect Lottie animation—a sleek volume slider or a pulsing hotspot. You drop it into Pano2VR, and it looks... fine. But then the client says, "Can we make the icon blue, the left wave green, the right wave gold, and can it shrink slightly when I click it like a real button?"

Usually, this is where you’d quietly close your laptop, walk into the woods, and start a new life as a goat herder.

But not today.

Today, we are moving past the quick color change and deep diving into Part 2. In this tutorial, we’re going to stop treating Lotties like flat movies and start treating them like the code-based puppets they actually are. We’re going to learn how to:

  • Perform "JSON Surgery": Labeling layers so we can boss them around individually.

  • Build a Physics Engine: Creating a global "Uniform" so every icon in your tour behaves with the same professional snappiness.

  • The Power of the Dashboard: Using CSS Variables so you can change your entire tour's color palette from one single "Control Room" without losing your mind.

Grab your digital scalpels. It’s time to stop letting your icons tell you what color they want to be.

A Modular Cinematic Sidebar in Pano2VR

A Modular Cinematic Sidebar in Pano2VR

"A Modular Cinematic Sidebar is a skin component that uses CSS Grid, Fluid Typography and Pano2VR Skin Elements to create a balanced, app-like experience that intelligently adapts its shape and content based on the viewer's screen ratio."

Note: for now I’ve removed the tutorial as the component has changed significantly in the past few days with redeveloped CSS and Javascript. I’ll be updating the project in the next couple of weeks and I’ll post on the Pano2VR & Object2VR Users Group in Facebook and on the Pano2VR forum when it’s available.

Using Ai to create Animated SVG's

Using Ai to create Animated SVG's

Let me preface this post by saying that I love the way AI can help us accomplish many of the tasks we need to do to realise our design/development goals. Let me also say I love using SVG files in Pano2VR for their resolution independence and the flexibility they offer.

This tutorial will use Le Chat AI features to update SVG files developed in Adobe Illustrator. From there we will create Custom Hotspot Templates, add them to the skin and project and expose the colors so we can customise the SVG files.

ngrok & Live Update - Mac

ngrok & Live Update - Mac

Pano2VR recently released a new beta version, Pano2VR 7.1. In a recent webinar, What’s New in Pano2VR 7.1, Martin Hopkins showed us how to use an application called ngrok. He demonstrated how remote locations can connect their local devices to your Pano2VR application running on your localhost via a URL and automatically update using Live Update.

In this tutorial, I’ll take you step-by-step through the process described by Martin in the video.

In it, I’ll cover the following topics;

  • Requirements

  • What does ngrok do?

  • Advantages of using ngrok

  • Limitations of Tunnel

  • Signing up to ngrok

  • Installing ngrok

  • Sharing a Project

  • Using a Rebrandly URL Shortener

Intro Animation with Fading Text and a Projection Button - Part One

Intro Animation with Fading Text and a Projection Button - Part One

This two-part “Pano2VR” Intro Animation with Fading Text and a Projection Button tutorial shows you how to create an animated opener that starts as a Little Planet (Stereographic projection) and, over 10 seconds, ends as a Flat (Rectilinear projection) panorama.

During the transition, a text block fades in and out and disappears at the end of the animation, and a small button that allows you to change the projection type appears.

Intro Animation with Fading Text and a Projection Button - Part Two

Intro Animation with Fading Text and a Projection Button - Part Two

This is part two of the “Pano2VR” Intro Animation with Fading Text and a Projection Button tutorial, which shows you how to create an animated opener that starts as a little planet (stereographic) and, over 10 seconds, ends as a flat (rectilinear) panorama. During the transition, a text block fades in and out and disappears at the end of the animation, and a small button that allows you to change the projection type appears.

Creating a Split-Screen Effect in V6 or V7

Creating a Split-Screen Effect in V6 or V7

If you need to compare two 360˚ panoramas side-by-side on a screen, this tutorial will provide step-by-step instructions on creating the files required to achieve the Split-Screen effect.

Two panoramas will be displayed; the left will display a skin that will control the view of the right panorama to match that of the left one reflecting any of the functions enabled in the skin.

Category Menu with Node Popup

Category Menu with Node Popup

This “Pano2VR” tutorial shows you how to use Cloners to create a Category Menu and a Popup window in Pano2VR V7.0.1. The Category Menu will open a popup window with information and clickable node images related to the selected category. Clicking on a node image will take you to that node. Active nodes will have highlighted text and a tick to indicate they have been visited.

Hotspot Templates and iFrames - Update 4/10/21

Hotspot Templates and iFrames - Update 4/10/21

Using Point Hotspots to deliver contextual content is a great way to make your Virtual Reality tours more interactive and provide an enhanced experience for the viewer. The most convenient way to create and deliver the content is by employing .html files and iFrames within the hotspots. Rather than create and manage multiple hotspots this tutorial shows how to use a single point hotspot template and external .html files with multiple hotspots.

This update details how to add the external HTML files to the assets folder in the output project using the Output > Advanced panel. Adding them this way a Garden Gnome Package Output will correctly show the HTML files in the iFrame.

Building a Desktop App (Windows 10)

Building a Desktop App (Windows 10)

Sometimes your client and/or project requires not only an offline project but also one that doesn’t require a web browser when outputting to HTML5.

This “Pano2VR” tutorial shows you how to Create a Desktop app suitable for use on a desktop Mac and works with both Pano2VR and Object2VR projects. The tutorial is based upon the original published by Garden Gnome Software on their website at https://ggnome.com/doc/tip-desktop-app/.

Building a Desktop App (Mac)

Building a Desktop App (Mac)

Sometimes your client and/or project requires not only an offline project but also one that doesn’t require a web browser when outputting to HTML5.

This “Pano2VR” tutorial shows you how to Create a Desktop app suitable for use on a desktop Mac and works with both Pano2VR and Object2VR projects. The tutorial is based upon the original published by Garden Gnome Software on their website at https://ggnome.com/doc/tip-desktop-app/.

Trimming the Tree - Part 1

Trimming the Tree - Part 1

Once you start working in Pano2VR you quickly realise that the Skin Editor is a very powerful part of the software application. The Skin Editor allows us to create unique User Interfaces and Interactivity inside our tours.

However during the development of a project the skin can be quite complex and requires the management of a large number of skin elements, such as interactive Components, Actions and Logic Blocks.

In this tutorial I’m going to take a look at a process that I call “Trimming the Tree”. Step by step you will learn how to reduce the number of elements that have similar functionality reducing the number of elements by over 50%.